
How To Make an Elevator in Minecraft
Today we bring you a guide on How to make an elevator in Minecraft.
If you are a Minecraft player, you will have realized that verticality is an important aspect within the world of this game and as you carry out your adventure you will be able to navigate up or down by making stairs or even stacking random blocks.
You should know that if you get the Elytra and manage to create a large number of fireworks, you will be able to overcome the verticality of the Minecraft world quite easily.
If you have not yet reached that point and want to expand the verticality in the game, you can use the water-powered elevators, a fairly fast and efficient solution in Minecraft.
 Insert your coin
Learn the step-by-step process to find, feed, and tame a Nautilus inMinecraft. Discover what items you need and how to use your newunderwater companion.
How to Get Spears in Minecraft
how to craft and use spears in Minecraft with our guide. Enhance your gameplay and master this essential weapon
How to Find the End Portal in Minecraft
Unlock the mysteries of the End Portal in Minecraft with ourstep-by-step. Learn how to find it and prepare for your ultimateadventure.
How to Spawn a Chicken Jockey in Minecraft
Learn how to spawn a Chicken Jockey in Minecraft with a simple command. Ourguide covers the summon code, enabling cheats, and defeating this raremob.
How to Get All Villager Jobs in Minecraft
how to unlock villagers job in Minecraft with our comprehensive guide. Master trading and enhance your gameplay
How to Get the Lava Chicken Music Disc in Minecraft
Learn how to obtain the rare Lava Chicken Music Disc in Minecraft withthis step-by-step guide. Discover spawn locations, mob drops, and tipsto add this unique soundtrack to your collection!
How to Get Dried Ghast Block in Minecraft
Discover the step-by-step on how to obtain Dried Ghast Blocks inMinecraft. Enhance your gameplay with this essential crafting material
How to fix Minecraft authentication servers are currently not reachable
Learn how to fix Minecraft authentication server issues with ourcomprehensive guide. Get back to playing your favorite game
Minecraft: How To Get Firefly Bush
Discover how to get Firefly Bush in Minecraft with our step-by-step guide.
How to Safely Raid Ancient Cities in Minecraft
Discover essential tips for safely raiding ancient cities in Minecraft. Master strategies
How to Build Districts in Frostpunk 2
We welcome you to our explanatory guide, in which we will tell you How to Build Districts in Frostpunk 2.
How to Get Schrift in Roblox Type Soul
Today we make a guide where we will explain how to get Schrift in Roblox Type Soul.
How To Get the Bloodmoon Twin Sword In Roblox King Legacy
Today we bring you a guide on How To Get the Bloodmoon Twin Sword In Roblox King Legacy with precise details.
How to get free anniversary treasures pickaxes in Monopoly GO
We have made a guide where we will tell you everything about How to get free anniversary treasure pickaxes in Monopoly GO.
How to Survive Your First Winter in Infection Free Zone
Next, we are going to explain how to survive your first winter in Infection Free Zone.
If you are a Minecraft player, you will have realized that verticality is an important aspect within the world of this game and as you carry out your adventure you will be able to navigate up or down by making stairs or even stacking random blocks.
You should know that if you get the Elytra and manage to create a large number of fireworks, you will be able to overcome the verticality of the Minecraft world quite easily.
If you have not yet reached that point and want to expand the verticality in the game, you can use the water-powered elevators, a fairly fast and efficient solution in Minecraft.
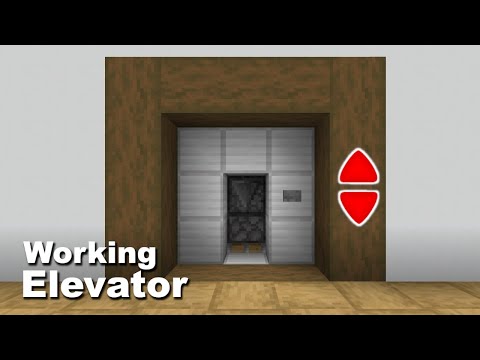
How to make an elevator in Minecraft
Constructing a Water Elevator in Minecraft
Water elevators offer a convenient and visually appealing method for vertical transportation within your Minecraft world. This guide details the materials and steps required to create a functional water elevator.
Materials:
- Water Bucket
- Kelp (Found in most ocean biomes except frozen and warm)
- Glass Blocks (For a clear view)
- Wooden or Iron Door (For access)
- Soul Sand (Found in the Nether)
- Magma Block (Found near underwater ruins or ruined portals)
Construction Process:
1. Dig and Encase: Begin by excavating a 1x1 shaft to your desired elevator height. Utilize glass blocks to create a visually seamless enclosure around the shaft.
2. Water Column Creation: Employ the water bucket to introduce water at the top of the elevator shaft. The water will naturally flow downwards, filling the shaft.
3. Source Block Conversion: Kelp plays a crucial role in transforming flowing water into source blocks, essential for bubble column generation. Carefully plant kelp all the way up the water column, ensuring each water block becomes a source block.
4. Upward or Downward Flow: Here's where you determine the elevator's direction:
- Upward Flow: Place a Soul Sand block at the absolute bottom of the elevator shaft. Soul Sand generates bubbles that propel you upwards when you enter the water column.
- Downward Flow: Utilize a Magma Block at the bottom instead. Magma generates bubbles that push you downwards within the water column.
5. Access Point: Enhance user experience by incorporating a door (wood or iron) on a chosen level within the glass enclosure. This allows for effortless entry and exit.
Additional Considerations:
Multiple Elevators: Construct two water elevators side-by-side for a more efficient system. Utilize Soul Sand for the upward flow elevator and Magma Block for the downward flow elevator.
Safety Measures:
- Implement a single block of water at the base of the downward flow elevator to act as a fall buffer, mitigating potential damage.
- Position Hoppers at the top of the elevator shaft to collect any dropped items during your ascent.
By following these steps and incorporating the suggested enhancements, you can construct a reliable and aesthetically pleasing water elevator in your Minecraft world.
In conclusion, you can learn everything about How to make an elevator in Minecraft, following our step-by-step guide. In this way, you will be able to turn your experience within the world of Minecraft into something more dynamic and fun.
Tags: Sandbox game, Mojang Studios, Minecraft mods, Minecraft servers, Minecraft tips, Minecraft updates, Minecraft crafting,
Platform(s): PC, macOS, Linux, PS4, Xbox One, Nintendo Switch
Genre(s): Sandbox, survival
Developer(s): Mojang, Xbox, Sony, Nintendo eShop
Publisher(s): Mojang, Microsoft Studios, Sony Computer Entertainment
Release date: 18 November 2011
Mode: Single-player, multiplayer
Age rating (PEGI): 7+
Other Articles Related
How to Tame Nautilus in MinecraftLearn the step-by-step process to find, feed, and tame a Nautilus inMinecraft. Discover what items you need and how to use your newunderwater companion.
How to Get Spears in Minecraft
how to craft and use spears in Minecraft with our guide. Enhance your gameplay and master this essential weapon
How to Find the End Portal in Minecraft
Unlock the mysteries of the End Portal in Minecraft with ourstep-by-step. Learn how to find it and prepare for your ultimateadventure.
How to Spawn a Chicken Jockey in Minecraft
Learn how to spawn a Chicken Jockey in Minecraft with a simple command. Ourguide covers the summon code, enabling cheats, and defeating this raremob.
How to Get All Villager Jobs in Minecraft
how to unlock villagers job in Minecraft with our comprehensive guide. Master trading and enhance your gameplay
How to Get the Lava Chicken Music Disc in Minecraft
Learn how to obtain the rare Lava Chicken Music Disc in Minecraft withthis step-by-step guide. Discover spawn locations, mob drops, and tipsto add this unique soundtrack to your collection!
How to Get Dried Ghast Block in Minecraft
Discover the step-by-step on how to obtain Dried Ghast Blocks inMinecraft. Enhance your gameplay with this essential crafting material
How to fix Minecraft authentication servers are currently not reachable
Learn how to fix Minecraft authentication server issues with ourcomprehensive guide. Get back to playing your favorite game
Minecraft: How To Get Firefly Bush
Discover how to get Firefly Bush in Minecraft with our step-by-step guide.
How to Safely Raid Ancient Cities in Minecraft
Discover essential tips for safely raiding ancient cities in Minecraft. Master strategies
How to Build Districts in Frostpunk 2
We welcome you to our explanatory guide, in which we will tell you How to Build Districts in Frostpunk 2.
How to Get Schrift in Roblox Type Soul
Today we make a guide where we will explain how to get Schrift in Roblox Type Soul.
How To Get the Bloodmoon Twin Sword In Roblox King Legacy
Today we bring you a guide on How To Get the Bloodmoon Twin Sword In Roblox King Legacy with precise details.
How to get free anniversary treasures pickaxes in Monopoly GO
We have made a guide where we will tell you everything about How to get free anniversary treasure pickaxes in Monopoly GO.
How to Survive Your First Winter in Infection Free Zone
Next, we are going to explain how to survive your first winter in Infection Free Zone.