
How to fix ROG Ally Left Bumper Not Working
Discover and learn How to fix ROG Ally Left Bumper Not Working and easily with our step-by-step guide.
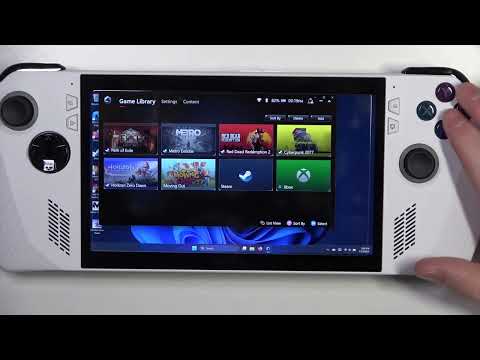
Having a gaming console is a thrilling experience, but it can be frustrating when one of its key components, like the left bumper, stops working. If you're facing this issue with your ROG Ally, fear not, as we have some solutions that can help you get your left bumper up and running again. In this blog post, we will explore three effective methods to fix the ROG Ally left bumper not working issue. Let's dive in!
Sometimes, the left bumper on ROG Ally may not respond due to mechanical blocks or issues with the joystick itself. To fix this, start by gently rotating the joystick in a circular motion. This simple step can help dislodge any debris or fix minor mechanical issues that might be causing the left bumper problem. Pay close attention to any unusual resistance or abnormal clicking sounds during the rotation. If you notice any such issues, it's advisable to take your console to a professional or return it to the shop for further inspection and repair.
the world of sandbox games! Learn what defines this genre, its keyfeatures, and why players love the freedom to create and explore.
What Is a Skill Tree
Explore the intricacies of skill trees, their role in gaming, and howthey empower players to customize abilities.
What Is a HUD in Video Games
Explore what a HUD is in video games and its importance in deliveringessential information to players. Enhance your gaming
What Is Motion Sickness in Gaming
Learn about motion sickness in gaming, including its triggers, effectson players, and tips to reduce symptoms
Best Games for Competitive Players
the best couch co-op games that bring friends and family together forunforgettable gaming experiences. Dive into fun and teamwork
The Best Couch Co‑Op Games
Explore our curated list of the best couch co-op games perfect forbonding with friends and family. Get ready for laughter
The Best Games for High‑End PCs
the best games for high-end PCs that deliver stunning graphics and immersive gameplay. Elevate your gaming experience
The Best RPGs for New Players
Discover the best RPGs for new players! Dive into immersive worlds, engaging stories, and easy-to-learn mechanics.
How to Play Better in Team‑Based Games
strategies to enhance your skills in team-based games. Learn tips and tricks for better teamwork and gameplay.
How to Improve Movement in Shooters
effective strategies to enhance movement in shooter games. Boost your gameplay and dominate the competition
How to play with Friends in Jagged Alliance 3
Learn How to play with Friends in Jagged Alliance 3 online! Get step-by-step instructions.
How to Fix League of Legends Critical Update Required
"Learn how to quickly and How to Fix League of Legends Critical Update Required. Critical Update Required' error.
How to Fix Games Crashing on ROG Ally
Learn How to Fix Games Crashing on ROG Ally and with our step-by-step guide. Get help from our experts now.
How to Fix Unable To Login Into Ubisoft
Learn the steps needed on How to Fix Unable To Login Into Ubisoft and easily. Get the help you need to get back into your Ubisoft account today
How to Fix Rainbow Six Siege Error Code 10-0x00000000
Troubleshoot and How to Fix Rainbow Six Siege Error Code 10-0x00000000 with this easy-to-follow guide.
Having a gaming console is a thrilling experience, but it can be frustrating when one of its key components, like the left bumper, stops working. If you're facing this issue with your ROG Ally, fear not, as we have some solutions that can help you get your left bumper up and running again. In this blog post, we will explore three effective methods to fix the ROG Ally left bumper not working issue. Let's dive in!
Gently rotate the joystick
Sometimes, the left bumper on ROG Ally may not respond due to mechanical blocks or issues with the joystick itself. To fix this, start by gently rotating the joystick in a circular motion. This simple step can help dislodge any debris or fix minor mechanical issues that might be causing the left bumper problem. Pay close attention to any unusual resistance or abnormal clicking sounds during the rotation. If you notice any such issues, it's advisable to take your console to a professional or return it to the shop for further inspection and repair.
Reset Windows
Another effective method to resolve the unresponsive left bumper issue on your ROG Ally is to reset the Windows operating system. Many users have reported success in fixing this problem by performing a system reset and reconfiguring the operating system. To do this, follow these steps:
- 1. Press the "Windows" key on your keyboard and search for "Settings".
- 2. Click on "Update & Security" and then select "Recovery" from the left-hand menu.
- 3. Under the "Reset this PC" section, click on "Get started".
- 4. Follow the on-screen instructions to reset your ROG Ally's Windows operating system.
Remember to back up your important files before performing the reset, as it will erase all data on your console. This method can help resolve software-related issues that might be causing the left bumper to malfunction.
Update BIOS
In some cases, an outdated BIOS (Basic Input Output System) can cause communication problems between the joystick and the console, leading to the left bumper not working. Updating the BIOS can be a potential solution to this issue. Here's how you can update the BIOS on your ROG Ally:
- 1. Visit the official ASUS support website for ROG Ally.
- 2. Search for the latest BIOS update available for your console model.
- 3. Download the BIOS update and save it to a USB flash drive.
- 4. Connect the USB drive to your ROG Ally and reboot the console.
- 5. During the boot-up process, enter the BIOS menu (usually by pressing the "Delete" or "F2" key).
- 6. Locate the BIOS update option and follow the on-screen instructions to install the update.
Updating the BIOS requires caution and precision to avoid any potential risks. Make sure to follow the instructions provided by ASUS accurately to successfully update the BIOS and resolve the left bumper issue.
Experiencing a non-functional left bumper on your ROG Ally can be frustrating, but with the right methods, you can troubleshoot and fix the problem. Start by gently rotating the joystick, paying attention to any mechanical blocks or issues. If the issue persists, try resetting the Windows operating system or updating the BIOS. By following these steps, you should be able to bring your left bumper back to life and enjoy uninterrupted gaming sessions with your ROG Ally. Happy gaming!
Mode:
Other Articles Related
What Is a Sandbox Gamethe world of sandbox games! Learn what defines this genre, its keyfeatures, and why players love the freedom to create and explore.
What Is a Skill Tree
Explore the intricacies of skill trees, their role in gaming, and howthey empower players to customize abilities.
What Is a HUD in Video Games
Explore what a HUD is in video games and its importance in deliveringessential information to players. Enhance your gaming
What Is Motion Sickness in Gaming
Learn about motion sickness in gaming, including its triggers, effectson players, and tips to reduce symptoms
Best Games for Competitive Players
the best couch co-op games that bring friends and family together forunforgettable gaming experiences. Dive into fun and teamwork
The Best Couch Co‑Op Games
Explore our curated list of the best couch co-op games perfect forbonding with friends and family. Get ready for laughter
The Best Games for High‑End PCs
the best games for high-end PCs that deliver stunning graphics and immersive gameplay. Elevate your gaming experience
The Best RPGs for New Players
Discover the best RPGs for new players! Dive into immersive worlds, engaging stories, and easy-to-learn mechanics.
How to Play Better in Team‑Based Games
strategies to enhance your skills in team-based games. Learn tips and tricks for better teamwork and gameplay.
How to Improve Movement in Shooters
effective strategies to enhance movement in shooter games. Boost your gameplay and dominate the competition
How to play with Friends in Jagged Alliance 3
Learn How to play with Friends in Jagged Alliance 3 online! Get step-by-step instructions.
How to Fix League of Legends Critical Update Required
"Learn how to quickly and How to Fix League of Legends Critical Update Required. Critical Update Required' error.
How to Fix Games Crashing on ROG Ally
Learn How to Fix Games Crashing on ROG Ally and with our step-by-step guide. Get help from our experts now.
How to Fix Unable To Login Into Ubisoft
Learn the steps needed on How to Fix Unable To Login Into Ubisoft and easily. Get the help you need to get back into your Ubisoft account today
How to Fix Rainbow Six Siege Error Code 10-0x00000000
Troubleshoot and How to Fix Rainbow Six Siege Error Code 10-0x00000000 with this easy-to-follow guide.