
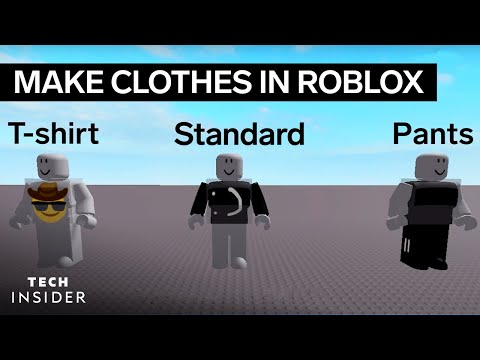
How To Make Clothes on Roblox
Create your unique Roblox style! Learn to How To Make Clothes on Roblox with our easy-to-follow guide
Roblox is a popular online gaming platform that allows players to create their own games and characters. One of the best features of Roblox is the ability to customize avatars with unique clothing items. This not only allows for creativity but also helps players stand out in the game. In this tutorial, we'll guide you through the step-by-step process of creating classic clothes in Roblox games.
To begin, head over to the Creator Hub and choose a clothing template that suits your needs. The Creator Hub is a great resource for all Roblox players as it provides a wide range of templates for shirts, pants, and other items. You can choose a template that matches your style or create something completely new. Once you've selected a template, save it on your computer.
After saving the template, open it in an image editor program such as Photopea. You can use free programs such as GIMP or Paint.NET if you don't have access to Photopea. Using an image editor program is necessary to customize your design using tools such as brush sizes, color palettes, and layers. These tools allow you to create unique designs for your clothing item.
Learn step-by-step how to forge a samurai chestplate in The Forge. Discover the materials, crafting recipes, and essential techniques tocraft this iconic armor.
How To Get Kaneki in Rogue Piece
Master Kaneki in Rogue Piece! Our guide covers the exact questline, Ken Kaneki unlock requirements, and pro tips to earn this powerful TokyoGhoul-inspired character fast.
How To Get Stone in The Forge
Learn the most efficient ways to mine, craft, and gather stone for all yourbuilding and crafting needs in The Forge. Get essential tips andstrategies here.
How To Play Ben 10 Super Hero Time
Learn how to play Ben 10 Super Hero Time! A quick guide for kids and fans onsetting up, choosing aliens, and using special abilities to win. Fun,easy steps to get into the game!
How To Get the Blade Of Glorp Rod in Fisch
Learn how to get the Blade of Glorp Rod in Fisch (Adopt Me) with ourstep-by-step guide. Find the latest trading tips, value, and tricks toobtain this rare item fast!
How To Get La Vacca Prese Presente in Steal a Brainrot
how to steal a Brainrot and get La Vacca Prese Presente with our ultimate guide. Unlock secrets and tips for success!
How To Speak With Glorp in Fisch
how to communicate with Glorp in Roblox Fisch! Unlock tips and tricks for an immersive gaming experience.
How To Get Demonite Key in The Forge
Unlock the secrets of The Forge! Discover how to obtain the elusive Demonite Key with our comprehensive guide.
All Enemies in Black Grimoire
the ultimate guide to Roblox Black Grimoire! Explore all enemies, their strengths, and strategies to conquer them. Level up your gameplay
All Secret Locations in The Forge
Discover all hidden collectibles in The Forge! This guide lists every secretlocation with clear directions to help you complete your map. Don't miss a thing.
How To Fix Fortnite Medallion Not Working
Discover effective solutions on How To Fix Fortnite Medallion Not Working on our website.
How to Complete The Grumpmas Challenge in BitLife
Master BitLife's Grumpmas Challenge with ease! Follow our expert tips to How to Complete The Grumpmas Challenge in BitLife.
How To Fix Ready or Not Multiplayer Connection
Learn effective troubleshooting techniques of How To Fix Ready or Not Multiplayer Connection with our comprehensive guide.
How to Complete Researcher’s Dilemma in DMZ
How to Complete Researcher’s Dilemma in DMZ! Get expert tips and strategies for a successful mission.
How To Beat Igneo Talus In Zelda Tears Of The Kingdom
Discover effective strategies on How To Beat Igneo Talus In Zelda Tears Of The Kingdom.
Roblox is a popular online gaming platform that allows players to create their own games and characters. One of the best features of Roblox is the ability to customize avatars with unique clothing items. This not only allows for creativity but also helps players stand out in the game. In this tutorial, we'll guide you through the step-by-step process of creating classic clothes in Roblox games.
How To Make Clothes on Roblox
Step 1: Use templates from the Creator Hub
To begin, head over to the Creator Hub and choose a clothing template that suits your needs. The Creator Hub is a great resource for all Roblox players as it provides a wide range of templates for shirts, pants, and other items. You can choose a template that matches your style or create something completely new. Once you've selected a template, save it on your computer.
Step 2: Use a free image editor program like Photopea
After saving the template, open it in an image editor program such as Photopea. You can use free programs such as GIMP or Paint.NET if you don't have access to Photopea. Using an image editor program is necessary to customize your design using tools such as brush sizes, color palettes, and layers. These tools allow you to create unique designs for your clothing item.
Step 3: Find and place textures and designs
One of the most important steps in creating unique clothing items is adding textures and designs. You can find high-quality textures from websites like Pexels or create your own using digital fabric swatches. Place the textures on top of your clothing design layer and adjust their size if needed. This will help create a realistic and unique design for your clothing item.
Step 4: Focus on bottom pants spaces
If you're creating pants, it is important to focus on adjusting the bottom areas of the pant legs so they fit properly on an avatar's body. This will ensure that the clothing item looks natural and not out of place on the avatar.
Step 5: Test creations by uploading decals on Creation Hub
Once you're done designing your clothing item, it is important to test it out to see how it looks on the avatar. You can do this by uploading it onto Creation Hub > Creations > Development Items > Decals. This is where you can test out how your creation will look on an avatar. Make sure you're happy with how it looks before moving on to the next step.
Step 6: Create an avatar with desired clothes
Before testing out your clothing item, you need to create an avatar with clothing items that complement what you've made so far. This will give you a better idea of how your clothing item looks in the game and how it matches with other items.
Step 7: Paste code in URL box to display them on avatar
Finally, paste the code found in Creation Hub into the URL box to display your new clothing item onto your avatar! This is where you can see your hard work pay off and watch your unique clothing item come to life on your avatar.
In conclusion, creating unique clothing items in Roblox is not only fun but also a great way to express yourself in the game. By following these 7 steps, you can create custom clothing items that are sure to make your avatar stand out in the game. The Creator Hub, image editor programs, and texture websites are great resources that can help you create unique designs. Remember to test out your creations and make sure you're happy with how they look before showing them off to other players. Happy designing!
Tags: online game, virtual world, multiplayer game, gaming platform, user-generated content, avatar customization, virtual eco
Platform(s): Windows PC, macOS, iOS, Android, Xbox One
Genre(s): Game creation system, massively multiplayer online
Developer(s): Roblox Corporation
Publisher(s): Roblox Corporation
Engine: OGRE 3D
Mode: Multiplayer
Age rating (PEGI): 7+
Other Articles Related
How To Forge a Samurai Chestplate in The ForgeLearn step-by-step how to forge a samurai chestplate in The Forge. Discover the materials, crafting recipes, and essential techniques tocraft this iconic armor.
How To Get Kaneki in Rogue Piece
Master Kaneki in Rogue Piece! Our guide covers the exact questline, Ken Kaneki unlock requirements, and pro tips to earn this powerful TokyoGhoul-inspired character fast.
How To Get Stone in The Forge
Learn the most efficient ways to mine, craft, and gather stone for all yourbuilding and crafting needs in The Forge. Get essential tips andstrategies here.
How To Play Ben 10 Super Hero Time
Learn how to play Ben 10 Super Hero Time! A quick guide for kids and fans onsetting up, choosing aliens, and using special abilities to win. Fun,easy steps to get into the game!
How To Get the Blade Of Glorp Rod in Fisch
Learn how to get the Blade of Glorp Rod in Fisch (Adopt Me) with ourstep-by-step guide. Find the latest trading tips, value, and tricks toobtain this rare item fast!
How To Get La Vacca Prese Presente in Steal a Brainrot
how to steal a Brainrot and get La Vacca Prese Presente with our ultimate guide. Unlock secrets and tips for success!
How To Speak With Glorp in Fisch
how to communicate with Glorp in Roblox Fisch! Unlock tips and tricks for an immersive gaming experience.
How To Get Demonite Key in The Forge
Unlock the secrets of The Forge! Discover how to obtain the elusive Demonite Key with our comprehensive guide.
All Enemies in Black Grimoire
the ultimate guide to Roblox Black Grimoire! Explore all enemies, their strengths, and strategies to conquer them. Level up your gameplay
All Secret Locations in The Forge
Discover all hidden collectibles in The Forge! This guide lists every secretlocation with clear directions to help you complete your map. Don't miss a thing.
How To Fix Fortnite Medallion Not Working
Discover effective solutions on How To Fix Fortnite Medallion Not Working on our website.
How to Complete The Grumpmas Challenge in BitLife
Master BitLife's Grumpmas Challenge with ease! Follow our expert tips to How to Complete The Grumpmas Challenge in BitLife.
How To Fix Ready or Not Multiplayer Connection
Learn effective troubleshooting techniques of How To Fix Ready or Not Multiplayer Connection with our comprehensive guide.
How to Complete Researcher’s Dilemma in DMZ
How to Complete Researcher’s Dilemma in DMZ! Get expert tips and strategies for a successful mission.
How To Beat Igneo Talus In Zelda Tears Of The Kingdom
Discover effective strategies on How To Beat Igneo Talus In Zelda Tears Of The Kingdom.