
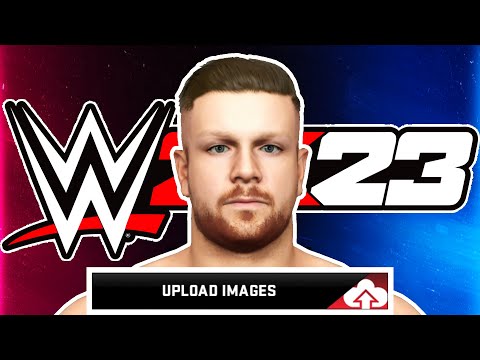
How To Upload Face Scans In WWE 2K23 - Ultimate Guide
This article will teach you How To Upload Face Scans In WWE 2K23 game.
Creating a custom Superstar in the WWE universe is a great way to show off your creative side and add a unique flair to your gaming experience. One of the most important steps in creating a custom Superstar is getting the facial features right. To do this, you’ll need to upload a face scan of yourself or someone else and use it as a template. In this article, we’ll walk you through the process of preparing, uploading, and using a face scan in your WWE customizations.
Discover How to Fix WWE 2K24 An error occurred while retrieving the latest data from the server with our comprehensive website. Fix the issue and enjoy uninterrupted gaming.
How to Fix WWE 2K24 Slow Motion
Learn How to Fix WWE 2K24 Slow Motion with our comprehensive guide. Get back to seamless gameplay with our expert tips and solutions.
List All Weapons In WWE 2K23 - Tips and tricks
Are you looking for a comprehensive list all weapons in the WWE 2K23 game? Well, you’ve come to the right place.
How To Upload Face Scans In WWE 2K23
This article will teach you How To Upload Face Scans In WWE 2K23 game.
How to fix WWE 2k23 slow motion issue
Learn how to fix WWE 2K23 slow motion issue and get back to playing the game.
WWE 2K Battlegrounds: How to get more Arenas
WWE 2K Battlegrounds has come to keep us as exercised as possible and therefore it is necessary to know how to get more aArenas, let's see.
WWE 2K Battlegrounds: How to get John Cena
WWE 2K Battlegrounds is here and therefore you need to know how to get John Cena, let's see.
WWE 2K Battlegrounds: How to Drop a Car
With our WWE 2K Battlegrounds guide you will learn more about how to drop a car.
WWE 2K Battlegrounds: Bagpipes Guide
This time we return with a WWE 2K Battlegrounds guide with the objective of explaining how to use the bagpipes.
How to fix Warzone 2 not launching on Steam
How to fix Warzone 2 not launching on Steam. Warzone 2 is one of the most popular first-person shooter games.
How To Throw Opponent Over The Top Rope In WWE 2K23
How To Throw Opponent Over The Top Rope In WWE 2K23 is a wrestling game from 2K Sports and is the latest iteration in the WWE 2K.
How to Complete Data Wipe Mission in Call of Duty DMZ
Do you want to know how to complete Data Wipe Mission in Call of Duty DMZ. Well, we have a complete guide for you.
How To Upload Custom Logos In WWE 2K23?
How To Upload Custom Logos In WWE 2K23 - One of the coolest features in WWE 2K23 is the ability to upload your own custom logos.
best TAQ-M loadout in Modern Warfare 2 season 2
TAQ-M loadout in Modern Warfare 2 Season 2 is a blog post with tips and tricks on how to be the best TAQ-M loadout in Modern Warfare 2 Season 2.
Creating a custom Superstar in the WWE universe is a great way to show off your creative side and add a unique flair to your gaming experience. One of the most important steps in creating a custom Superstar is getting the facial features right. To do this, you’ll need to upload a face scan of yourself or someone else and use it as a template. In this article, we’ll walk you through the process of preparing, uploading, and using a face scan in your WWE customizations.
Preparing a Face Scan
- Taking a Clear Photo: The first step in preparing a face scan is to take a clear, high-resolution photo of the face you want to use. It should be taken from the front in good lighting and without any obstructions. You’ll want to make sure that the photo is large enough that all the facial features can be seen clearly.
- Converting Dimensions: Once you have your photo, you’ll need to convert it to the correct dimensions for the WWE website. You can usually do this with a basic photo editor, or you can use a free online converter. The size should be 2,048 x 2,048 pixels.
Uploading a Face Scan
- Going to the WWE Website: Once your photo is in the right size and format, you’ll need to go to the WWE website and sign into your account.
- Signing into Your Account: Once you’ve signed into your account, you’ll need to select the “Face Photo” option in the account settings menu. This will bring you to the photo upload page.
- Selecting the Face Photo Option: Once you’re on the photo upload page, you’ll need to select the “Upload Photo” button, which will open up the file selection menu.
- Uploading the Photo: Once you’ve selected the photo, you’ll need to click the “Upload” button to upload it to the website.
- Accepting the Photo: Once the photo has been uploaded, you’ll need to click the “Accept” button to confirm that you’re happy with the photo. This will then save the photo to your account.
Using a Face Scan on a Superstar
- Going to the Online Tab: Once the photo has been accepted, you’ll need to go to the “Online” tab in the WWE website. From here, you’ll be able to access the Image Manager.
- Selecting Image Manager: Once you’re in the Image Manager, you’ll need to select the photo you just uploaded and download it to a local file.
- Downloading the Image to a Local File: Once the photo has been downloaded, you’ll need to go to the “Creations” tab in the WWE website.
- Going to the Creations Tab: Once you’re in the Creations tab, you’ll need to select the “New Custom Superstar” option. This will bring up the customization menu.
- Selecting New Custom Superstar: Once you’re in the customization menu, you’ll need to follow the prompts to the face selection page.
- Following the Prompts to the Customization Menu: Once you’re on the face selection page, you’ll need to choose the right face template for your face scan. This will usually be the “Face Photo Capture” option.
- Choosing the Right Face Template: Once you’ve chosen the right face template, you’ll need to apply the facial photo capture to it. This will allow you to see how the face scan looks on the chosen template.
- Applying the Facial Photo Capture: Once the facial photo capture has been applied, you can then customize the face template to your liking. This will then be the face you’ll use for your custom Superstar.
Creating a custom Superstar in the WWE universe is a great way to show off your creative side. By following the steps outlined in this article, you’ll be able to create a custom Superstar with your own face scan. So what are you waiting for? Get out there and start creating your own unique Superstar today!
Mode:
Other Articles Related
How to Fix WWE 2K24 An error occurred while retrieving the latest data from the serverDiscover How to Fix WWE 2K24 An error occurred while retrieving the latest data from the server with our comprehensive website. Fix the issue and enjoy uninterrupted gaming.
How to Fix WWE 2K24 Slow Motion
Learn How to Fix WWE 2K24 Slow Motion with our comprehensive guide. Get back to seamless gameplay with our expert tips and solutions.
List All Weapons In WWE 2K23 - Tips and tricks
Are you looking for a comprehensive list all weapons in the WWE 2K23 game? Well, you’ve come to the right place.
How To Upload Face Scans In WWE 2K23
This article will teach you How To Upload Face Scans In WWE 2K23 game.
How to fix WWE 2k23 slow motion issue
Learn how to fix WWE 2K23 slow motion issue and get back to playing the game.
WWE 2K Battlegrounds: How to get more Arenas
WWE 2K Battlegrounds has come to keep us as exercised as possible and therefore it is necessary to know how to get more aArenas, let's see.
WWE 2K Battlegrounds: How to get John Cena
WWE 2K Battlegrounds is here and therefore you need to know how to get John Cena, let's see.
WWE 2K Battlegrounds: How to Drop a Car
With our WWE 2K Battlegrounds guide you will learn more about how to drop a car.
WWE 2K Battlegrounds: Bagpipes Guide
This time we return with a WWE 2K Battlegrounds guide with the objective of explaining how to use the bagpipes.
How to fix Warzone 2 not launching on Steam
How to fix Warzone 2 not launching on Steam. Warzone 2 is one of the most popular first-person shooter games.
How To Throw Opponent Over The Top Rope In WWE 2K23
How To Throw Opponent Over The Top Rope In WWE 2K23 is a wrestling game from 2K Sports and is the latest iteration in the WWE 2K.
How to Complete Data Wipe Mission in Call of Duty DMZ
Do you want to know how to complete Data Wipe Mission in Call of Duty DMZ. Well, we have a complete guide for you.
How To Upload Custom Logos In WWE 2K23?
How To Upload Custom Logos In WWE 2K23 - One of the coolest features in WWE 2K23 is the ability to upload your own custom logos.
best TAQ-M loadout in Modern Warfare 2 season 2
TAQ-M loadout in Modern Warfare 2 Season 2 is a blog post with tips and tricks on how to be the best TAQ-M loadout in Modern Warfare 2 Season 2.