
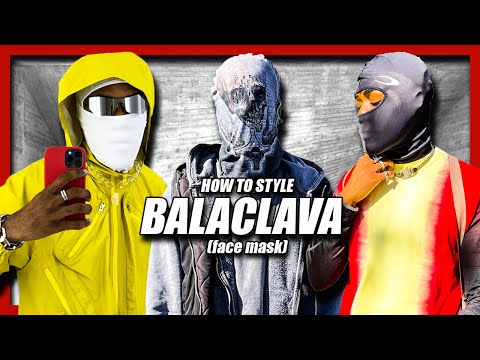
How To Wear a Balaclava in Ready Or Not
Discover the ultimate guide to How To Wear a Balaclava in Ready Or Not and stay warm and stylish in any situation.
Hello there, fellow gamers! Are you excited to learn how to wear a balaclava in Ready or Not? If you're a fan of tactical first-person shooter games, then you know that balaclavas are a staple item for any seasoned operator. These masks are not only functional but also add a layer of mystery and intimidation to your character. Ready or Not is no exception and luckily, adding a balaclava to your character is a straightforward process. However, before we dive into the steps, let's talk about what Ready or Not is and why you should consider adding a balaclava to your character.
Ready or Not is a tactical first-person shooter game developed by VOID Interactive. The game is set in a fictional city called Haventon, where you play as a member of an elite SWAT team tasked with carrying out high-risk operations. The game is heavily inspired by real-life SWAT operations and features realistic gameplay mechanics, including bullet physics, tactical decision-making, and team coordination.
Adding a balaclava to your character in Ready or Not not only enhances the game's realism but also adds an extra layer of customization to your character. Not to mention, it also makes your character look badass.
Now that we've established why you should add a balaclava to your character, let's dive into the steps on how to do it.
Nexus Mods is a popular website for downloading mods for various games. To access the Ready or Not balaclava mod, you'll need to create an account on Nexus Mods and log in. If you already have an account, simply log in and search for "Ready or Not Balaclava Mod" in the search bar.
Master the Three Letter Triad mission in Ready or Not with our comprehensive guide. Tips and strategies for success
How To Bring Order to Chaos in Ready or Not
Discover effective strategies in Ready or Not: How To Bring Order to Chaos to transform disorder into harmony.
How To Get the Coffee Machine Trophy in Ready or Not
Unlock the Coffee Machine Trophy in Ready or Not with our guide! Discover tips and strategies to achieve this challenge
How To Rescue Hostages in Neon Tomb Quest in Ready or Not
Learn the best strategies to successfully rescue hostages in the 'NeonTomb' quest in Ready or Not. Expert tips for stealth, combat, andteamwork to complete the mission safely.
How to Get the Toxic Fumes Achievement in Ready or Not
Learn how to unlock the Toxic Fumes achievement in Ready or Not withthis step-by-step guide. Discover the best strategies and tips tocomplete the challenge efficiently!
All Objectives in Ends of the Earth in Ready or Not
Discover all objectives in the 'Ends of the Earth' mission in Ready or Not. Complete your mission with our detailed walkthrough and tactical tips for success.
All Objective Locations in Neon Tomb in Ready or Not
Discover all objective locations in Neon Tomb for Ready or Not. Master the game with our comprehensive guide
All Objective Locations in Buy Cheap, Buy Twice in Ready or Not
Discover essential objective locations in Ready or Not: Buy Cheap, Buy Twice. Enhance your gameplay
All Game Modes in Ready or Not
Explore all game modes in Ready or Not and discover thrilling gameplay experiences. Dive into tactical action
How to Defuse All Bombs From Elephant Quest in Ready or Not
Join the thrilling adventure of Ready or Not: Defuse All Bombs From Elephant Quest and test your skills
How to Investigate Stolen Present Stashes in Fortnite
Discover the How to Investigate Stolen Present Stashes in Fortnite with our comprehensive investigation guide.
How to fix Stardew Valley crashing on Steam Deck
Discover effective solutions on How to fix Stardew Valley crashing on Steam Deck and enjoy uninterrupted gameplay.
How to Unlock Guardian in Vampire Survivors Emergency Meeting
Discover the secrets of How to Unlock Guardian in Vampire Survivors Emergency Meeting.
How to Fix Madden NFL 24 Draft Class Appearance
Discover effective solutions on How to Fix Madden NFL 24 Draft Class Appearance.
Where to find Spare Parts in Avatar Frontiers of Pandora
Discover a comprehensive collection of Where to find Spare Parts in Avatar Frontiers of Pandora at our website.
Hello there, fellow gamers! Are you excited to learn how to wear a balaclava in Ready or Not? If you're a fan of tactical first-person shooter games, then you know that balaclavas are a staple item for any seasoned operator. These masks are not only functional but also add a layer of mystery and intimidation to your character. Ready or Not is no exception and luckily, adding a balaclava to your character is a straightforward process. However, before we dive into the steps, let's talk about what Ready or Not is and why you should consider adding a balaclava to your character.
Ready or Not is a tactical first-person shooter game developed by VOID Interactive. The game is set in a fictional city called Haventon, where you play as a member of an elite SWAT team tasked with carrying out high-risk operations. The game is heavily inspired by real-life SWAT operations and features realistic gameplay mechanics, including bullet physics, tactical decision-making, and team coordination.
Adding a balaclava to your character in Ready or Not not only enhances the game's realism but also adds an extra layer of customization to your character. Not to mention, it also makes your character look badass.
Now that we've established why you should add a balaclava to your character, let's dive into the steps on how to do it.
How To Wear a Balaclava in Ready Or Not
Step 1: Head over to Nexus Mods and log in with your account.
Nexus Mods is a popular website for downloading mods for various games. To access the Ready or Not balaclava mod, you'll need to create an account on Nexus Mods and log in. If you already have an account, simply log in and search for "Ready or Not Balaclava Mod" in the search bar.
Step 2: Download the mod using Mod Manager or manually.
Once you've found the Ready or Not Balaclava Mod, you can download it using Mod Manager or manually. Mod Manager is the easiest way to download and install the mod. If you don't have Mod Manager installed, you can download it from the Nexus Mods website.
If you prefer manual installation, use Winrar to extract the mod file. You should see a file named "Pakchunk0-WindowsNoEditor.pak" after extraction.
Step 3: Copy and paste the extracted mod file into the Pak folder.
After extracting the mod file, right-click on Ready or Not and select Manage. Then, browse local files in the Pak folder. If you don't see the Pak folder, simply create a new folder and name it "Pak". Copy and paste the extracted mod file into the Pak folder.
Step 4: Restart the game and access the balaclava customization option.
After completing these steps, restart the game, and voila! The balaclava customization option should appear. The mod features black and tan colors and is designed to work with the helmet. For best results, make sure your helmet is on when using it. You'll find the customization option under the Eyewear section.
Step 5: Be mindful of potential clipping and stay updated for updates to the mod and base game.
Just keep in mind that like any mods, there's always a chance of clipping. Make sure to stay updated for updates to the mod and balaclava in the base game.
And that's it! You're now ready to look mysterious and ready for action with your new balaclava in Ready or Not. Have fun!
In conclusion, adding a balaclava to your character in Ready or Not is a simple process that enhances the game's realism and offers an additional layer of customization. The Ready or Not Balaclava Mod is available on Nexus Mods and can be downloaded using Mod Manager or manually. Remember to be mindful of potential clipping and stay updated for updates to the mod and base game. So what are you waiting for? Gear up with your new balaclava and get ready to take on the high-risk operations of Haventon in Ready or Not.
Platform(s): Microsoft Windows PC
Genre(s): First-person shooter, tactical shooter
Developer(s): Void Interactive
Publisher(s): Void Interactive
Engine: Unreal Engine 4
Mode: Single-player, multiplayer
Age rating (PEGI): 16+
Other Articles Related
How to Complete Three Letter Triad Mission in Ready or NotMaster the Three Letter Triad mission in Ready or Not with our comprehensive guide. Tips and strategies for success
How To Bring Order to Chaos in Ready or Not
Discover effective strategies in Ready or Not: How To Bring Order to Chaos to transform disorder into harmony.
How To Get the Coffee Machine Trophy in Ready or Not
Unlock the Coffee Machine Trophy in Ready or Not with our guide! Discover tips and strategies to achieve this challenge
How To Rescue Hostages in Neon Tomb Quest in Ready or Not
Learn the best strategies to successfully rescue hostages in the 'NeonTomb' quest in Ready or Not. Expert tips for stealth, combat, andteamwork to complete the mission safely.
How to Get the Toxic Fumes Achievement in Ready or Not
Learn how to unlock the Toxic Fumes achievement in Ready or Not withthis step-by-step guide. Discover the best strategies and tips tocomplete the challenge efficiently!
All Objectives in Ends of the Earth in Ready or Not
Discover all objectives in the 'Ends of the Earth' mission in Ready or Not. Complete your mission with our detailed walkthrough and tactical tips for success.
All Objective Locations in Neon Tomb in Ready or Not
Discover all objective locations in Neon Tomb for Ready or Not. Master the game with our comprehensive guide
All Objective Locations in Buy Cheap, Buy Twice in Ready or Not
Discover essential objective locations in Ready or Not: Buy Cheap, Buy Twice. Enhance your gameplay
All Game Modes in Ready or Not
Explore all game modes in Ready or Not and discover thrilling gameplay experiences. Dive into tactical action
How to Defuse All Bombs From Elephant Quest in Ready or Not
Join the thrilling adventure of Ready or Not: Defuse All Bombs From Elephant Quest and test your skills
How to Investigate Stolen Present Stashes in Fortnite
Discover the How to Investigate Stolen Present Stashes in Fortnite with our comprehensive investigation guide.
How to fix Stardew Valley crashing on Steam Deck
Discover effective solutions on How to fix Stardew Valley crashing on Steam Deck and enjoy uninterrupted gameplay.
How to Unlock Guardian in Vampire Survivors Emergency Meeting
Discover the secrets of How to Unlock Guardian in Vampire Survivors Emergency Meeting.
How to Fix Madden NFL 24 Draft Class Appearance
Discover effective solutions on How to Fix Madden NFL 24 Draft Class Appearance.
Where to find Spare Parts in Avatar Frontiers of Pandora
Discover a comprehensive collection of Where to find Spare Parts in Avatar Frontiers of Pandora at our website.