
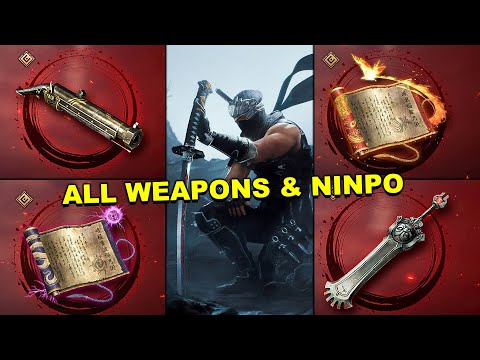
Where to Find Every Weapon in Ninja Gaiden 2 Black
Discover every weapon in Ninja Gaiden 2 Black! Unleash your inner ninja with our comprehensive guide to mastering the game.
Becoming the ultimate Dragon Ninja in Ninja Gaiden 2 Black requires not only mastery of skill but also a formidable arsenal of weapons. Throughout your perilous journey, you'll uncover a diverse range of deadly tools, each offering unique combat advantages. This guide provides a comprehensive breakdown of every weapon location across various chapters, ensuring you're fully equipped to face the relentless onslaught of fiends.
Learn how to unlock the powerful Dual Hammers for the Bardin Goreksson inVermintide 2. This guide covers the simple steps to get this top-tiermelee weapon for the Ironbreaker, Ranger Veteran, and Slayer careers.
All Heroes and Careers in Vermintide 2
Explore the diverse heroes and careers in Vermintide 2. Discover unique abilities, playstyles, and strategies to enhance your gameplay
Return to the Reik Grimoire and Tome Locations in Vermintide 2
Searching for every grimoire and tome? Our Vermintide 2 collectible guide for"Return to the Reik" reveals all book locations to maximize your lootand complete the mission.
All Formable Nations in Europa Universalis 5
all formable nations in Europa Universalis 5! Explore strategies, tips, and guides to expand your empire and dominate the game.
How To Beat Challenges in Kirby Air Riders
Struggling to master the skies? Learn expert tips and strategies to overcome every challenge in Kirby Air Ride. Dominate the City Trial, conquer all racetracks, and unlock the game's secrets with our complete guide.
How To Get All Crafting Materials in Moonlighter 2
essential tips for gathering all crafting materials in Moonlighter 2. Enhance your gameplay and unlock new possibilities!
Weapon Tier List in Moonlighter 2
the ultimate weapon tier list for Moonlighter 2! Optimize your gameplay with our guide to the best weapons and strategies.
How to find Mandrakes in Don't Starve Together
Struggling to find Mandrakes in Don't Starve Together? Learn thebest seasons, locations, and strategies to hunt these elusive livingroots and craft their powerful items.
How To Improve Institution Growth In Europa Universalis 5
effective strategies to enhance institution growth in Europa Universalis 5. Unlock new potential and dominate your gameplay
How to Fix Europa Universalis 5 Not Launching Error
Resolve the Europa Universalis 5 not launching error with our step-by-step. Get back to gaming quickly and enjoy seamless gameplay!
How to Pass Time in Fantasy Life i
Discover creative ways to pass time in Fantasy Life i. Explore tips, tricks, and activities to enhance your gaming!
How To Open The Airport Subway Station in Warzone
Join the action in Warzone as you explore the Airport Subway Station. Uncover secrets, strategize with teammates
How to Fix REMATCH Not Launching Issue
Resolve the REMATCH not launching problem with our comprehensive guide.Find step-by-step solutions
How to Fix REMATCH Stuck on Loading Screen Issue
Resolve the REMATCH loading screen issue with our comprehensive guide.Discover effective solutions to get back to your game
How to Fix REMATCH Lag on PC & Consoles
Discover effective solutions to fix REMATCH lag on PC and consoles.Enhance your gaming experience with our expert tips
Becoming the ultimate Dragon Ninja in Ninja Gaiden 2 Black requires not only mastery of skill but also a formidable arsenal of weapons. Throughout your perilous journey, you'll uncover a diverse range of deadly tools, each offering unique combat advantages. This guide provides a comprehensive breakdown of every weapon location across various chapters, ensuring you're fully equipped to face the relentless onslaught of fiends.
Ninja Gaiden 2 Black: Find Every Weapon
Chapter 1: The Way of the Ninja
1. The Lunar Staff- Location: The Lunar Staff is the sole weapon you'll find in the inaugural chapter. Approximately halfway through Chapter 1, you'll encounter your first fireball-throwing enemies just outside a temple. After defeating them, a cutscene will cue, highlighting a statue inside the temple holding the staff. Simply walk up to the statue and interact with it to acquire this versatile weapon.
Chapter 2: The Castle of the Dragon
1. Falcon's Talons- Location: Early in Chapter 2, after navigating a water section, you'll arrive at the level's first Earth Dragon save point. Proceed past this point, around a building, and into a courtyard flanked by two structures. One structure will be locked, but the other, which has a dead body and the "Notebook: Ultimate Guidance" collectible in front of it, is open. Enter this open structure and proceed to the rear wall. The Falcon's Talons will be on display. Be prepared for a fight immediately after picking up this weapon.
- Location: The Fiend's Bane Bow is the second and final weapon found in Chapter 2. After ascending the side of a hill to a large temple, you'll engage in combat with several enemies in a courtyard outside. Once this group is defeated, climb a makeshift ramp onto the temple roof, where another group of enemies awaits. After dispatching them, you'll drop through a burning hole in the roof, landing in a small chamber with two more enemies. Before exiting this chamber, look to the left of the exit at the dragon-head statue mounted on the wall. The Fiend's Bane Bow is clutched in its mouth. You cannot miss this weapon, as the door to the next chamber will not open until you collect it.
Chapter 3: Thunderclap of Catastrophe
1. Vigoorian Flail
- Location: The Vigoorian Flail is the only weapon available in Chapter 3. You'llfind it at the end of a street within a chest. The area's exit is asmall gate to the right of this chest. This gate will only open onceyou've opened the chest and collected the Vigoorian Flail, making itunmissable for progression.
Chapter 4: A Fiend's Curse
1. Enma's Fang
- Location: This massive greatsword is acquired after a significant boss encounter. Following your defeat of Godomus and reaching the Statue of Liberty,you'll clear out fiends on the lawn outside a building. Upon enteringthe first main chamber of this building, you'll notice several itemsbehind glass displays. Near the exit, a colossal sword will beprominently displayed on a stand. Approach and interact with this swordto claim Enma's Fang.
Chapter 6: The Aqua Capital
1. Dragon's Claw and Tiger's Fang
- Location: These powerful dual katanas are found relatively early in Chapter 6.Progress along the main path until you reach the first Earth Dragon save point. While technically missable, they are conveniently located on adead body positioned directly in front of this save point. Be sure topick them up as you approach the save point before continuing yourmission.
2. Howling Cannon
- Location: Towards the end of a hallway, where your only turn option is to theright, you will be ambushed by two large, winged fiends. Aftersuccessfully dealing with these enemies, make the right turn. At the end of this hall, you should spot a dead body. Interact with the body toretrieve the Howling Cannon.
Chapter 7: The Lycanthrope's Castle
1. Kusari-gama
- Location: After defeating the mid-level boss, Gogmagog, amidst a massive bonepile, you'll need to wall-jump up to a narrow dirt path lining the sideof a huge pit. The path will eventually transition to wood, with amissing section requiring a wall-run to traverse. Immediately afterlanding on the other side of this gap, you will find the Kusari-gama on a dead body.
2. Tonfa
- Location: After exiting a chamber via a large stairway, you will enter astone-tiled room featuring a large portrait of Volf on the wall. Thischamber will contain numerous enemies. Once all adversaries aredefeated, a chest will materialize directly beneath the portrait,containing the formidable Tonfa.
By diligently exploring each chapter and following this guide, you willsystematically unlock and wield Ryu Hayabusa's full devastating arsenal, empowering you to conquer the challenges of Ninja Gaiden 2 Black.
Mode:
Other Articles Related
How To Get Dual Hammers in Vermintide 2Learn how to unlock the powerful Dual Hammers for the Bardin Goreksson inVermintide 2. This guide covers the simple steps to get this top-tiermelee weapon for the Ironbreaker, Ranger Veteran, and Slayer careers.
All Heroes and Careers in Vermintide 2
Explore the diverse heroes and careers in Vermintide 2. Discover unique abilities, playstyles, and strategies to enhance your gameplay
Return to the Reik Grimoire and Tome Locations in Vermintide 2
Searching for every grimoire and tome? Our Vermintide 2 collectible guide for"Return to the Reik" reveals all book locations to maximize your lootand complete the mission.
All Formable Nations in Europa Universalis 5
all formable nations in Europa Universalis 5! Explore strategies, tips, and guides to expand your empire and dominate the game.
How To Beat Challenges in Kirby Air Riders
Struggling to master the skies? Learn expert tips and strategies to overcome every challenge in Kirby Air Ride. Dominate the City Trial, conquer all racetracks, and unlock the game's secrets with our complete guide.
How To Get All Crafting Materials in Moonlighter 2
essential tips for gathering all crafting materials in Moonlighter 2. Enhance your gameplay and unlock new possibilities!
Weapon Tier List in Moonlighter 2
the ultimate weapon tier list for Moonlighter 2! Optimize your gameplay with our guide to the best weapons and strategies.
How to find Mandrakes in Don't Starve Together
Struggling to find Mandrakes in Don't Starve Together? Learn thebest seasons, locations, and strategies to hunt these elusive livingroots and craft their powerful items.
How To Improve Institution Growth In Europa Universalis 5
effective strategies to enhance institution growth in Europa Universalis 5. Unlock new potential and dominate your gameplay
How to Fix Europa Universalis 5 Not Launching Error
Resolve the Europa Universalis 5 not launching error with our step-by-step. Get back to gaming quickly and enjoy seamless gameplay!
How to Pass Time in Fantasy Life i
Discover creative ways to pass time in Fantasy Life i. Explore tips, tricks, and activities to enhance your gaming!
How To Open The Airport Subway Station in Warzone
Join the action in Warzone as you explore the Airport Subway Station. Uncover secrets, strategize with teammates
How to Fix REMATCH Not Launching Issue
Resolve the REMATCH not launching problem with our comprehensive guide.Find step-by-step solutions
How to Fix REMATCH Stuck on Loading Screen Issue
Resolve the REMATCH loading screen issue with our comprehensive guide.Discover effective solutions to get back to your game
How to Fix REMATCH Lag on PC & Consoles
Discover effective solutions to fix REMATCH lag on PC and consoles.Enhance your gaming experience with our expert tips