
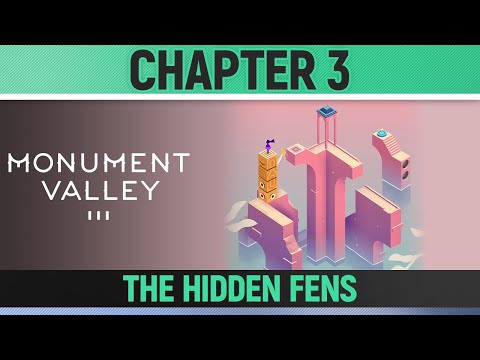
How To Solve The Hidden Fens Puzzle in Monument Valley 3
Discover How To Solve The Hidden Fens Puzzle in Monument Valley 3 with our practical guide today.
Monument Valley 3 is a series of soothing puzzles developed by Ustwo Games. In Chapter 3, "The Hidden Fens," you will meet a new friend and work with your mentor to light the Lighthouse by capturing the sacred light.
These spiritual features of the game are also extended in the journey that Noor, an apprentice under a mystic who is entrusted to keep the Lighthouse illuminated so villagers can return back home, embarks upon. Problems in level three are no less tranquil and confusing compared to the previous chapters. These The Hidden Fens problems for Monument Valley 3 will be easily solvable using the help of this tutorial.
Level 3 of Monument Valley, The Hidden Fens, has two sections and three challenging riddles, as previously stated. The solution is as follows:
the world of sandbox games! Learn what defines this genre, its keyfeatures, and why players love the freedom to create and explore.
What Is a Skill Tree
Explore the intricacies of skill trees, their role in gaming, and howthey empower players to customize abilities.
What Is a HUD in Video Games
Explore what a HUD is in video games and its importance in deliveringessential information to players. Enhance your gaming
What Is Motion Sickness in Gaming
Learn about motion sickness in gaming, including its triggers, effectson players, and tips to reduce symptoms
Best Games for Competitive Players
the best couch co-op games that bring friends and family together forunforgettable gaming experiences. Dive into fun and teamwork
The Best Couch Co‑Op Games
Explore our curated list of the best couch co-op games perfect forbonding with friends and family. Get ready for laughter
The Best Games for High‑End PCs
the best games for high-end PCs that deliver stunning graphics and immersive gameplay. Elevate your gaming experience
The Best RPGs for New Players
Discover the best RPGs for new players! Dive into immersive worlds, engaging stories, and easy-to-learn mechanics.
How to Play Better in Team‑Based Games
strategies to enhance your skills in team-based games. Learn tips and tricks for better teamwork and gameplay.
How to Improve Movement in Shooters
effective strategies to enhance movement in shooter games. Boost your gameplay and dominate the competition
All Currencies Guide in Marvel Rivals
Games offer us various resources of interest and for this reason today we are talking about All Currencies Guide in Marvel Rivals.
How To Make Money in Fast Food Simulator
In this guide post we explain How To Make Money in Fast Food Simulator, let's see.
All Vatican City Codes in Indiana Jones And The Great Circle
We have made a practical guide where we talk about All Vatican City Codes in Indiana Jones And The Great Circle.
How To Get The Kashyyyk Star Map in Star Wars Knights of the Old Republic
Our guide today aims to explain to you How To Get The Kashyyyk Star Map in Star Wars Knights of the Old Republic.
How To Get a Storm Charm in LEGO Fortnite Odyssey
Find out How To Get a Storm Charm in LEGO Fortnite Odyssey with our detailed guide today.
Monument Valley 3 is a series of soothing puzzles developed by Ustwo Games. In Chapter 3, "The Hidden Fens," you will meet a new friend and work with your mentor to light the Lighthouse by capturing the sacred light.
These spiritual features of the game are also extended in the journey that Noor, an apprentice under a mystic who is entrusted to keep the Lighthouse illuminated so villagers can return back home, embarks upon. Problems in level three are no less tranquil and confusing compared to the previous chapters. These The Hidden Fens problems for Monument Valley 3 will be easily solvable using the help of this tutorial.
How To Solve The Hidden Fens Puzzle in Monument Valley 3?
Level 3 of Monument Valley, The Hidden Fens, has two sections and three challenging riddles, as previously stated. The solution is as follows:
Finding a New Friend (Part 1)
Pressing all of the pastel-blue floor buttons at the same time is the solution to the first problem in The Hidden Fens. The catch is that pressing a button makes it inactive.
- Put it all together by tapping and holding the three small blue circles on it to pull down the steps. Once you've climbed the stairs, put them back where they should be.
- From the ledge you'll be able to see three more small circles behind the building if you shift the cube containing the pastel-orange plant in the middle two moves to the right. You can position the building by standing on it, pulling the block above, and then shifting the cube two times back to the left.
- To reach the floor, simply head up top and hit the blue button.
- A small scene will occur showing how the structure changed and that a yellow block is now movable; it's a Totem, similar to one from Monument Valley 2. What you need to do here is simply use the cube twice to move everything to the left.
- Jump to the Totem block when the stars align.
- Press the button on the floor and then pull the Totem three times to the right.
- You should finish it with rotating the cube two times to the right and putting the Totem on the button for the second floor.
- In this puzzle, a huge flower stands under the water, surrounded by pillars that form a maze. The landscape is breathtaking, but it is also full of optical illusions. The pastel-blue button in the middle of the flower is the platform for the Totem-like block, which is your goal in this area.
- Move the ledge forward with the totem-like yellow block.
- After having created a track with the central cube moved completely to the left, you can put on top of it the block resembling a totem.
- Now swing the cube to the right until it becomes completely in a right angle. Place the Totem block on the right pillar.
- Place the Totem in the center and then rotate the cube to the left again.
- In order to move the Totem to the right ledge, you need to rotate the cube to the right, then back to the left. Once the cube is inside the big flower, click the floor button.
- Later, in a short cutscene, this Totem block will transform into a boat, becoming your sidekick deeper into the ocean.
- Get on the boat and take it to the right side of the ocean until you encounter a bridge blocking the pathway. Simply move the three blue circles of the center of the bridge to the left and the walkway will give way.
- Keep sailing until you come across the only building that has this enormous door underwater. Have your boat completely stopped in the dock, then press the button on the floor.
- Now, get back into the boat and sail the boat under the fence.
Section 2: Steal the Light
Once you pass the gate, you'll arrive at the shore of the ocean-the start of Part 2 of The Hidden Fens. As you progress through this part, you are expected to channel the holy light into your mentor's staff.
- Get the boat as close to the building of the mentor as possible.
- Step onto the ledge beside the wall with three yellow circles. Push the wall up, so it comes to the ledge, and climb up on top. Lower the wall and punch the first button.
- Shortly after a gear appears, the ledge will shrink. Go back to the boat, turn the gear to the right, sail across to the other side, get on the retractable wall, and pull it up.
- Get back on board, change the gear to reverse, sail to one side, climb down the steps, step on the second button, and then change the gear to reverse again.
- Follow the mentor up the steps, then turn left, back up and jump back onto the boat. Sail to the other building, and click the two floor buttons to create a flight of stairs extending to the middle of an elevated platform. It's that simple to stand on top of the geometric sign.
- In the following cutscene, a light beam will shoot out of the platform. Using your finger, tap and drag the five glowing dots on the screen to trace a mystical geometric pattern. Tap on it to conjure the mystic's staff and the light inside it. This is the end of Monument Valley level 3.
This is all you need to know about How To Solve The Hidden Fens Puzzle in Monument Valley 3, follow our steps and complete this puzzle.
Mode:
Other Articles Related
What Is a Sandbox Gamethe world of sandbox games! Learn what defines this genre, its keyfeatures, and why players love the freedom to create and explore.
What Is a Skill Tree
Explore the intricacies of skill trees, their role in gaming, and howthey empower players to customize abilities.
What Is a HUD in Video Games
Explore what a HUD is in video games and its importance in deliveringessential information to players. Enhance your gaming
What Is Motion Sickness in Gaming
Learn about motion sickness in gaming, including its triggers, effectson players, and tips to reduce symptoms
Best Games for Competitive Players
the best couch co-op games that bring friends and family together forunforgettable gaming experiences. Dive into fun and teamwork
The Best Couch Co‑Op Games
Explore our curated list of the best couch co-op games perfect forbonding with friends and family. Get ready for laughter
The Best Games for High‑End PCs
the best games for high-end PCs that deliver stunning graphics and immersive gameplay. Elevate your gaming experience
The Best RPGs for New Players
Discover the best RPGs for new players! Dive into immersive worlds, engaging stories, and easy-to-learn mechanics.
How to Play Better in Team‑Based Games
strategies to enhance your skills in team-based games. Learn tips and tricks for better teamwork and gameplay.
How to Improve Movement in Shooters
effective strategies to enhance movement in shooter games. Boost your gameplay and dominate the competition
All Currencies Guide in Marvel Rivals
Games offer us various resources of interest and for this reason today we are talking about All Currencies Guide in Marvel Rivals.
How To Make Money in Fast Food Simulator
In this guide post we explain How To Make Money in Fast Food Simulator, let's see.
All Vatican City Codes in Indiana Jones And The Great Circle
We have made a practical guide where we talk about All Vatican City Codes in Indiana Jones And The Great Circle.
How To Get The Kashyyyk Star Map in Star Wars Knights of the Old Republic
Our guide today aims to explain to you How To Get The Kashyyyk Star Map in Star Wars Knights of the Old Republic.
How To Get a Storm Charm in LEGO Fortnite Odyssey
Find out How To Get a Storm Charm in LEGO Fortnite Odyssey with our detailed guide today.