
How to Unlock All Maps in Megabonk
Understanding Megabonk's Map and Tier System
Unlike games with sprawling worlds, Megabonk focuses on mastering two distinct arenas, each with three escalating stages of difficulty known as Tiers.- Forest Map: This is your starting arena, a verdant landscape with rolling hills populated by Goblins. It serves as the training ground for the trials to come.
- Desert Map: A stark, flat expanse filled with deadly Scorpions and Cacti. While visibility is better, the challenging enemy types make it a formidable location.
Ascending the Ranks: How to Unlock Tier 2 and Tier 3
Progression in Megabonk is linear and demanding. You must prove your mastery at each level before moving forward.Proven Strategies to Dominate Tier 3 and Defeat the Final Boss
Tier 3 represents the peak of Megabonk's difficulty. Success here requires careful planning, smart scaling, and a solid defensive plan.1. Prioritize Scaling with XP and Luck Tomes
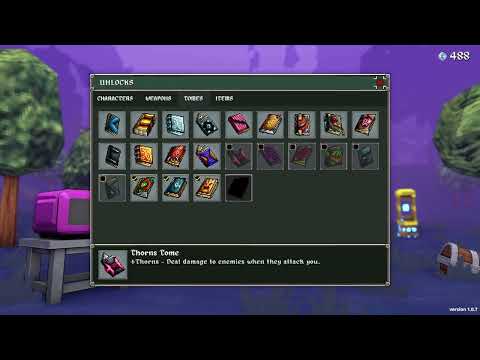
Your top priority in any Tier 3 attempt should be to secure the XP Tome and Luck Tome as early as possible. The XP Tome accelerates your leveling curve,while the Luck Tome dramatically improves the quality of your upgradeoptions. Don't hesitate to re-roll your level-up rewards or even restart a run to get these crucial items early.
2. Mandatory Defense: HP Regeneration and the Aegis
The final bosses feature a devastating opening phase that neutralizes mostof your offensive capabilities. During this puzzle-like segment, you will take damage. Relying solely on offense is a death sentence.
- HP Regeneration: This is your most reliable survival tool. Since bosses often gainshields that negate life steal, passive HP regen becomes invaluable.
- The Aegis Weapon: This defensive powerhouse blocks incoming damage and recharges overtime. Increasing its projectile count can make you nearly invinciblebetween attacks.
3. Manipulate Your Loot Pool for a Optimal Build
One of the most powerful meta-progression features is the ability to curate your item pool.
- Toggle Unwanted Items: In the shop, you can deactivate weapons and items that don't synergizewith your chosen character. This drastically reduces bad RNG and ensures your level-ups and chests offer only beneficial rewards.
- Strategic Banishing: During a run, use the Banish ability on undesirable items from Chestsand Moai statues. This permanently removes them from the reward pool for that run, increasing your odds of getting your best-in-slot gear.
4. Leverage Character Synergy
Every hero in Megabonk has a unique starting weapon and passive ability.Build around these strengths. For instance, Calcium scales with movement speed, making projectile-based weapons a natural fit while renderingarea-of-effect aura abilities less effective. Focus on upgrades thatamplify your character's inherent playstyle.
5. Carefully Increase the Difficulty Stat
For a significant boost to your potential power, gradually increase theDifficulty stat during a run. A higher difficulty percentage spawns more enemies, which translates directly into more experience points. Aim for a manageable increase (e.g., 40% by the end of Tier 1) to superchargeyour leveling without becoming overwhelmed.
By mastering these systems and strategies, you'll be well-equipped tounlock all maps in Megabonk and claim victory against its mostformidable foes.
Other Articles Related
How To Get Dual Hammers in Vermintide 2Learn how to unlock the powerful Dual Hammers for the Bardin Goreksson inVermintide 2. This guide covers the simple steps to get this top-tiermelee weapon for the Ironbreaker, Ranger Veteran, and Slayer careers.
All Heroes and Careers in Vermintide 2
Explore the diverse heroes and careers in Vermintide 2. Discover unique abilities, playstyles, and strategies to enhance your gameplay
Return to the Reik Grimoire and Tome Locations in Vermintide 2
Searching for every grimoire and tome? Our Vermintide 2 collectible guide for"Return to the Reik" reveals all book locations to maximize your lootand complete the mission.
All Formable Nations in Europa Universalis 5
all formable nations in Europa Universalis 5! Explore strategies, tips, and guides to expand your empire and dominate the game.
How To Beat Challenges in Kirby Air Riders
Struggling to master the skies? Learn expert tips and strategies to overcome every challenge in Kirby Air Ride. Dominate the City Trial, conquer all racetracks, and unlock the game's secrets with our complete guide.
How To Get All Crafting Materials in Moonlighter 2
essential tips for gathering all crafting materials in Moonlighter 2. Enhance your gameplay and unlock new possibilities!
Weapon Tier List in Moonlighter 2
the ultimate weapon tier list for Moonlighter 2! Optimize your gameplay with our guide to the best weapons and strategies.
How to find Mandrakes in Don't Starve Together
Struggling to find Mandrakes in Don't Starve Together? Learn thebest seasons, locations, and strategies to hunt these elusive livingroots and craft their powerful items.
How To Improve Institution Growth In Europa Universalis 5
effective strategies to enhance institution growth in Europa Universalis 5. Unlock new potential and dominate your gameplay
How to Fix Europa Universalis 5 Not Launching Error
Resolve the Europa Universalis 5 not launching error with our step-by-step. Get back to gaming quickly and enjoy seamless gameplay!
How to Complete Impatience and Determination in Digimon Story Time Stranger
Master the side quest "Impatience and Determination" in Digimon Story CyberSleuth. Our guide provides a complete walkthrough to find the requireditems and Digimon to complete this challenging task.
How to Find Black Night Kubo in Ghost of Yotei
Searching for the elusive Black Night Kubo? Our guide reveals his exact locationin Ghost of Yotei, along with proven strategies to defeat thischallenging boss and claim your reward.
How to Find the Last Bounty in Ghost of Yotei
Uncover the final secret of Mount Uchi. Our guide reveals theexact location and strategy to defeat the Last Bounty in Ghost of Yoteiand claim your ultimate reward.
How to Change the Time of Day in Ghost of Yotei
Learn how to manipulate the in-game clock in Ghost of Yotei. This guideexplains day and night cycle mechanics for completing time-sensitivemissions, finding specific wildlife, and unlocking all content.
How to Get Onryo Mask in Ghost of Yotei
Unlock the legendary Onryo Mask in Ghost of Yotei. Our guide reveals thesecret quest, hidden location, and challenges you must overcome to claim this powerful artifact.