
How to Complete Lanayru Temple in Zelda Echoes of Wisdom
Our guide today aims to explain to you How to Complete Lanayru Temple in Zelda Echoes of Wisdom, let's see.
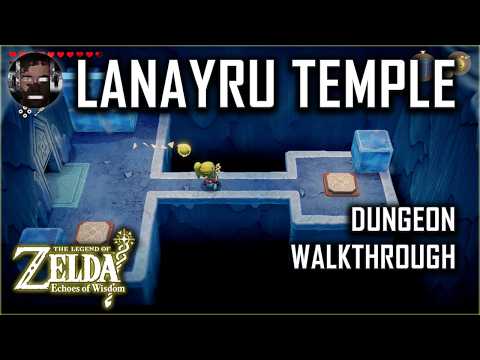
In The Legend of Zelda: Echoes of Wisdom, one needs to complete the restoration of Hyrule Castle along with its town for them to be allowed to progress through the three additional temples. This is the detailed Zelda: Echoes of Wisdom guide for the Lanayru Temple, which is located in the northern snowy area.
Enter the temple, head through the checkpoint, and continue onward until you reach a track system you'll be using later. In the left room, defeat the Ice Octos for five Rock Salt; then head into the right room.
Cross the water with either the Ice Block Echoes or the Cloud Echoes, then connect the fire sign from the right pedestal to the empty one on the left. The track now activates and retracts the wall to reveal a ladder. Send the Strandtula Echo to investigate the 2D chamber, where a chest is located that contains three Monster Fangs.
Fill cold air vents with rocks, then head through the entrance on the left. The track will be activated but to no effect from binding the fire symbol into an ice symbol through the freezing vent. If you are using a Boulder Echo to block the vent, you need to get fire symbol passed the gate unscathed.
Jump into the water to get the Small Key, then go back out into the previous area and put the ice symbol in the pedestal. Once the ice has come back, create a Platboom Echo, opening the door on the right.
By tying and moving the falling icicles around, you can guide them to move past the vents in your 2D room. Afterwards, bridge the pits with either of the Flying Tile or the Cloud Echoes. Note that there is an upside entrance in the middle of the room, which leads up to a treasure chest containing the Golden Egg.
To show a ladder, summon an Ignizol Echo or Brazier on the top of the ice blocks. Now, head back to the base level of the 2D room and bind the fire symbol in your bind. Avoid the cold vents that melted the ice in the previous room and back to its pedestal at the top of the room. Go through the east gate and send the block of ice across to the right to hit the button. Once the bottom button is pressed, press it to the right when the chunk of ice hits the right button, which will spawn a treasure box containing a small key.
Head back to the door of the previous room that was closed and get it. Defeating all of the Temper Tweelus opens up the door and allows you to make a treasure chest with the Dungeon Map. Hit the checkpoint after going through the left door.
We invite you to discover How to Get the Bow in Zelda Echoes of Wisdom with our guide today.
All Stamp Locations in Zelda Echoes of Wisdom
Our guide today aims to tell you about All Stamp Locations in Zelda Echoes of Wisdom.
How To Get All Amiibo Reward in Zelda Echoes Of Wisdom
We welcome you to our guide on How To Get All Amiibo Reward in Zelda Echoes Of Wisdom in a specific and detailed way.
How to complete the Beetle Ballyhoo quest in Zelda Echoes of Wisdom
This time we return with a guide with the objective of explaining to you How to complete the Beetle Ballyhoo quest in Zelda Echoes of Wisdom.
How to get Monster Guts in Zelda Echoes of Wisdom
Discover How to get Monster Guts in Zelda Echoes of Wisdom with this excellent and detailed explanatory guide.
How to Find Monster Stones in Zelda Echoes of Wisdom
We invite you to discover How to Find Monster Stones in Zelda Echoes of Wisdom, a new task in this incredible adventure.
How to Break Spider Webs in Faron Wetlands in Zelda Echoes of Wisdom
Our guide today aims to explain to you How to Break Spider Webs in Faron Wetlands in Zelda Echoes of Wisdom.
All Side Quests in Zelda Echoes of Wisdom
We invite you to discover All Side Quests in Zelda Echoes of Wisdom with this excellent and explanatory guide.
How to Find Eternal Forest Routes - Pedestals in Zelda Echoes of Wisdom
Today we bring you an explanatory guide on How to Find Eternal Forest Routes - Pedestals in Zelda Echoes of Wisdom with precise details.
How to Defeat the Mogryph in Zelda Echoes of Wisdom
Discover How to Defeat the Mogryph in Zelda Echoes of Wisdom with this excellent and detailed explanatory guide.
How to use Horses in Manor Lords
Today we bring you an explanatory guide on How to use Horses in Manor Lords with precise details.
How to Get and Use the Resonance Stone in Baldur’s Gate 3
Discover How to Get and Use the Resonance Stone in Baldur’s Gate 3 with our practical guide today.
Best Nuclear Power Setup in Satisfactory
This time we are back with a guide aiming to explain to you about Best Nuclear Power Setup in Satisfactory.
How to manage food consumption in Elder Scrolls Castles
We invite you to discover How to manage food consumption in Elder Scrolls Castles with our guide today.
How to get the Web-Wrapped Curio in WoW The War Within
Today we bring you an explanatory guide on How to get the Web-Wrapped Curio in WoW The War Within.
In The Legend of Zelda: Echoes of Wisdom, one needs to complete the restoration of Hyrule Castle along with its town for them to be allowed to progress through the three additional temples. This is the detailed Zelda: Echoes of Wisdom guide for the Lanayru Temple, which is located in the northern snowy area.
How to Complete Lanayru Temple in Zelda Echoes of Wisdom?
Enter the temple, head through the checkpoint, and continue onward until you reach a track system you'll be using later. In the left room, defeat the Ice Octos for five Rock Salt; then head into the right room.
Cross the water with either the Ice Block Echoes or the Cloud Echoes, then connect the fire sign from the right pedestal to the empty one on the left. The track now activates and retracts the wall to reveal a ladder. Send the Strandtula Echo to investigate the 2D chamber, where a chest is located that contains three Monster Fangs.
Fill cold air vents with rocks, then head through the entrance on the left. The track will be activated but to no effect from binding the fire symbol into an ice symbol through the freezing vent. If you are using a Boulder Echo to block the vent, you need to get fire symbol passed the gate unscathed.
Jump into the water to get the Small Key, then go back out into the previous area and put the ice symbol in the pedestal. Once the ice has come back, create a Platboom Echo, opening the door on the right.
By tying and moving the falling icicles around, you can guide them to move past the vents in your 2D room. Afterwards, bridge the pits with either of the Flying Tile or the Cloud Echoes. Note that there is an upside entrance in the middle of the room, which leads up to a treasure chest containing the Golden Egg.
To show a ladder, summon an Ignizol Echo or Brazier on the top of the ice blocks. Now, head back to the base level of the 2D room and bind the fire symbol in your bind. Avoid the cold vents that melted the ice in the previous room and back to its pedestal at the top of the room. Go through the east gate and send the block of ice across to the right to hit the button. Once the bottom button is pressed, press it to the right when the chunk of ice hits the right button, which will spawn a treasure box containing a small key.
Head back to the door of the previous room that was closed and get it. Defeating all of the Temper Tweelus opens up the door and allows you to make a treasure chest with the Dungeon Map. Hit the checkpoint after going through the left door.
How to Defeat Zelda Echoes of Wisdom's Green Slime?
Although it would appear that the Green Slime miniboss is invincible in the first place, freezing is a pre-requisite to attack him. First, do a constant cold stream with a Freezard Echo and then do other Echoes or Swordfighter Form to attack him.
This will make the Green Slime divide into two, although it continues its previous behavior. Continue to circle the arena to avoid the slimes dropping down from above as they freeze and continue to split. Feeling sickly, jump into the green hot spring to regain some health. Defeating it will unlock the north door.
Light all the braziers in this room to proceed. Melt the icicles and light the braziers using Ignizol Echo. To light up northeast brazier, you need to bind an Ignizol through the wall. The same is the case with the south one. Before you ascend south, be sure to drop a Water Block trail to the northwest treasure chest with 100 Rupees.
You'll need to be clever to enter the following room, which houses the Big Key. Go south, through the southern entrance once more. After defeating the enemies, take the three Twisted Pumpkins from the chest and go south again. Go north after passing the right-hand door to find the fire sign.
Keeping the fire symbol bound, head it across the icy track to avoid the various hazards. Bind it to the north pedestal to melt a number of the ice pools. Swim under the enormous wall, back to the previous area for a treasure chest with a Monster Stone inside.
Head back to the room filled with several sets of tracks; put a rock on the underwater button, then exit through the left door. Skip the next room: exit this room through the left door for a fire emblem and several vents. All the vents in the previous room must be blocked using a Boulder Echo: it will freeze the water and flip the fire sign to an ice type variation. Move onto the other pedestal and place it there.
Getting Across the Ice to the Button: Go to the east entrance and call an Ice Block Echo. As it comes into contact with the ice, stand on the other button to unlock the north entrance, then jump over the gate and go through. In order for you to move further ahead, you have to beat the White Wolfos.
Move the fire symbol from one pedestal to the other by blocking all cold vents in the next area. This will make the wall hot in the room with the ice symbol. Go back in the room via the ladder and flip it with the button.
Light the brazier, take the fire out with the sign when you drag it over, and put it on the pedestal. This will reset when you leave the room, at which point you can put the ice sign on its own pedestal. For the Big Key, proceed to the previous room and stand on the yellow switch to unlock the gate. To the right-hand side, the boss chamber entrance can be seen. The players defeat Skorchill inside the chamber to win a full Heart Container and Nayru's Sanction.
This is all you need to know about How to Complete Lanayru Temple in Zelda Echoes of Wisdom, follow this guide to easily achieve it.
Mode:
Other Articles Related
How to Get the Bow in Zelda Echoes of WisdomWe invite you to discover How to Get the Bow in Zelda Echoes of Wisdom with our guide today.
All Stamp Locations in Zelda Echoes of Wisdom
Our guide today aims to tell you about All Stamp Locations in Zelda Echoes of Wisdom.
How To Get All Amiibo Reward in Zelda Echoes Of Wisdom
We welcome you to our guide on How To Get All Amiibo Reward in Zelda Echoes Of Wisdom in a specific and detailed way.
How to complete the Beetle Ballyhoo quest in Zelda Echoes of Wisdom
This time we return with a guide with the objective of explaining to you How to complete the Beetle Ballyhoo quest in Zelda Echoes of Wisdom.
How to get Monster Guts in Zelda Echoes of Wisdom
Discover How to get Monster Guts in Zelda Echoes of Wisdom with this excellent and detailed explanatory guide.
How to Find Monster Stones in Zelda Echoes of Wisdom
We invite you to discover How to Find Monster Stones in Zelda Echoes of Wisdom, a new task in this incredible adventure.
How to Break Spider Webs in Faron Wetlands in Zelda Echoes of Wisdom
Our guide today aims to explain to you How to Break Spider Webs in Faron Wetlands in Zelda Echoes of Wisdom.
All Side Quests in Zelda Echoes of Wisdom
We invite you to discover All Side Quests in Zelda Echoes of Wisdom with this excellent and explanatory guide.
How to Find Eternal Forest Routes - Pedestals in Zelda Echoes of Wisdom
Today we bring you an explanatory guide on How to Find Eternal Forest Routes - Pedestals in Zelda Echoes of Wisdom with precise details.
How to Defeat the Mogryph in Zelda Echoes of Wisdom
Discover How to Defeat the Mogryph in Zelda Echoes of Wisdom with this excellent and detailed explanatory guide.
How to use Horses in Manor Lords
Today we bring you an explanatory guide on How to use Horses in Manor Lords with precise details.
How to Get and Use the Resonance Stone in Baldur’s Gate 3
Discover How to Get and Use the Resonance Stone in Baldur’s Gate 3 with our practical guide today.
Best Nuclear Power Setup in Satisfactory
This time we are back with a guide aiming to explain to you about Best Nuclear Power Setup in Satisfactory.
How to manage food consumption in Elder Scrolls Castles
We invite you to discover How to manage food consumption in Elder Scrolls Castles with our guide today.
How to get the Web-Wrapped Curio in WoW The War Within
Today we bring you an explanatory guide on How to get the Web-Wrapped Curio in WoW The War Within.