
How to fix Exoprimal aiming
Learn How to fix Exoprimal aiming and with our simple step-by-step guide. Get back to gaming.
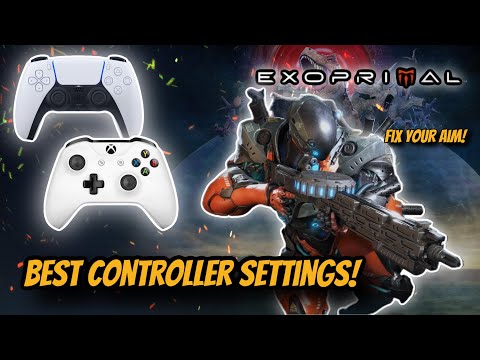
Exoprimal is an exciting game that offers a thrilling gaming experience. However, if you're having trouble with aiming, it can be frustrating. In this blog post, we will guide you through the steps to fix Exoprimal aiming and improve your gameplay.
The first step to fix Exoprimal aiming is to access the controller settings menu. Depending on your gaming platform, follow these steps:
Once you are in the settings menu, you need to navigate to the controller sections. Use the following buttons, depending on your gaming platform:
Learn How to disable crossplay in Exoprimal it with our easy step-by-step guide! Get back to gaming.
How to turn off vibrations in Exoprimal
Learn How to turn off vibrations in Exoprimal and easily with our step-by-step guide.
How to fix Exoprimal ‘server error has occurred’
Learn How to fix Exoprimal ‘server error has occurred’ and Get helpful tips and advice on troubleshooting.
How to disable damage numbers in Exoprimal
Discover the easy steps How to disable damage numbers in Exoprimal! Get a better gaming experience.
How to fix Exoprimal aiming
Learn How to fix Exoprimal aiming and with our simple step-by-step guide. Get back to gaming.
How to disable the damage indicator in Exoprimal
Discover How to disable the damage indicator in Exoprimal and enjoy an immersive gaming experience
How to disable voice chat in Exoprimal
Learn How to disable voice chat in Exoprimal and have a more peaceful gaming experience
How to fix brightness in Exoprimal
Learn How to fix brightness in Exoprimal device with our simple step-by-step guide. Get your device looking its best today
How To Get Savali Gold Bolts Ratchet And Clank Rift Apart
Learn how to get Savali Gold Bolts Ratchet and Clank Rift Apart with our easy-to-follow guide! Get the gold bolts you need.
How to fix Exoprimal failed to communicate with the server
Learn How to fix Exoprimal failed to communicate with the server and easily with our step-by-step guide.
How to change subtitle size in Exoprimal
Learn How to change subtitle size in Exoprimal with our step-by-step guide. Get the bigger subtitles you need today
How to disable the damage indicator in Exoprimal
Discover How to disable the damage indicator in Exoprimal and enjoy an immersive gaming experience
How to disable voice chat in Exoprimal
Learn How to disable voice chat in Exoprimal and have a more peaceful gaming experience
Exoprimal is an exciting game that offers a thrilling gaming experience. However, if you're having trouble with aiming, it can be frustrating. In this blog post, we will guide you through the steps to fix Exoprimal aiming and improve your gameplay.
Accessing the Controller Settings Menu
The first step to fix Exoprimal aiming is to access the controller settings menu. Depending on your gaming platform, follow these steps:
PlayStation Controller:
- - Press the Options button on your PlayStation controller.
- - Select "Settings" from the menu that appears.
Xbox Controller:
- - Press the Options button on your Xbox controller.
- - Select "Settings" from the menu that appears.
Navigating the Controller Sections
Once you are in the settings menu, you need to navigate to the controller sections. Use the following buttons, depending on your gaming platform:
PlayStation Controller:
- Use the L1 and R1 buttons to change sections within the settings menu. - Locate the "Controller Settings" tab.Xbox Controller:
- Use the LB and RB buttons to change sections within the settings menu. - Locate the "Controller Settings" tab.Adjusting Aiming Sensitivity Settings
Now that you have found the "Controller Settings" tab, it's time to adjust the aiming sensitivity settings. Follow these steps:
- 1. Within the "Controller Settings" tab, find the "Aiming Sensitivity" section.
- 2. Here, you will see options to adjust the X-Axis and Y-Axis sensitivity levels.
- 3. Adjust these sensitivity levels to your desired settings, keeping in mind your comfort and gameplay style.
- 4. Additionally, you can fine-tune specific sensitivity settings like "Pilot Aiming Sensitivity," "Dead Eye Sensitivity," and "Vigilant Scope Sensitivity (x2.0)" to enhance your aiming precision.
Additional Aiming Sensitivity Adjustments
To further refine your aiming experience, you can explore additional options within the controller settings. These options may vary depending on the game, but some common ones include:
- Right Stick Deadzone: Adjust the deadzone of the right stick to eliminate any input lag.
- Acceleration Delay: Modify the acceleration delay to control the responsiveness of your aiming.
- Stick Response Curve: Fine-tune the stick response curve to match your aiming preferences.
- Aim Assist Scaling: Adjust the aim assist scaling to find the right balance between precision and assistance.
Experiment with these additional settings based on your personal preference and gameplay requirements. Finding the perfect configuration may take some trial and error, but it will greatly improve your aiming accuracy.
Testing the New Aiming Configurations
After making the necessary adjustments to your aiming sensitivity and exploring additional settings, it's time to put them to the test. Load up Exoprimal and enter a practice mode or play a few matches to see how the new configurations feel.
Pay attention to how the aiming responds to your inputs and make further adjustments if needed. Remember, finding the ideal aiming settings is a personal journey, and it may take some time to find the perfect balance.
By following the steps outlined in this blog post, you should be able to fix Exoprimal aiming issues and enhance your gameplay experience. Remember to adjust the aiming sensitivity settings, explore additional options, and test your new configurations to find the perfect aiming setup for you. With improved aiming, you can take your Exoprimal skills to the next level and enjoy the game to its fullest potential. Happy gaming!
Mode:
Other Articles Related
How to disable crossplay in ExoprimalLearn How to disable crossplay in Exoprimal it with our easy step-by-step guide! Get back to gaming.
How to turn off vibrations in Exoprimal
Learn How to turn off vibrations in Exoprimal and easily with our step-by-step guide.
How to fix Exoprimal ‘server error has occurred’
Learn How to fix Exoprimal ‘server error has occurred’ and Get helpful tips and advice on troubleshooting.
How to disable damage numbers in Exoprimal
Discover the easy steps How to disable damage numbers in Exoprimal! Get a better gaming experience.
How to fix Exoprimal aiming
Learn How to fix Exoprimal aiming and with our simple step-by-step guide. Get back to gaming.
How to disable the damage indicator in Exoprimal
Discover How to disable the damage indicator in Exoprimal and enjoy an immersive gaming experience
How to disable voice chat in Exoprimal
Learn How to disable voice chat in Exoprimal and have a more peaceful gaming experience
How to fix brightness in Exoprimal
Learn How to fix brightness in Exoprimal device with our simple step-by-step guide. Get your device looking its best today
How To Get Savali Gold Bolts Ratchet And Clank Rift Apart
Learn how to get Savali Gold Bolts Ratchet and Clank Rift Apart with our easy-to-follow guide! Get the gold bolts you need.
How to fix Exoprimal failed to communicate with the server
Learn How to fix Exoprimal failed to communicate with the server and easily with our step-by-step guide.
How to change subtitle size in Exoprimal
Learn How to change subtitle size in Exoprimal with our step-by-step guide. Get the bigger subtitles you need today
How to disable the damage indicator in Exoprimal
Discover How to disable the damage indicator in Exoprimal and enjoy an immersive gaming experience
How to disable voice chat in Exoprimal
Learn How to disable voice chat in Exoprimal and have a more peaceful gaming experience