
How to Climb Power to the Library in Dying Light The Beast
Dying Light The Beast: Climb & Restore Power to the Library
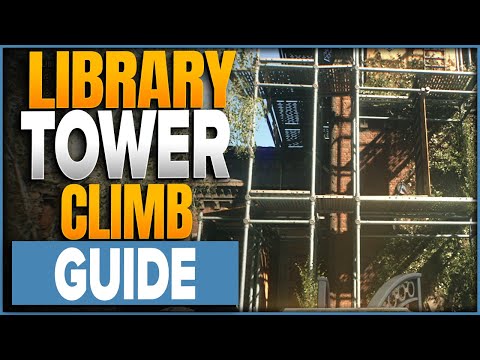
Infiltrating the Library Tower
The first hurdle is simply getting inside. The main entrance to the Library Tower is typically barricaded or locked, forcing you to find an alternative entry point. The most accessible route is to use the parkour skills you've honed throughout your journey. Look for scaffolding or climbable ledges on the exterior of the library compound that lead up to the roof. Once you're at the top, you'll spot an open window. This is your way in.Stepping through the window, you'll find yourself in a large, multi-level chamber. A locked door on the ground floor may seem to be the primary obstacle, but your goal is to find a path upward. The interior of the tower is a complex puzzle of platforms and pathways that require a keen eye and precise movement. The first step is to locate a metal grate leaning against some plywood. This is the starting point of your vertical ascent.To begin your climb, you need to jump toward the wooden beams above the grate. As is the case with much of the traversal in Dying Light: The Beast, you may need to press or hold the jump button a second time as you make contact with the plywood. This maneuver will initiate a wall run, propelling you to the next level. Once you've successfully landed on the floor above, make your way down a set of stairs to unlock the gate you saw earlier. This creates a shortcut for future use, should you need it.Navigating the Tower's Interior
With the shortcut secured, the true ascent begins. Follow the seriesof wooden beams that wind through the tower. Your path will lead you to a window, but resist the urge to go outside. Instead, turn your attention to the walls. You're looking for a series of red bricks that form aledge you can grab and shimmy along.
From this red brick ledge,you have a couple of options to proceed. You can follow the ledge untilyou spot a wooden beam with some grey cloth draped over it. From there,make a jump to the grey-cloth beam, then leap to the adjacent beammarked with red cloth. Alternatively, if you're feeling confident inyour parkour skills, you can climb onto the red brick ledge and perform a direct jump to the wooden beam with the red cloth. For this secondoption, aim for the section of the beam closest to you to ensure asuccessful landing.
Solving the Clock Chamber Puzzle
Your final parkour challenge takes place in a grand, multi-tiered chamberdominated by a massive clock. To reach the safe house, which is locatedabove the clock, you must manipulate one of the clock's gears.
The solution lies with the power cords scattered throughout the area. Grabone of the power cords and connect it to one of the nearby junctionboxes. Next, you need to find the clock gear with the long arm andconnect the power cord to the junction box next to it. This willactivate the clock mechanism and cause the arm to rotate. You must nowwait patiently for the arm to reach the twelve o'clock position. As soon as it does, quickly detach the power cable. This will lock the clockarm in place, creating a temporary platform for you to use.
Withthe clock arm now a stable platform, you can complete the final part ofyour climb. While still holding the power cord, jump onto the smallmaintenance cabinet in the center of the chamber. From here, you canleap toward the now-stationary clock arm. You may need to swing yourbody a bit to build momentum before making a final jump toward thewooden beams near the ceiling. From these beams, you'll be able to climb up to the final floor where the safe house awaits.
Once you'vereached the top, you'll be greeted by a couple of infected. Take themout, then look for the final junction box. Plug in your power cable, and the safe zone will be officially secured. You now have a new place torest and prepare for the dangers of the night in the unforgiving worldof Dying Light: The Beast.
Other Articles Related
How to Get Ciupaga Axe in Dying Light The BeastLearn how to obtain the powerful Ciupaga axe in Dying Light: The Following.Our guide covers the location, quest, and steps to claim this uniquetwo-handed weapon.
How to Start the Last Wish Side Quest in Dying Light The Beast
Discover the location of Iris' husband's grave in Dying Light: The Beast. Uncover secrets and enhance your gameplay
How to Get Inside the Main Power Plant Building in Dying Light The Beast
Learn the essential steps to breach the Main Power Plant in Dying Light: TheFollowing. Get expert tips for navigating the infected horde andactivating the complex's defenses.
How to get Leviathan Axe from God of War in Dying Light The Beast
Unlock Kratos' iconic weapon in Dying Light! This guide explains how to getthe Leviathan Axe from God of War through The Beast bounty. Master thethrowing mechanic and dominate the infected.
How to Find Hidden Truths With Spark in Dying Light The Beast
Uncover the hidden truths of Dying Light: The Beast with Spark. Dive into thrilling gameplay, secrets, and strategies to survive the night!
How to Climb the Gas Station Voltage Pole in Dying Light The Beast
Master the ultimate parkour challenge in Dying Light. This guide reveals thestep-by-step strategy for climbing the Gas Station voltage pole todefeat The Beast.
Where to find UV Bar in Dying Light The Beast
Searching for the UV Bar in Dying Light's "The Beast" DLC? Find its exactlocation and learn how to use this key item to survive the night against Volatiles.
How to Solve Treasure Map D2 in Dying Light The Beast
Struggling with Treasure Map D2 in Dying Light? Our guide shows you the exactlocation of the treasure chest on the bridge in The Slums and thevaluable loot inside.
How to Get the Sawblade Launcher in Dying Light The Beast
Discover how to obtain the powerful Sawblade Launcher in Dying Light:The Beast. Unleash chaos on your enemies
How to Solve Emil’s Brick School Safe Code Puzzle in Dying Light The Beast
Stuck on Emil's safe in Dying Light: The Following? This guide reveals how to solve the brick school puzzle to find the code for Emil's safe andclaim the loot inside.
Where to find Poppy in Dying Light The Beast
Struggling to find Poppy in Dying Light: The Following? This guide reveals herexact location in the Countryside and how to start the "Mother's Day"quest to get the powerful EXPCalibur weapon.
How to Fix the "His Vile Sanctum" Glitch in Borderlands 4
how to access Vile Lictor's Fortress in Borderlands 4 with our step-by-step. Unlock secrets and conquer challenges!
How to Play With Friends in EA FC 26
Discover how to play EA FC 26 with friends! Explore tips, modes, and strategies for an unforgettable gaming experience
How to Change Difficulty Settings in Dying Light The Beast
Master Dying Light's challenges! Learn how to change difficulty settings inDying Light: The Following to tailor your zombie survival experience,from easy exploration to the ultimate Nightmare mode test.
How to Play with Friends & Fix Cross-Play Errors in Skate 4
Discover how to play Skate 4 with friends! Learn tips, tricks, and strategies for an epic multiplayer experience.