
How to Get & Upgrades All Bow in Black Ops 3 Zombies
This time we return with a guide with the objective of explaining to you How to Get & Upgrades All Bow in Black Ops 3 Zombies.
You can't help but give Der Eisendrache some of the credit for Call of Duty: Black Ops 3's top-notch zombies mode. Among the mazes of this Group 935 fortress, Der Eisendrache, lies the Wrath of the Ancients bow, a special weapon in Call of Duty: Zombies that can be enhanced with four distinct components.
Players can witness the heartbreaking endings of their beloved characters in Call of Duty Zombies, as the destiny of every crew is revealed.
See below for a rundown of how to get the original, as well as every other elemental bow in Black Ops 3 Zombies. Even if it's not easy, the stages to upgrading the bows in Der Eisendrache—one of the best maps in Call of Duty: Zombies—are laid out such that anyone desiring more strength can simply digest them.
Playing as the Wrath of the Ancients, players in Black Ops 3's Zombies Der Eisendrache battlefield will have access to sixty arrows that deal explosive damage. Players can charge this explosive damage to unleash two arrows that deal double the damage against zombies, and it's impervious to them.
Players must find three Dragon Head Statues spread throughout the map when they spawn into Der Esiendrache. You can find the dragon head statues in these places:
To activate these Dragon Head Statues, gamers must first eliminate any nearby zombies. After then, there are a total of eight zombies that players need to feed. Because the Dragon Head can only eat one zombie at a time, you must wait until it finishes chewing before killing the next zombie. When the player has done everything correctly, the zombie will die by flipping over and being swallowed by the dragon. The Dragon Head will transform back into stone and eventually crumble after eight zombies.
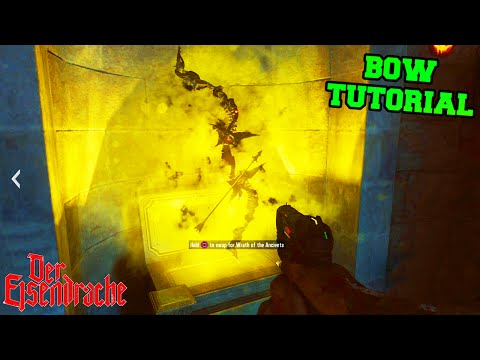
Players can visit a knight's grave after completing all three Dragon Head Statues by descending through Mission Control and continuing past Speed Cola. The Wrath of the Ancients bow is floating below the knight's tomb and is available to all players.
Like the Wunderwaffe DG-2, the 75-arrow Lightning Bow shoots a sphere of electricity that can shock and even chain zombies. Use two arrows to charge each shot, and a thunderstorm will erupt, snatching up zombies and electrocuting them for ten seconds. Obtaining it is as follows:
After players have obtained the Wrath of the Ancients, they should ascend to the castle's rooftop to activate a Pack-a-Punch machine and turn on the electricity. At this point, aim your weapon towards the Clock Tower and fire the weathervane with the Wrath of the Ancients. When players do this, an arrow will appear from the wall, and they can retrieve it to advance to the next level.
Players will need to utilize the Wrath of the Ancients bow, armed with the shattered arrow, to target some pyres located outside the map's boundaries. The proper shooting of the pyre will be marked by the whirlwind of a great fire. Listed here are the three fire pits:
Step two requires players to descend into the Undercroft and stand on the four squares flanking the pyramid to activate the low-gravity zones. Players are now tasked with waiting for the gravity to drop before wall-running across five extended hexagonal runes that bear a wind carving. You have to run over all five of them without touching the floor, but luckily, the anti-gravity jumps make it easier to recover.
The following section will focus on three urns near Der Eisendrache that are notable for the lightning bolts that emanate from them. You can find these urns at three distinct locations:
Go back to where the players found the shattered arrow and interact with the blue fog that has now settled into the area surrounding the weathervane.
The last thing to do is go back to the Undercroft, where the pyramid resides, and press the interact button on the box with the lightning bolt or tornado inscribed into it. In order to transfer souls, players must kill 20 zombies within this shrine. Doing so will award them with Max Ammo. When you've used up all the souls you can transfer, return to the box using your Wrath of the Ancients bow to get the lightning bow upgrade.
Discover How to Get Kills Shortly After Sprinting in Black Ops 6 with this excellent and detailed explanatory guide.
How to Get & Upgrades All Bow in Black Ops 3 Zombies
This time we return with a guide with the objective of explaining to you How to Get & Upgrades All Bow in Black Ops 3 Zombies.
How to play Call of Duty: Black Ops 2 with Plutonium on PC
Get ready to enjoy the best first-person shooter game, How to play Call of Duty: Black Ops 2 with Plutonium on PC.
Call of Duty Black Ops Cold War - Warzone: How to unlock Vargo 52 Assault Rifle
We invite you to discover How to unlock Vargo 52 assault rifle, a new task in Call of Duty Black Ops Cold War - Warzone.
Call of Duty Black Ops Cold War: How to get all free weapon Blueprints in for Season 4
With our Call of Duty Black Ops Cold War guide, you will learn more about How to get all free weapon blueprints in for season 4.
Call of Duty Black Ops 4: How to get for free with PlayStation Plus
Call of Duty Black Ops 4 has been an interesting game, and that is why today we explain how to get it for free with PlayStation Plus.
Operation Grand Heist, the newest of Call of Duty: Black Ops 4
Treyarch reveals the new features of the new season of Black Ops 4.
Treyarch announces a bonus for CoD followers Black Ops 4
Treyarch presents a universe of zombies that will appear in the Call of Duty saga. This game has presented a bonus event for zombie players and the good that announced the different features that will soon reach the game.
How to Control the Camera in Tiny Glade
Discover How to Control the Camera in Tiny Glade with this excellent and detailed explanatory guide.
How to get XP in Visions of Mana
We invite you to discover How to get XP in Visions of Mana with this excellent and explanatory detailed guide.
How to Rush Projects in Ara History Untold
With our help you will see that knowing How to Rush Projects in Ara History Untold is easier than you think.
A Treat for My Person Walkthrough in Zelda Echoes of Wisdom
We welcome you to our guide on A Treat for My Person Walkthrough in Zelda Echoes of Wisdom in a specific and detailed way.
How To Create or Join a Guild in Throne and Liberty
Today we bring you an explanatory guide on How To Create or Join a Guild in Throne and Liberty with precise details.
You can't help but give Der Eisendrache some of the credit for Call of Duty: Black Ops 3's top-notch zombies mode. Among the mazes of this Group 935 fortress, Der Eisendrache, lies the Wrath of the Ancients bow, a special weapon in Call of Duty: Zombies that can be enhanced with four distinct components.
Players can witness the heartbreaking endings of their beloved characters in Call of Duty Zombies, as the destiny of every crew is revealed.
See below for a rundown of how to get the original, as well as every other elemental bow in Black Ops 3 Zombies. Even if it's not easy, the stages to upgrading the bows in Der Eisendrache—one of the best maps in Call of Duty: Zombies—are laid out such that anyone desiring more strength can simply digest them.
How to Get & Upgrades All Bow in Black Ops 3 Zombies
The Ancients' Fury
Playing as the Wrath of the Ancients, players in Black Ops 3's Zombies Der Eisendrache battlefield will have access to sixty arrows that deal explosive damage. Players can charge this explosive damage to unleash two arrows that deal double the damage against zombies, and it's impervious to them.
Players must find three Dragon Head Statues spread throughout the map when they spawn into Der Esiendrache. You can find the dragon head statues in these places:
- Located in the courtyard, facing the tram cart from spawn, it may be located near the castle wall and Mystery Box, after Double Tap Root Beer.
- The Speed Cola machine is located inside Mission Control, just above the fireplace.
- On the wall across from the crafting table in the Undercroft Pyramid area.
To activate these Dragon Head Statues, gamers must first eliminate any nearby zombies. After then, there are a total of eight zombies that players need to feed. Because the Dragon Head can only eat one zombie at a time, you must wait until it finishes chewing before killing the next zombie. When the player has done everything correctly, the zombie will die by flipping over and being swallowed by the dragon. The Dragon Head will transform back into stone and eventually crumble after eight zombies.
Players can visit a knight's grave after completing all three Dragon Head Statues by descending through Mission Control and continuing past Speed Cola. The Wrath of the Ancients bow is floating below the knight's tomb and is available to all players.
The Lightning Bow: Der Eisendrache's Acquisition Guide
Oh, how wonderful!
Like the Wunderwaffe DG-2, the 75-arrow Lightning Bow shoots a sphere of electricity that can shock and even chain zombies. Use two arrows to charge each shot, and a thunderstorm will erupt, snatching up zombies and electrocuting them for ten seconds. Obtaining it is as follows:
After players have obtained the Wrath of the Ancients, they should ascend to the castle's rooftop to activate a Pack-a-Punch machine and turn on the electricity. At this point, aim your weapon towards the Clock Tower and fire the weathervane with the Wrath of the Ancients. When players do this, an arrow will appear from the wall, and they can retrieve it to advance to the next level.
Players will need to utilize the Wrath of the Ancients bow, armed with the shattered arrow, to target some pyres located outside the map's boundaries. The proper shooting of the pyre will be marked by the whirlwind of a great fire. Listed here are the three fire pits:
- At the top of the castle, near the green computer terminals, hug the wall beside the Clock Tower. There, you'll find a shattered section of the wall. Look down, and you'll notice a bastion with an unlit pyre.
- As you stand next to the tram at spawn, turn left by the KRM-262 wall purchase and stare out of the map to see an unlit pyre.
- Reach the Rocket Platform from the Undercroft Pyramid room via the teleporter. The last campfire is located on the cliffside to the right of the rocket launch pad.
Step two requires players to descend into the Undercroft and stand on the four squares flanking the pyramid to activate the low-gravity zones. Players are now tasked with waiting for the gravity to drop before wall-running across five extended hexagonal runes that bear a wind carving. You have to run over all five of them without touching the floor, but luckily, the anti-gravity jumps make it easier to recover.
The following section will focus on three urns near Der Eisendrache that are notable for the lightning bolts that emanate from them. You can find these urns at three distinct locations:
- Located in the room atop Double Tap Root Beer, adjacent to the L-CAR 9 wall-buy and the crafting bench.
- On the Clock Tower's middle level, next to the stairwell and the communications desk.
- On the floor, across from the teleporter, within the Rocket Launch chamber.
- At these urns, players can transfer the souls of approximately five zombies. After killing a zombie, the player will know they have completed the task since they will no longer emit any souls. Players must charge the urns before drawing their bows to them, which will convert the electric current into an arrow. Then, they must shoot the arrow into each of the three pyres to transform the fire from burning to electric.
Go back to where the players found the shattered arrow and interact with the blue fog that has now settled into the area surrounding the weathervane.
The last thing to do is go back to the Undercroft, where the pyramid resides, and press the interact button on the box with the lightning bolt or tornado inscribed into it. In order to transfer souls, players must kill 20 zombies within this shrine. Doing so will award them with Max Ammo. When you've used up all the souls you can transfer, return to the box using your Wrath of the Ancients bow to get the lightning bow upgrade.
In Der Eisendrache, Where Can I Find a Fire Bow?
Ahmhogaroc Kreeaho-ahm
The Fire Bow has a 75-shot ammo capacity and each uncharged arrow it fires will cause a brief burst of lava to be released. At the same time, adversaries in the vicinity can take a hammering from an erupted magma ball that zombies are trapped in as you charge your shot. Obtaining it is as follows:
To release a broken arrow, climb to the top of the Clock Tower with the Wrath of the Ancients Bow in hand. Then, shoot the wall designated by the red symbol to explode part of it.
Go to the Rocket Launch location and wait for a rocket fire test while equipped with the broken arrow. Upon completion of the rocket fire test, proceed to the open area and, using the Wrath of the Ancients bow, blast the glowing red rock situated on the roof of the VMP wall-buy to your right. With any luck, the rock will burst and fly away. If that doesn't work, you'll only have to wait another two to five minutes for the rocket test.
Players may become frustrated with the next phase, but they need to remain patient and bring a lot of points. Players must now use their Wrath of the Ancients while hovering in midair while utilizing the Wundersphere to shoot three rings engraved into the floor in specified areas. If you manage to fire one of these rings while it's in the air, it will light up with flames.
- It is recommended to use the Wundersphere from the Bastion to reach the first ring, which is located near the KRM-262 and Double Tap perk upon spawn.
- Next to the green terminals and the Clock Tower is the second ring. Wundersphere is most conveniently located in the Lower Courtyard, between Double Tap and the L-CAR 9 wall-buy.
- If you're taking the Wundersphere at the Kuda wall-buy in the Upper Courtyard, you should be able to reach the third ring on top of the castle by the Death Ray in the Bastion.
Whether you're playing solo or with a friend, hitting these is no picnic, and you'll need 500 points to activate each Wundersphere. To charge the bow and shoot it with immediate reflex to activate the ring, players should activate the Wundersphere while standing in their specific aiming spots.
The rings are now ready to go, so gamers can go to any of them and kill zombies from inside. Although zombies aren't required to be in the ring, players are. Once a player has killed roughly ten zombies, they will no longer be able to transfer souls between rings. At that point, they can ascend to the top floor of the Clock Tower and find a sign inside. After players find the sign, they need to find the fireplace on the map that corresponds to it. You can find the location of each symbol and its fireplace below:
- You may find the appropriate ring beside the KRM-262 and Double Tap perk, as well as the Templar cross emblem in Samantha's room near the fireplace.
- The fireplace under the dragon head statue in the control room is marked with an arrow pointing right with two triangles underneath. The Death Ray and Wundersphere can be used to find the matching ring.
- Along the stairs in the Lower Courtyard, opposite the Mystery Box and Dragon Head Statue, you can see a fireplace with two right-angled triangles, an arrow pointing in the same direction, and two more right-angled triangles. Just outside the Clock Tower is the matching ring.
Once players have located their fireplace and symbol, they need to go back to the glowing fire ring nearest to the fireplace. A glowing filter will appear on the player's screen's edges as they enter the ring. Get to the fireplace by chaining your charged arrows. Players can create volcanic rocks by shooting charged arrows from farther away in the ring. Standing next to a rock causes it to emit the same glowing edges as the screen, allowing them to fire another rock. Before players are required to return to the ring, they have a total of four shots. The shot that is fired into the fireplace serves as the fourth and last shot. Holding down the interact button on the fireplace allows players to spawn a Max Ammo and chain their bullets, increasing their chances of success.
In doing so, they can collect a fixed arrow by interacting with a floating ball of lava near the Death Ray on top of the castle. To activate the red ring in the center of the pyramid, use the arrow to travel to the Undercroft and interact with the box there. Use the arrow to interact with the box, and then eliminate the twenty zombies standing next to it. When you're ready, put the bow from Wrath of the Ancients into the box to get the Fire Bow.
The Eisendrache Wolf Bow: A Guide on Obtaining It
You are a Kreemasaleet.
The Wolf Bow can hold 75 rounds of ammunition, making it a very powerful weapon. Charging the bow needs two arrows, but it summons phantom wolves to jump out of the arrow, damaging and slowing down zombies in its path, similar to a Thundergun. The Wolf Bow's particular usage is to deal damage and slow down zombies within the blast radius. Obtaining it is as follows:
Now that they have the Wrath of the Ancients bow, players need to find four paintings on the map and interact with them. The paintings appear in different places in every game, but the sequence in which they must be dealt with is consistent, and a soft instrument strum verifies that the player has performed the step correctly. If the sequence is messed up, gamers will still have to deal with all four:
- Upon a throne sits the Wolf King.
- A mounted knight
- A castle amidst a mountain of fire
- King Wolf and Arthur
Here are the places where you may find all four paintings:
- Across from Speed Cola on the second floor of Mission Control.
- On the second floor of the Clock Tower, next to the radio desk, beside the spiral staircase.
- In the castle, halfway between Samantha's chamber and the armory, following the Dragon Statue Head.
- From the Trophy Room, descend the steps leading to the Upper Courtyard.
After completing the correct sequence of interactions with all of the paintings, a wolf howl will sound, and a broken arrow may be located down the stairs to the left of the Undercroft. Get the Wrath of the Ancients Bow, teleport to the Rocket Launch location, and then go outside to the right of the launch pad. Shoot the red flag that's above the exit door once you have the arrow in your hand.
Players must retrieve a wolf skull that appears after shooting the red flag. Then, they must go back to the side of the box in the Undercroft, near the Pyramid, and look for the one with two wolf heads carved into it. To call upon a ghostly wolf, make contact with the skeleton on the right side of this container.
At this point in the game, you must pursue the spectral wolf until it stops moving and starts digging. After it finishes excavating, you can fill the dirt with the souls of 10 zombies in this region. When that happens, the dog will keep digging in the same area, and players can remove the blue light by interacting with it. Just follow the wolf to its three designated positions in the Courtyard, beside Double Tap, and the Undercroft; you must complete this a total of three times. When things become crazy, you can reset the wolf's last dig spot by interacting with the box again.
Upon completion of all holes, the wolf will proceed to paw at a wall within the Undercroft. Now that players have engaged anti-gravity by stepping on the four square panels on the floor on either side of the Pyramid, they must wait for the effect to take effect. Jump to the spot where the wolf is pawing while using anti-gravity. Then, in the open crypt, shoot at the symbols of wolf heads to create a platform. Once the platform has spawned, step on it while holding the interact button inside the tomb. This will bring an arrow, which you can then collect. Put it back in the box by the Pyramid with the wolf heads.
You can transfer zombie souls into this box by killing about 20 of them. Once you've transferred enough souls, you can interact with it while wearing the Wrath of the Ancients bow to summon the wolf bow upgrade.
Der Eisendrache: The Best Way to Acquire the Void Bow
Creegakaleet lu Gosata'ahm
Using the Void Bow's 75 arrows in a non-charged shot triggers a tiny explosion, releasing a skull that can bite and devour two or three zombies. It's an intriguing weapon. How to achieve the charged shot, which uses two arrows and opens a doorway where a swarm of skulls devour zombies—much better!
After obtaining Wrath of the Ancients, players must proceed to the Gate Trap located in the Double Tap perk machine area. When you face the Gate Trap, look up straight ahead to see purple painted marks that you can shoot with your bow. The player can retrieve the shattered arrow after it has been shot.
Navigate the Courtyard to reach the Trophy Room, which is located beside the Clocktower. Once inside, head to the center of the room and look for a glowing purple tile.
In order to access the urn, players must first kill a zombie in a melee attack while standing immediately above it. You should aim for the early rounds or use a Bowie knife for the melee kill.
Now that the player has the urn in their inventory, they need to interact with the world and gather six Keeper skulls—these skulls will always be in the same spot:
- Located on the church's windowsill, outside the stairs leading to Mission Control.
- Midway between the Mule Kick chamber and the spawn room, you'll see a skull in the shattered wall.
- You may find the Double Tap perk machine by glancing to the right, where there is a shattered wall.
- On the left side of Samantha's toy chest in her room you can see a skull.
- Once inside the teleporter room, face the device and look to your right for a skull resting on a sink.
- To find the back of the truck in the launch room on the left, head to the Rocket Launch Pad area.
Bring six crawler zombies back to the Trophy Room and place them in the center of the glowing circle. Explosives like grenades make short work of this task. After feeding six souls to the urn, a demonic voice will utter three out of six words:
Crown
- Front door
- Griffin
- Heart
- Horn
- Stag
Remembering the exact sequence of the three words is essential, but if you happen to forget one, don't worry—just fire the floating urn with your Wrath of the Ancients bow. The demonic voice will repeat the words for you.
There are six statues of knights in the area that connects Samantha's area to the Power Switch Room, which players must now enter. Plaques bearing symbols representing the things the demonic voice said are presented to each of them. An occasional purple glyph will appear whenever the player interacts with one of these statues, and they must do so in the sequence of the uttered lines. Players will need to keep in mind the sequence of these particular symbols for a subsequent step.
Zombies now pose a threat to players, as they have the ability to drop glyphs that may be used as power-ups. Collect it by running into it as soon as it spawns. Collecting more glyphs has no bearing on the mission; players are only need to have the three glyphs that match their spoken phrases. Return to the Trophy Room after you have obtained all three symbols. The illuminated glyphs that players have collected can be seen within the summoning circle. For the Wrath of the Ancients Bow to release purple flames from its center and reveal the fixed arrow to be picked up, players must shoot the three right glyphs in the specified order.
Players should just exit the room and return when the skulls on the summoning circle have calmed down if they make a mistake in the glyph order; otherwise, they will whirl around and attempt to devour the player.
Get back down to the Undercroft and open the box at the pyramid—the one with the purple skull etchings—that corresponds to the arrow. Get the Void Bow by interacting with the box once you've killed 20 zombies in the area.
So we come to the end of this explanatory guide, now you know How to Get & Upgrades All Bow in Black Ops 3 Zombies, just do it and enjoy it to the fullest.
Mode:
Other Articles Related
How to Get Kills Shortly After Sprinting in Black Ops 6Discover How to Get Kills Shortly After Sprinting in Black Ops 6 with this excellent and detailed explanatory guide.
How to Get & Upgrades All Bow in Black Ops 3 Zombies
This time we return with a guide with the objective of explaining to you How to Get & Upgrades All Bow in Black Ops 3 Zombies.
How to play Call of Duty: Black Ops 2 with Plutonium on PC
Get ready to enjoy the best first-person shooter game, How to play Call of Duty: Black Ops 2 with Plutonium on PC.
Call of Duty Black Ops Cold War - Warzone: How to unlock Vargo 52 Assault Rifle
We invite you to discover How to unlock Vargo 52 assault rifle, a new task in Call of Duty Black Ops Cold War - Warzone.
Call of Duty Black Ops Cold War: How to get all free weapon Blueprints in for Season 4
With our Call of Duty Black Ops Cold War guide, you will learn more about How to get all free weapon blueprints in for season 4.
Call of Duty Black Ops 4: How to get for free with PlayStation Plus
Call of Duty Black Ops 4 has been an interesting game, and that is why today we explain how to get it for free with PlayStation Plus.
Operation Grand Heist, the newest of Call of Duty: Black Ops 4
Treyarch reveals the new features of the new season of Black Ops 4.
Treyarch announces a bonus for CoD followers Black Ops 4
Treyarch presents a universe of zombies that will appear in the Call of Duty saga. This game has presented a bonus event for zombie players and the good that announced the different features that will soon reach the game.
How to Control the Camera in Tiny Glade
Discover How to Control the Camera in Tiny Glade with this excellent and detailed explanatory guide.
How to get XP in Visions of Mana
We invite you to discover How to get XP in Visions of Mana with this excellent and explanatory detailed guide.
How to Rush Projects in Ara History Untold
With our help you will see that knowing How to Rush Projects in Ara History Untold is easier than you think.
A Treat for My Person Walkthrough in Zelda Echoes of Wisdom
We welcome you to our guide on A Treat for My Person Walkthrough in Zelda Echoes of Wisdom in a specific and detailed way.
How To Create or Join a Guild in Throne and Liberty
Today we bring you an explanatory guide on How To Create or Join a Guild in Throne and Liberty with precise details.