
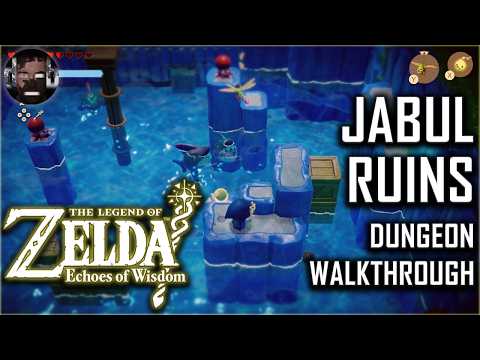
How to Complete Jabul Ruins Dungeon in Zelda Echoes of Wisdom
With our help you will see that knowing How to Complete Jabul Ruins Dungeon in Zelda Echoes of Wisdom is easier than you think.
In Zelda: Echoes of Wisdom, you are presented with options to head into the desert or out to sea. Jabul Ruins is the second if you went into the desert and third if you venture out to sea. This one's about the latter, so here is the full walkthrough of the Jabul Ruins in Zelda: Echoes of Wisdom.
 Donate: buy me a coffee
Donate: buy me a coffee
We invite you to discover How to Get the Bow in Zelda Echoes of Wisdom with our guide today.
All Stamp Locations in Zelda Echoes of Wisdom
Our guide today aims to tell you about All Stamp Locations in Zelda Echoes of Wisdom.
How To Get All Amiibo Reward in Zelda Echoes Of Wisdom
We welcome you to our guide on How To Get All Amiibo Reward in Zelda Echoes Of Wisdom in a specific and detailed way.
How to complete the Beetle Ballyhoo quest in Zelda Echoes of Wisdom
This time we return with a guide with the objective of explaining to you How to complete the Beetle Ballyhoo quest in Zelda Echoes of Wisdom.
How to get Monster Guts in Zelda Echoes of Wisdom
Discover How to get Monster Guts in Zelda Echoes of Wisdom with this excellent and detailed explanatory guide.
How to Find Monster Stones in Zelda Echoes of Wisdom
We invite you to discover How to Find Monster Stones in Zelda Echoes of Wisdom, a new task in this incredible adventure.
How to Break Spider Webs in Faron Wetlands in Zelda Echoes of Wisdom
Our guide today aims to explain to you How to Break Spider Webs in Faron Wetlands in Zelda Echoes of Wisdom.
All Side Quests in Zelda Echoes of Wisdom
We invite you to discover All Side Quests in Zelda Echoes of Wisdom with this excellent and explanatory guide.
How to Find Eternal Forest Routes - Pedestals in Zelda Echoes of Wisdom
Today we bring you an explanatory guide on How to Find Eternal Forest Routes - Pedestals in Zelda Echoes of Wisdom with precise details.
How to Defeat the Mogryph in Zelda Echoes of Wisdom
Discover How to Defeat the Mogryph in Zelda Echoes of Wisdom with this excellent and detailed explanatory guide.
How to kill monsters without a sword in Zelda Echoes of Wisdom
We welcome you to our guide on How to kill monsters without a sword in Zelda Echoes of Wisdom in a specific and detailed way.
Where to find Tri’s friends in Zelda Echoes of Wisdom
Today we bring you an explanatory guide on Where to find Tri’s friends in Zelda Echoes of Wisdom with precise details.
How to fix Metaphor ReFantazio FPS drop issues
Discover How to fix Metaphor ReFantazio FPS drop issues with this excellent and detailed explanatory guide.
How to Get Monorail Weapon in Remnant 2 The Dark Horizon
This time we return with a guide with the objective of explaining to you How to Get Monorail Weapon in Remnant 2 The Dark Horizon.
How to Get Insight Trait in Remnant 2 The Dark Horizon
We invite you to discover How to Get Insight Trait in Remnant 2 The Dark Horizon, a new task in this incredible game.
In Zelda: Echoes of Wisdom, you are presented with options to head into the desert or out to sea. Jabul Ruins is the second if you went into the desert and third if you venture out to sea. This one's about the latter, so here is the full walkthrough of the Jabul Ruins in Zelda: Echoes of Wisdom.
How to Complete Jabul Ruins Dungeon in Zelda Echoes of Wisdom
You'll still be in the Still World once you enter the rift in the Jabul Ruins; you'll have to platform your way through the water blocks from there. The Platboom Echo and Crawltila work very nicely for this part in terms of mobility. If you wish to make water bridges, you will have to learn how to use the Water Block Echo. Press onward upwards for the more scarce pathways to find a fairy, ten Riverhorses, and fifty Rupees.
When you reach the checkpoint of the dungeon, you'll see a cutscene of yourself falling through the floor. In this 2D water level, take out huge boulders by binding and hit air bubbles to keep oxygen supplies high. As you swim by, a very large monster will stir up an enormous cyclone underwater; you'll need to hurry through it. It's short, but you still have to be patient dodging enemies and holding things in place.
You will need to progress through the following area to reach the other side of the chasm at the entrance. Five colored buttons are hidden and must be located to be pressed, which will raise the water level to allow you to reach the boss chamber. From the checkpoint head forward into the central area. You are already in the room with the purple button.
Go down the left ladder to the next 2D water level; use the Tangler Lv. 2 Echo to light your way. You can see a chest in the distance that contains 100 Rupees. Next, go into a room with four torches, but one is underwater. Use binds on the underwater one to pull it out of the water and hit the blue button to go to the next chamber. Use Brazier or Ignizol Echoes on all four.
Jumping into the hole will get you back to the purple area. Scale the right ladder from there for some more water platforming up until you reach a chest, which holds the Dungeon Map. In said room, without getting hit by bombfish, reach the ladder. In the ensuing room, dive under the barrier to beat the flying foes, octopuses, and Chompfins. After binding the box behind the north wall, a 50 Rupees treasure can be found there. Now climb to the tightrope and balance across the water to the west door.
You need to take out the sand crabs in the next room to proceed into said chamber with the red button. Head back into the main area by going down the hole, then go upstairs to that second floor with two ways using the water geyser.
If you go left, you will eventually reach a waterfall. The waterfall is actually caused by a river. Go downstream and jump across the planks. Left platform, jump again, this time going upstream. Flying Tile Echo can also be used after you complete the Gerudo Sanctum dungeon.
The door can only be unlocked by destroying all five towers in the next room. Currents are strong, but Zelda can leap over the river at these places: Using some platforms, Water Block Echo bridges can be built, though the blocks cannot be on water.
To reach a few of the switch towers, you'll have to stack Water Blocks on top of each other to achieve the proper height. Attacking the switch from afar with a Flying Tile or a Tornando Echo works just fine. To hit the switch that's underwater, one is forced to dive into the water, take on Swordfighter Form, and strike it with a sword. Just watch out for spikey enemies when diving head-first.
Next, turn to the yellow button by defeating all of the room's adversaries. Jump down the hole and proceed up the right side of the main area to another 2D water level. You may need Bombfish Echoes to break through blocks. Each of the treasure chests at the very bottom of the room contains the Big Key and one golden egg.
You'll find several ocean creatures in the next room; to get to that location, take the path in the right direction. On your aquatic enemies, use Bombfish Echo and step into the other room to step on the green button. Place a Boulder Echo on the last underwater button so you won't step on it; swim into the hole and bombfish the plank. In order to return to the main area, bind the huge rock to remove it from blocking your path.
Raise the geyser to top height and use the Big Key on the boss door. Engage in combat with Vocavor-a big, swimming fish that spends most of its battle submerged. For defeating Vocavor, players can gain a full Heart Container to use as health.
This is all there is to consider regarding How to Complete Jabul Ruins Dungeon in Zelda Echoes of Wisdom, we will only have to apply it to get the most out of this busy game.
Mode:
Other Articles Related
How to Get the Bow in Zelda Echoes of WisdomWe invite you to discover How to Get the Bow in Zelda Echoes of Wisdom with our guide today.
All Stamp Locations in Zelda Echoes of Wisdom
Our guide today aims to tell you about All Stamp Locations in Zelda Echoes of Wisdom.
How To Get All Amiibo Reward in Zelda Echoes Of Wisdom
We welcome you to our guide on How To Get All Amiibo Reward in Zelda Echoes Of Wisdom in a specific and detailed way.
How to complete the Beetle Ballyhoo quest in Zelda Echoes of Wisdom
This time we return with a guide with the objective of explaining to you How to complete the Beetle Ballyhoo quest in Zelda Echoes of Wisdom.
How to get Monster Guts in Zelda Echoes of Wisdom
Discover How to get Monster Guts in Zelda Echoes of Wisdom with this excellent and detailed explanatory guide.
How to Find Monster Stones in Zelda Echoes of Wisdom
We invite you to discover How to Find Monster Stones in Zelda Echoes of Wisdom, a new task in this incredible adventure.
How to Break Spider Webs in Faron Wetlands in Zelda Echoes of Wisdom
Our guide today aims to explain to you How to Break Spider Webs in Faron Wetlands in Zelda Echoes of Wisdom.
All Side Quests in Zelda Echoes of Wisdom
We invite you to discover All Side Quests in Zelda Echoes of Wisdom with this excellent and explanatory guide.
How to Find Eternal Forest Routes - Pedestals in Zelda Echoes of Wisdom
Today we bring you an explanatory guide on How to Find Eternal Forest Routes - Pedestals in Zelda Echoes of Wisdom with precise details.
How to Defeat the Mogryph in Zelda Echoes of Wisdom
Discover How to Defeat the Mogryph in Zelda Echoes of Wisdom with this excellent and detailed explanatory guide.
How to kill monsters without a sword in Zelda Echoes of Wisdom
We welcome you to our guide on How to kill monsters without a sword in Zelda Echoes of Wisdom in a specific and detailed way.
Where to find Tri’s friends in Zelda Echoes of Wisdom
Today we bring you an explanatory guide on Where to find Tri’s friends in Zelda Echoes of Wisdom with precise details.
How to fix Metaphor ReFantazio FPS drop issues
Discover How to fix Metaphor ReFantazio FPS drop issues with this excellent and detailed explanatory guide.
How to Get Monorail Weapon in Remnant 2 The Dark Horizon
This time we return with a guide with the objective of explaining to you How to Get Monorail Weapon in Remnant 2 The Dark Horizon.
How to Get Insight Trait in Remnant 2 The Dark Horizon
We invite you to discover How to Get Insight Trait in Remnant 2 The Dark Horizon, a new task in this incredible game.