
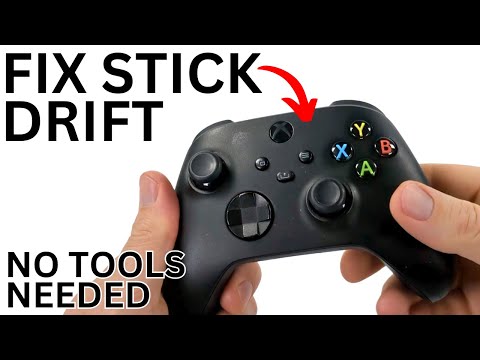
How to Fix Xbox Controller Drift
What Causes Xbox Controller Drift?
Before we dive into the fixes, it helps to understand the why. Knowing the enemy makes it easier to defeat. At the heart of every analog stick is a component called a potentiometer. Think of it as a tiny, circular track that measures the stick's position. A small wiper inside this component glides along the track, sending variable resistance readings to the controller's brain.Stick drift occurs when those readings get messed up. Here are the primary culprits:Quick Fix for the Impatient Gamer
Short on time? Try this 90-second first response before anything else:Detailed Step-by-Step Solutions to Fix Stick Drift
Gather a small Phillips-head screwdriver, a prying tool (a plastic spudger or old guitar pick), and some isopropyl alcohol (90%+ is best). Patience is your greatest tool here.Method 1: The Deep Clean (Software & Physical)
Ideal for drift caused by dust or minor grime.- Dampen a cotton swab with a small amount of isopropyl alcohol. Do not pour it directly into the controller.
- Remove the thumbstick cap. Gently lift the rubber skirt around the stick’s base.
- While rotating the stick, carefully wipe the exposed plastic rim and gently allow a tiny amount of alcohol to seep down the sides. The alcohol will dissolve grime without causing damage as it evaporates quickly.
- Rotate the stick vigorously for 30 seconds in all directions to work the cleaning agent in.
- Let it dry completely for 5-10 minutes before testing.

Method 2: The Potentiometer Adjustment (For the Careful Tinkerer)
This targets the worn electrical contacts directly and is often the most effective physical fix.
Warning: This requires opening the controller. Proceed with caution.
- Disassemble the Controller: Remove the battery cover and battery. Unscrew all visible screws(including those under the label in the battery compartment). Use yourplastic tool to carefully unclip the housing starting from the triggers. Work slowly to avoid breaking plastic clips.
- Locate the Offending Potentiometer: Once open, you’ll see the main circuit board. The analog stick modulesare the square plastic housings the sticks are attached to.
- Access the Potentiometer: You don’t need to desolder anything. On the side of the analog module,you’ll see a small opening that leads to the potentiometer’s circulartrack.
- The "Cardstock & Alcohol" Fix: Cut a tiny, narrow strip of index card or business card. Dampen the very tip with isopropyl alcohol.
- Gently insert the dampened paper tip into the potentiometer’s opening.
- Gently rotate the stick to move the internal wiper, allowing the card to lightly scrub the circular track inside.
- Remove the card. Use a dry part of the strip to wipe any dislodged debris.
- Repeat 2-3 times.
- Reassemble and Test: Carefully put the controller back together in reverse order. Beforefully screwing it shut, connect it via USB to test for drift in thedevice settings.
Method 3: Replacement (The Permanent Hardware Fix)
If cleaning and adjusting fail, the potentiometer or entire analog module is likely worn out.
9. Source Parts: Search online for "Xbox Series X/S controller analog stick replacement" or "Xbox One potentiometer." Kits are cheap and often come with thenecessary tools.
10. Soldering Required: This step requires basic soldering skills to remove the old analogmodule and solder in the new one. If you’re not comfortable soldering,this is the point to either seek a skilled friend or consider thealternative solutions below.
Alternative Solutions
- Controller Calibration Apps (For PC): Tools like Gamepad Tester or Steam’s Big Picture controller calibration can sometimes apply software dead zones to override minor drift.
- Increase Deadzone In-Game: Many games, especially competitive shooters like Apex Legends or Rainbow Six Siege, have a "deadzone" setting in their controller options. Increasing thisslightly tells the game to ignore small, unintentional stick inputs.
- Professional Repair: Local phone or console repair shops often fix controller drift at a cost much lower than a new controller.
- Microsoft Warranty/Service: If your controller is still under warranty (usually one year), contact Microsoft Support for a free repair or replacement.
How to Prevent Stick Drift from Happening Again
An ounce of prevention is worth a pound of repair.
- Clean Hands, Clean Controller: Wash your hands before playing. It reduces oil and grime transfer.
- Dust-Free Zone: Store your controller in a drawer or case when not in use.
- Gentle Handling: Avoid excessive force on the sticks. The "click" (L3/R3) is often the first thing to wear out.
- Regular Blow-Outs: Use compressed air around the sticks every few weeks as routine maintenance.
Frequently Asked Questions
Q: Can I fix stick drift without opening my controller?
A: Yes! The compressed air and isopropyl alcohol cleaning methods (Method1) are non-invasive and solve a significant percentage of drift casescaused by debris.
Q: Does blowing into the controller actually work?
A: It’s a classic fix, but we don’t recommend it. The moisture from yourbreath can cause corrosion over time, making the problem worse. Usecompressed air instead.
Q: How much does it cost to fix vs. replace?
A: A DIY repair costs $5-$20 for tools/parts. Professional repair is$30-$50. A new official controller is $60+. Fixing is almost always more economical.
Q: Is stick drift covered under warranty?
A: Yes, if the controller is within its one-year manufacturer warranty. Contact Xbox Support.
Q: Do all controllers get drift eventually?
A: Due to the nature of moving parts and wear, most potentiometer-basedsticks are susceptible over enough time and use. Higher-qualitycomponents may last longer.
Take Back Control – You’ve Got This!
Stick drift might feel like a death sentence for your favorite controller,but as you’ve seen, it’s often a repairable issue. From a simple blastof air to a satisfying hands-on solder repair, you have the power to fix it. You don’t have to accept defeat or unnecessarily spend money.
Did this guide help you conquer the drift? We’d love to hear your battle story! Share your success (or questions)in the comments below. And if you’re fighting other gaming hardwaregremlins, explore our other guides on fixing connectivity issues, improving your headset mic quality, andbuilding the ultimate ergonomic gaming setup. Game on, and enjoy thatsweet, sweet, precise control once again
Other Articles Related
How to Fix Xbox Controller DriftLearn step-by-step solutions to fix Xbox controller drift. Discover DIYrepairs using isopropyl alcohol, replacement parts, and calibration tips to restore precise control without buying a new controller.
How to use Xbox Cloud Gaming on PC, mobile, or TV
Experience gaming like never before with Xbox Cloud Gaming. Play your favorite titles anytime, anywhere
How to open ports for Xbox Live and improve NAT
open ports for Xbox to enhance your gaming experience.Optimize your connection and enjoy seamless online play
How to Use an External SSD on Xbox Series X/S Correctly
Discover how to enhance your Xbox gaming experience by using an external SSD. Boost storage, speed, and performance
How to easily free up space on Xbox Series X/S
methods to free up space on your Xbox Series. Optimize your storage and enhance your gaming experience with our tips.
How to fix XBox Error Code 8015190A
How to fix XBox Error Code 8015190A! Our guide walks you through simple, effective steps to resolve.
How to Fix Xbox Series X Not Loading
Learn how to fix Xbox Series X not loading with our easy-to-follow guide. Get back to gaming in no time!
Xbox Series X / S: How To Turn Off
This time we are back with a guide from Xbox Series X / S, aiming to show you how to turn off fast resume.
Xbox Series X / S: How to Fix Sign In Error Code 0x87dd0006
With our help, you will see that knowing how to correct the login error code 0x87dd0006 is easier than Xbox Series X / S thought.
Xbox Party: How To Fix Error Code 0x80190193
Today we make for you a Xbox Party guide where we explain how to fix error code 0x80190193.
How to Fix PC Restarts While Gaming
Expert tips to diagnose and fix sudden PC restarts during gaming. Learntroubleshooting steps for overheating, PSU issues, driver problems, andhardware stability.
How to Fix CPU Overheating While Gaming
Learn how to fix CPU overheating while gaming with effective coolingsolutions, proper maintenance, and system optimization tips to preventdamage and boost performance.
How to Fix Warzone Dev Error
Learn how to fix Warzone Dev Error codes quickly with effectivetroubleshooting steps for PC & console. Get back to the game fast.
How to find Krampus in Phasmophobia
Searching for Krampus in Phasmophobia? Here's how to trigger the festive yetfearsome Krampus event, find his hidden sack, and survive his punishingwrath during the Christmas season.
How to Get the Shaker in ARC Raiders
Learn step-by-step how to get the Shaker in ARC Raiders, including missiontriggers and key strategies to unlock this powerful energy weapon.