
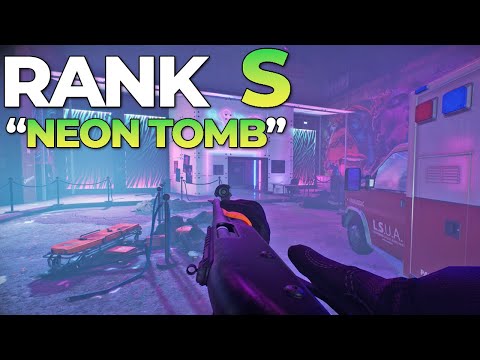
All Objective Locations in Neon Tomb in Ready or Not
"Neon Tomb" is the fourteenth mission in Ready or Not, and it stands out as one of the game's most intense and challenging scenarios. Players are tasked with clearing the Neon Nightclub, which has been taken over by a lethal terrorist cell known as "The Hand." This mission is a gauntlet of close-quarters combat, heavily armed enemies, lethal traps, and vulnerable civilians. Achieving a coveted S-Rank requires not only precision and tactical skill but also a deep understanding of the map and its unique threats.This guide will provide a comprehensive breakdown of the objectives, an optimal loadout, and the most effective strategies for a non-lethal S-Rank run.Left Flank: Start by taking the left path through the cloakroom. This allows you to bypass the chaotic main dance floor and begin clearing the mission from a safer, more controlled position. Clear Upstairs: Your priority should be to clear the entire upstairs area first.Systematically go room by room, being careful to avoid the railings that offer a clear line of sight to the central dance floor below. Disable the Music: As you clear the second floor, make your way to the DJ booth located opposite the entrance to the bathhouse. Disabling the loudmusic here is a small but critical step that will allow you and yoursquad to hear enemy and civilian shouts more clearly. The Bathhouse: After clearing the upstairs, loop around to the bathhouse on the firstfloor. This area is full of twists, turns, and glass walls, so proceedwith caution. The Main Dance Floor: Once the upper floor and bathhouse are secure, the only area left to clear is thecentral dance floor. This is the most exposed part of the map, but bythis point, most of the suspects should be gone, making the final pushmuch safer.
Master the Three Letter Triad mission in Ready or Not with our comprehensive guide. Tips and strategies for success
How To Bring Order to Chaos in Ready or Not
Discover effective strategies in Ready or Not: How To Bring Order to Chaos to transform disorder into harmony.
How To Get the Coffee Machine Trophy in Ready or Not
Unlock the Coffee Machine Trophy in Ready or Not with our guide! Discover tips and strategies to achieve this challenge
How To Rescue Hostages in Neon Tomb Quest in Ready or Not
Learn the best strategies to successfully rescue hostages in the 'NeonTomb' quest in Ready or Not. Expert tips for stealth, combat, andteamwork to complete the mission safely.
How to Get the Toxic Fumes Achievement in Ready or Not
Learn how to unlock the Toxic Fumes achievement in Ready or Not withthis step-by-step guide. Discover the best strategies and tips tocomplete the challenge efficiently!
All Objectives in Ends of the Earth in Ready or Not
Discover all objectives in the 'Ends of the Earth' mission in Ready or Not. Complete your mission with our detailed walkthrough and tactical tips for success.
All Objective Locations in Neon Tomb in Ready or Not
Discover all objective locations in Neon Tomb for Ready or Not. Master the game with our comprehensive guide
All Game Modes in Ready or Not
Explore all game modes in Ready or Not and discover thrilling gameplay experiences. Dive into tactical action
How to Defuse All Bombs From Elephant Quest in Ready or Not
Join the thrilling adventure of Ready or Not: Defuse All Bombs From Elephant Quest and test your skills
How to Get the Deadmau5 Skin in Fortnite
Unlock the Deadmau5 skin in Fortnite with our step-by-step guide! Discover tips, tricks, and exclusive insights
All Objective Locations in Buy Cheap, Buy Twice in Ready or Not
Discover essential objective locations in Ready or Not: Buy Cheap, Buy Twice. Enhance your gameplay
How to Get All Villager Jobs in Minecraft
how to unlock villagers job in Minecraft with our comprehensive guide. Master trading and enhance your gameplay
How to Survive Toxic Areas in Grounded 2
Master survival in Grounded 2's toxic areas with our essential tips and strategies. Navigate hazards and thrive
How to Get Festival Flight god rolls in Destiny 2
Learn how to get Festival Flight god rolls in Destiny 2, including thebest perks and farming tips. Maximize your Rocket Launcher's potentialthis event!
Ready or Not: All Objective Locations in Neon Tomb
Mission Objectives and S-Rank Requirements
Unlike some other missions, "Neon Tomb" has no soft objectives, meaning your focus should be entirely on completing the three main goals flawlessly.- Bring Order to Chaos: Secure all 15+ suspects. For an S-Rank, this means arresting them non-lethally. Killing suspects will result in a point penalty.
- Rescue All of the Civilians: Secure all 9+ civilians. This is the most delicate objective, as any civilian casualties will instantly fail the mission.
- Arrest Qadamah: Apprehend and secure Qadamah, the leader of "The Hand." He must be arrested alive to complete this objective and secure the S-Rank.
The Optimal Loadout for 'Neon Tomb'
The confined, chaotic environment of "Neon Tomb" demands a specialized loadout that prioritizes control over pure firepower.
- Primary Weapon: The M32A1 Flash Grenade Launcher is arguably the safest and most effective weapon for this mission. Itsflash rounds will stun enemies and force them to drop their weapons,minimizing the risk of them detonating a suicide vest or accidentallyhitting a civilian. Since the mission is so dense, a single flash roundcan neutralize multiple threats.
- Armor: Opt for Light Armor with Ceramic Plates covering only the front. This will give you a balance of protection and speed, which is crucial for maneuvering through the tight corners ofthe nightclub.
- Tactical Gear:
- Sidearm: The TRPL Pistol is a solid choice for a backup weapon.
- Grenades: Carry a full complement of Flashbangs. These are essential for clearing tight rooms and stunning targets at a moment's notice.
- Shield: A Tactical Shield is highly recommended for protecting your back as you navigate through the nightclub's linear corridors.
- Headgear: Anti-Flash Goggles are a must-have to prevent your own Flash Grenades from stunning you and your team.
- AI Team Loadout: If playing solo, equip your AI teammates with VPL-25 rifles, which are effective non-lethal weapons. Assign them the Kicker, Negotiator, Pacifier, and Nutritionist traits to make them more effective at securing suspects and keeping the team healthy. Ensure they also have Anti-Flash Goggles to avoid being stunned by your M32A1 Flash Grenade Launcher.
Tactical Route and Strategy
The key to "Neon Tomb" is to avoid the central dance floor until you've cleared the more manageable, enclosed areas.
Key Targets and Threats
- Qadamah: The leader of "The Hand" must be arrested alive. He is easilyidentifiable by his lack of a mask, a black leather jacket, and a headscarf. While his spawn location can vary, he is most often found in thebathhouse at the back of the first floor.
- Suicide Bombers: The most dangerous threat in "Neon Tomb" are suspects wearing suicidevests. These enemies will charge you and detonate their vests, resulting in an instant mission failure. The best way to deal with them is to use the M32A1 Flash Grenade Launcher to stun them from a safe distance,then shout for them to surrender. The stun effect will give you acritical window to get them to comply without them being able todetonate their vest.
- Civilian Hostages: A fewcivilians in this mission will have bombs strapped to them, which cannot be defused. It is crucial to be careful when securing theseindividuals. Do not shoot them in the torso, as this could detonate thebomb and kill them, failing the mission. Use your M32A1 Flash GrenadeLauncher and non-lethal methods to stun any armed suspects near them and secure the civilian safely.
Platform(s): Microsoft Windows PC
Genre(s): First-person shooter, tactical shooter
Developer(s): Void Interactive
Publisher(s): Void Interactive
Engine: Unreal Engine 4
Mode: Single-player, multiplayer
Age rating (PEGI): 16+
Other Articles Related
How to Complete Three Letter Triad Mission in Ready or NotMaster the Three Letter Triad mission in Ready or Not with our comprehensive guide. Tips and strategies for success
How To Bring Order to Chaos in Ready or Not
Discover effective strategies in Ready or Not: How To Bring Order to Chaos to transform disorder into harmony.
How To Get the Coffee Machine Trophy in Ready or Not
Unlock the Coffee Machine Trophy in Ready or Not with our guide! Discover tips and strategies to achieve this challenge
How To Rescue Hostages in Neon Tomb Quest in Ready or Not
Learn the best strategies to successfully rescue hostages in the 'NeonTomb' quest in Ready or Not. Expert tips for stealth, combat, andteamwork to complete the mission safely.
How to Get the Toxic Fumes Achievement in Ready or Not
Learn how to unlock the Toxic Fumes achievement in Ready or Not withthis step-by-step guide. Discover the best strategies and tips tocomplete the challenge efficiently!
All Objectives in Ends of the Earth in Ready or Not
Discover all objectives in the 'Ends of the Earth' mission in Ready or Not. Complete your mission with our detailed walkthrough and tactical tips for success.
All Objective Locations in Neon Tomb in Ready or Not
Discover all objective locations in Neon Tomb for Ready or Not. Master the game with our comprehensive guide
All Game Modes in Ready or Not
Explore all game modes in Ready or Not and discover thrilling gameplay experiences. Dive into tactical action
How to Defuse All Bombs From Elephant Quest in Ready or Not
Join the thrilling adventure of Ready or Not: Defuse All Bombs From Elephant Quest and test your skills
How to Get the Deadmau5 Skin in Fortnite
Unlock the Deadmau5 skin in Fortnite with our step-by-step guide! Discover tips, tricks, and exclusive insights
All Objective Locations in Buy Cheap, Buy Twice in Ready or Not
Discover essential objective locations in Ready or Not: Buy Cheap, Buy Twice. Enhance your gameplay
How to Get All Villager Jobs in Minecraft
how to unlock villagers job in Minecraft with our comprehensive guide. Master trading and enhance your gameplay
How to Survive Toxic Areas in Grounded 2
Master survival in Grounded 2's toxic areas with our essential tips and strategies. Navigate hazards and thrive
How to Get Festival Flight god rolls in Destiny 2
Learn how to get Festival Flight god rolls in Destiny 2, including thebest perks and farming tips. Maximize your Rocket Launcher's potentialthis event!