
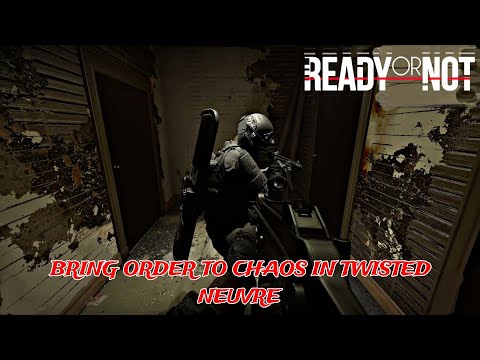
How To Bring Order to Chaos in Ready or Not
The "Buy Cheap Buy Twice" mission in Ready or Not places your SWAT team in a compact, dangerous environment: a car dealership being used as a front for illegal activities. The map's small size and closed-quarters design mean there's little room for error, making a tactical approach and a well-thought-out plan essential for success.This guide provides a complete walkthrough, from the best gear to use to a step-by-step path to complete your objectives and secure an S-rank rating.
Master the Three Letter Triad mission in Ready or Not with our comprehensive guide. Tips and strategies for success
How To Bring Order to Chaos in Ready or Not
Discover effective strategies in Ready or Not: How To Bring Order to Chaos to transform disorder into harmony.
How To Get the Coffee Machine Trophy in Ready or Not
Unlock the Coffee Machine Trophy in Ready or Not with our guide! Discover tips and strategies to achieve this challenge
How To Rescue Hostages in Neon Tomb Quest in Ready or Not
Learn the best strategies to successfully rescue hostages in the 'NeonTomb' quest in Ready or Not. Expert tips for stealth, combat, andteamwork to complete the mission safely.
How to Get the Toxic Fumes Achievement in Ready or Not
Learn how to unlock the Toxic Fumes achievement in Ready or Not withthis step-by-step guide. Discover the best strategies and tips tocomplete the challenge efficiently!
All Objectives in Ends of the Earth in Ready or Not
Discover all objectives in the 'Ends of the Earth' mission in Ready or Not. Complete your mission with our detailed walkthrough and tactical tips for success.
All Objective Locations in Neon Tomb in Ready or Not
Discover all objective locations in Neon Tomb for Ready or Not. Master the game with our comprehensive guide
All Objective Locations in Buy Cheap, Buy Twice in Ready or Not
Discover essential objective locations in Ready or Not: Buy Cheap, Buy Twice. Enhance your gameplay
All Game Modes in Ready or Not
Explore all game modes in Ready or Not and discover thrilling gameplay experiences. Dive into tactical action
How to Defuse All Bombs From Elephant Quest in Ready or Not
Join the thrilling adventure of Ready or Not: Defuse All Bombs From Elephant Quest and test your skills
How To Improve Weapon Durability in Mafia The Old Country
Discover effective strategies to enhance weapon durability in Mafia: The Old Country. Boost your gameplay
How to Get the Fowler-Mutant Injection in Black Ops 6 Zombies Reckoning
Dive into the chaos of Black Ops 6 Zombies: the Fowler-Mutant Injection. Unleash powerful strategies
All 3 Stadium Easter Eggs in Warzone
all 3 Stadium Easter Eggs in Warzone! Uncover hidden secrets and enhance your gameplay with our guide.
Where to find the Scout Cannon in PEAK
Discover where to find the Scout Cannon in PEAK with our quick guide.Unlock this powerful weapon and dominate your battles in the game!
How to Activate Reckoning Pack-a-Punch in Black Ops 6 Zombies
Unleash chaos in Black Ops 6 Zombies with the Reckoning Pack-a-Punch! Upgrade your weapons
"Buy Cheap Buy Twice" Mission Guide in Ready or Not
Mission Objectives
To successfully complete the "Buy Cheap Buy Twice" mission, you must fulfill both the main and optional objectives:- Bring Order to Chaos: Arrest or neutralize all 15 suspects. For a high score or S-rank, you must arrest them without using lethal force.
- Rescue All Civilians: Locate and rescue all 5 civilians at the scene.
- Locate Undercover Officer: Find the restrained and deceased Officer Brian in the meeting room.
- Report Evidence (Optional): To achieve an S-rank, you must also report specific evidence. There are two main soft objectives: a weapons cache in the garage and human trafficking records in the offices. You only need to report one to complete the soft objective requirement.
Recommended Loadout and Strategy
Given the mission's close-quarters combat and the need for a non-lethal approach for an S-rank, your loadout is critical.
- Primary Weapons: Equip non-lethal weapons like the Pepperball Launcher or the Beanbag Shotgun. Both are excellent for incapacitating suspects in tight spaces,allowing you to move in for the arrest. The Pepperball Launcher cancreate a gas cloud to disorient multiple enemies, while the BeanbagShotgun is effective for quickly staggering a single target at shortrange.
- Tactical Gear: The Optiwand is your most important tool. Use it to check corners and peer under closed doors without exposing yourself. Flash Grenades or Stingers are also highly effective for disorienting suspects before a breach.
- Armor & Protection: A light armor vest is sufficient for this map, as movement speed is more important than heavy protection.
"Buy Cheap Buy Twice" Mission Walkthrough
The safest and most effective route starts from the left entrance, near the Caesar’s Cars Dealership sign. This approach allows you to clear theback sections of the building before breaching the main showroom floor.
- Initial Breach: Use the alley near the dealership's side and enter through the left entrance. This leads you into a service bay/garage area.
- Clear the Garage: Systematically clear the garage area first. Use your Optiwand to checkbehind vehicles and in the back corners. Be aware of the weapons cacheon top of a car that you may need to report for a soft objective.
- Secure the Back Rooms: Proceed from the garage through the back door. Carefully clear eachsmall storage room, office, and bathroom on the ground floor. Rememberto announce your presence and check all corners for civilians andsuspects.
- Move Upstairs: Once the ground floor is secure, head to the stairs and make your way to the second-floor offices. Thisarea contains a number of rooms where suspects and the undercoverofficer are likely to be.
- Clear the Offices: Methodically clear the office spaces one by one, using your Optiwand to check doorsbefore breaching. Be prepared for suspects with submachine guns in thisarea.
- Locate Officer Brian: The undercover officer,Brian, is found dead in the main meeting room on the second floor.Report his body once you've found it to complete the objective.
- Final Sweep: After clearing the offices, do a final sweep of the entire map,ensuring all suspects are arrested and all civilians are rescued.Remember to report all evidence and secure any weapons you find.
Tips for Success
- Teamwork is Key: If playing with a team, communicate constantly. Use your team's stackformation to clear rooms efficiently and cover each other's backs.
- Use the Optiwand: Never breach a door or clear a corner without using your Optiwandfirst. The information it provides is invaluable and can preventambushes.
- Surrender & Arrest: Yell for compliancebefore engaging suspects. Most of them are likely to surrender if youcatch them off guard. Once they are on the ground, secure them withhandcuffs. Arresting all suspects is crucial for a perfect score.
- Protect Civilians: Civilians are often scattered throughout the map and may be hiding insmall rooms. Announce your presence and use the "Report Civilian"command to ensure they are safe.
Platform(s): Microsoft Windows PC
Genre(s): First-person shooter, tactical shooter
Developer(s): Void Interactive
Publisher(s): Void Interactive
Engine: Unreal Engine 4
Mode: Single-player, multiplayer
Age rating (PEGI): 16+
Other Articles Related
How to Complete Three Letter Triad Mission in Ready or NotMaster the Three Letter Triad mission in Ready or Not with our comprehensive guide. Tips and strategies for success
How To Bring Order to Chaos in Ready or Not
Discover effective strategies in Ready or Not: How To Bring Order to Chaos to transform disorder into harmony.
How To Get the Coffee Machine Trophy in Ready or Not
Unlock the Coffee Machine Trophy in Ready or Not with our guide! Discover tips and strategies to achieve this challenge
How To Rescue Hostages in Neon Tomb Quest in Ready or Not
Learn the best strategies to successfully rescue hostages in the 'NeonTomb' quest in Ready or Not. Expert tips for stealth, combat, andteamwork to complete the mission safely.
How to Get the Toxic Fumes Achievement in Ready or Not
Learn how to unlock the Toxic Fumes achievement in Ready or Not withthis step-by-step guide. Discover the best strategies and tips tocomplete the challenge efficiently!
All Objectives in Ends of the Earth in Ready or Not
Discover all objectives in the 'Ends of the Earth' mission in Ready or Not. Complete your mission with our detailed walkthrough and tactical tips for success.
All Objective Locations in Neon Tomb in Ready or Not
Discover all objective locations in Neon Tomb for Ready or Not. Master the game with our comprehensive guide
All Objective Locations in Buy Cheap, Buy Twice in Ready or Not
Discover essential objective locations in Ready or Not: Buy Cheap, Buy Twice. Enhance your gameplay
All Game Modes in Ready or Not
Explore all game modes in Ready or Not and discover thrilling gameplay experiences. Dive into tactical action
How to Defuse All Bombs From Elephant Quest in Ready or Not
Join the thrilling adventure of Ready or Not: Defuse All Bombs From Elephant Quest and test your skills
How To Improve Weapon Durability in Mafia The Old Country
Discover effective strategies to enhance weapon durability in Mafia: The Old Country. Boost your gameplay
How to Get the Fowler-Mutant Injection in Black Ops 6 Zombies Reckoning
Dive into the chaos of Black Ops 6 Zombies: the Fowler-Mutant Injection. Unleash powerful strategies
All 3 Stadium Easter Eggs in Warzone
all 3 Stadium Easter Eggs in Warzone! Uncover hidden secrets and enhance your gameplay with our guide.
Where to find the Scout Cannon in PEAK
Discover where to find the Scout Cannon in PEAK with our quick guide.Unlock this powerful weapon and dominate your battles in the game!
How to Activate Reckoning Pack-a-Punch in Black Ops 6 Zombies
Unleash chaos in Black Ops 6 Zombies with the Reckoning Pack-a-Punch! Upgrade your weapons