
All Night Raid Collectibles in Battlefield 6
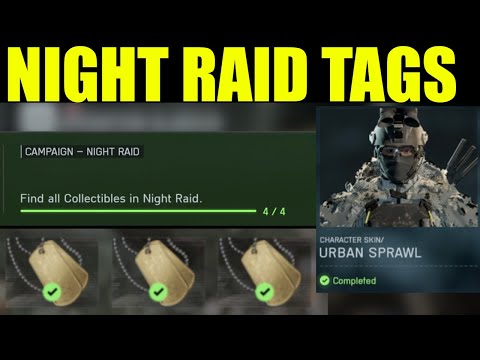
The fourth mission of the Battlefield 6 campaign, ‘Night Raid,’ ups the ante in more ways than one. While previous missions asked players to hunt for three collectible Dog Tags, the tense infiltration of Cairo features a total of four. Finding every one of these covert collectibles is crucial, as success earns you the coveted Urban Sprawl skin for your Recon character class.The mission sees Sergeant Murphy and his squad navigating the volatile streets of Cairo under the cover of darkness, with aid from the Egyptian army. Since the bulk of the mission is played using night vision goggles, locating these small, shining collectibles can be trickier than usual.Here is a detailed, step-by-step guide to help you find all four Dog Tags and unlock your exclusive Recon cosmetic reward.
Unlock all Red Bull Challenges rewards in Battlefield 6. Our guide coversstrategies, tips, and step-by-step instructions to complete everychallenge and earn exclusive in-game content.
How to Change Character Skins in Battlefield 6
Learn how to customize your soldier's appearance in Battlefield 6. Our guidecovers unlocking and equipping new character skins and camouflage tostand out on the battlefield.
How to Fix Battlefield 6 challenges not working
Struggling with Battlefield 6 challenges not tracking or completing? Learn how tofix common issues with our quick troubleshooting guide for resetting,updating, and getting back in the game.
Battlefield 6: Best Loadouts for Gauntlet Mode
the best class loadouts for Gauntlet Mode in BF6. Optimize your gameplay with tips and strategies to dominate the battlefield
How to Level Up Weapons in Battlefield 6
expert tips on leveling up weapons in BF6. Enhance your gameplay and dominate the battlefield with our guide!
How to Fix Battlefield 6 REDSEC error occurred when launching the game
Fix the frustrating REDSEC error in Battlefield 6 with our step-by-stepsolutions. Get back to gaming adventure!
How to Access a Vehicle Trailer in Battlefield RedSec
Discover the thrilling Vehicle Trailer for Battlefield RedSec! Dive into intense gameplay and explore new features.
How to Open Locked Safes in Battlefield RedSec
Unlock the secrets of Battlefield RedSec! Discover expert tips and strategies to open locked safes and enhance your gameplay.
How to Redeploy Teammates in Battlefield RedSec
Optimize your Battlefield RedSec strategy. Learn when and how to effectivelyredeploy teammates for tactical advantages, better positioning, andsecuring key objectives. Master the redeploy feature to control the flow of battle.
How to Complete All Exploration Challenges in Battlefield Redsec
Master all Battlefield Redsec exploration challenges with our expert guide.Find hidden intel, complete all objectives, and unlock every reward with step-by-step strategies.
How To Disable Cameras In Little Nightmares 3
how to disable cameras in Little Nightmares 3 with our step-by-step. Enhance your gameplay and navigate the shadows with ease.
How to Escape the Dentist Office in Institute in Little Nightmares 3
Dive into the eerie world of Little Nightmares 3 as you navigate thechilling Dentist Office in the Institute. Can you escape the horrorsthat await?
How to Use XP Boosters in Battlefield 6
effective strategies for using XP boosters in Battlefield 6 to level upfaster and enhance your gameplay experience. Maximize your potential
How To Get The Batteries In Little Nightmares 3
Struggling to locate batteries in Little Nightmares 3? Our guide provides tips and strategies to help you power up your adventure!
How to Use Range Finder in Battlefield 6
Master the art of precision in Battlefield 6 with our comprehensiveguide on using the range finder effectively. Elevate your gameplay
Battlefield 6: All Night Raid Collectibles
Dog Tag Collectibles: General Information
- Total Tags: 4
- Reward: Urban Sprawl Character Skin (Recon Class)
- Action: Dog Tags are collected by pressing E (PC), X (Xbox), or Square (PlayStation). They emit a slight metallic glint, making them easier to spot, and display a soldier’s name and date of birth upon pickup.
Dog Tag 1: Informant’s Office
The first collectible is a fair way into the mission, after the initial infiltration phase.
- Advance to the Compound: Progress through the sewers and streets until the team cuts the lights off and enters the main compound (the palace/embassy).
- Ascend and Raid: A fire will start inside the building, forcing the team to moveupstairs. You will then approach and breach a closed door to a roomwhere you initially expect to find the informant.
- Find the Desk: Inside this room, there will be a desk with a PC.
- Locate the Tag: The informant isn't there, but the collectible is. To the left of the PC, there is a smaller room with double doors already open (sometimes described as a bathroom).
- The Target: Look straight ahead at the wall within this small room. The Dog Tag is hanging beneath a covered painting or tapestry. Collect it before moving on with your squad.
Dog Tag 2: The Rooftop Football Pitch
This tag is found during the initial escape sequence, shortly after leaving the palace.
- Reach the Open Area: Continue through the streets and alleys after the initial encounter.Your team will eventually emerge into a small, open area, oftendescribed as a makeshift football pitch or soccer court.
- Identify Landmarks: You will notice pyramids in the background, and a squad member will comment on the civilians who quickly scatter.
- Search the Corner: Look towards the right corner of the pitch. Specifically, search to the right of one of the goalposts and slightly to the right of the pyramids in the distance.
- The Tag’s Spot: The Dog Tag is resting on a small stone wall covered in graffiti, near some loose bottles or spray-paint cans.
Dog Tag 3: The Clothing Shop Ambush
This collectible is located shortly after a significant enemy engagement and helicopter fly-by.
- Survive the Ambush: Progress further into the mission, surviving the ambush on the way tothe getaway vehicle. You'll move through narrow streets under multipleattacks from the enemy helicopter.
- Wait for the All-Clear: Keep fighting and moving forward until a squad member announces that the “helo’s bugging out,” signifying a temporary reprieve. The squad will likely regroup inside a small building or covered area.
- Locate the Shop: As you exit and proceed around a few corners, keep a sharp lookout on the left side of the street. You're searching for a small clothes shop.
- The Mannequin: The shop will have several items out front, including flip-flops on sale and a mannequin wearing a white top. The Dog Tag is tucked away just beneath the mannequin display. This is an easy tag to miss if you rush past the storefront.
Dog Tag 4: The Munitions Stash
The final Dog Tag is found right at the mission's climax, before the final confrontation with the helicopter.
- Reach the Shelter: Continue until Lopez is wounded and the team takes shelter from the attacking helicopter.
- Clear the Infantry: You will first have to defend your position against a wave of infantry soldiers. Clear all hostiles.
- Enter the Explosives Room: Once the area is secure, head through the closed door and down the steps to the room containing the explosives (RPG launcher) necessary to take down the helicopter.
- The Final Tag: Once inside this room, look on the wall behind the blue PC monitors or next to the weapon stash table. You should see a 'No Pax' poster. Dog Tag number 4 is hanging from a knife that has been stabbed into the wall or poster.
With all four Dog Tags collected, you will successfully complete the Night Raid Campaign Challenge and permanently unlock the Urban Sprawl Recon Skin for use in your multiplayer loadout. Enjoy your new look, soldier!
Mode:
Other Articles Related
how to earn all Red Bull Challenges rewards in Battlefield 6Unlock all Red Bull Challenges rewards in Battlefield 6. Our guide coversstrategies, tips, and step-by-step instructions to complete everychallenge and earn exclusive in-game content.
How to Change Character Skins in Battlefield 6
Learn how to customize your soldier's appearance in Battlefield 6. Our guidecovers unlocking and equipping new character skins and camouflage tostand out on the battlefield.
How to Fix Battlefield 6 challenges not working
Struggling with Battlefield 6 challenges not tracking or completing? Learn how tofix common issues with our quick troubleshooting guide for resetting,updating, and getting back in the game.
Battlefield 6: Best Loadouts for Gauntlet Mode
the best class loadouts for Gauntlet Mode in BF6. Optimize your gameplay with tips and strategies to dominate the battlefield
How to Level Up Weapons in Battlefield 6
expert tips on leveling up weapons in BF6. Enhance your gameplay and dominate the battlefield with our guide!
How to Fix Battlefield 6 REDSEC error occurred when launching the game
Fix the frustrating REDSEC error in Battlefield 6 with our step-by-stepsolutions. Get back to gaming adventure!
How to Access a Vehicle Trailer in Battlefield RedSec
Discover the thrilling Vehicle Trailer for Battlefield RedSec! Dive into intense gameplay and explore new features.
How to Open Locked Safes in Battlefield RedSec
Unlock the secrets of Battlefield RedSec! Discover expert tips and strategies to open locked safes and enhance your gameplay.
How to Redeploy Teammates in Battlefield RedSec
Optimize your Battlefield RedSec strategy. Learn when and how to effectivelyredeploy teammates for tactical advantages, better positioning, andsecuring key objectives. Master the redeploy feature to control the flow of battle.
How to Complete All Exploration Challenges in Battlefield Redsec
Master all Battlefield Redsec exploration challenges with our expert guide.Find hidden intel, complete all objectives, and unlock every reward with step-by-step strategies.
How To Disable Cameras In Little Nightmares 3
how to disable cameras in Little Nightmares 3 with our step-by-step. Enhance your gameplay and navigate the shadows with ease.
How to Escape the Dentist Office in Institute in Little Nightmares 3
Dive into the eerie world of Little Nightmares 3 as you navigate thechilling Dentist Office in the Institute. Can you escape the horrorsthat await?
How to Use XP Boosters in Battlefield 6
effective strategies for using XP boosters in Battlefield 6 to level upfaster and enhance your gameplay experience. Maximize your potential
How To Get The Batteries In Little Nightmares 3
Struggling to locate batteries in Little Nightmares 3? Our guide provides tips and strategies to help you power up your adventure!
How to Use Range Finder in Battlefield 6
Master the art of precision in Battlefield 6 with our comprehensiveguide on using the range finder effectively. Elevate your gameplay