
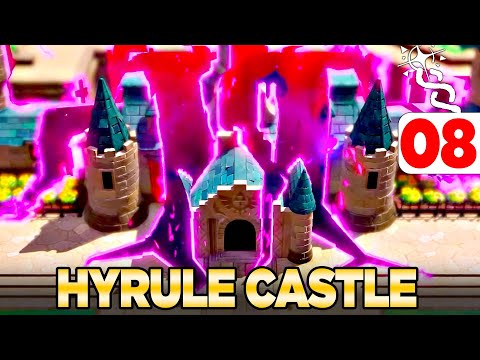
How to Complete Hyrule Castle in Zelda Echoes of Wisdom
With our help you will see that knowing How to Complete Hyrule Castle in Zelda Echoes of Wisdom is easier than you think.
As players go through Zelda Echoes of Wisdom, they will encounter Hyrule Castle, the fourth major dungeon. This famous setting appears in nearly all of The Legend of Zelda games; however, the dungeon in Echoes of Wisdom: Hyrule Castle features more stealth and fighting than the usual Zelda puzzles.
You are free to visit Gerudo Sanctum or the Jabul Ruins in any sequence you like, but when you finish the second dungeon, you will be led to Hyrule Castle. The stealth sections of Hyrule Castle can be challenging without the proper Echoes, but they aren't as bad after you have them.
This guide provides a comprehensive walkthrough of the Hyrule Castle dungeon in Zelda Echoes of Wisdom, including all of the rooms and their bosses, including Ganon, the last boss.
As you enter Hyrule Castle from Still Hyrule Town, go straight ahead until you come to a set of stairs that will take you down.
If you're interested, you can explore the rooms to the right, although they don't hold any significance. The room on the far right of this region is actually Zelda's, divided in half by the Rift.
To reach the first Stealth area of Hyrule Castle, use the stairs. A number of guards are stationed at various points throughout the chamber, with some of them moving around on patrol. Even if you summon Echoes to battle these Rift Guards, they will be annihilated in a second. If a guard catches you, you'll be locked in a sub-zone from which you can't escape unless you kill all the adversaries.
In a guard's life cycle, there are three states: undetected, detected, and hunting.
A single crate positioned front and center can easily obstruct the first guard.
We invite you to discover How to Get the Bow in Zelda Echoes of Wisdom with our guide today.
All Stamp Locations in Zelda Echoes of Wisdom
Our guide today aims to tell you about All Stamp Locations in Zelda Echoes of Wisdom.
How To Get All Amiibo Reward in Zelda Echoes Of Wisdom
We welcome you to our guide on How To Get All Amiibo Reward in Zelda Echoes Of Wisdom in a specific and detailed way.
How to complete the Beetle Ballyhoo quest in Zelda Echoes of Wisdom
This time we return with a guide with the objective of explaining to you How to complete the Beetle Ballyhoo quest in Zelda Echoes of Wisdom.
How to get Monster Guts in Zelda Echoes of Wisdom
Discover How to get Monster Guts in Zelda Echoes of Wisdom with this excellent and detailed explanatory guide.
How to Find Monster Stones in Zelda Echoes of Wisdom
We invite you to discover How to Find Monster Stones in Zelda Echoes of Wisdom, a new task in this incredible adventure.
How to Break Spider Webs in Faron Wetlands in Zelda Echoes of Wisdom
Our guide today aims to explain to you How to Break Spider Webs in Faron Wetlands in Zelda Echoes of Wisdom.
All Side Quests in Zelda Echoes of Wisdom
We invite you to discover All Side Quests in Zelda Echoes of Wisdom with this excellent and explanatory guide.
How to Find Eternal Forest Routes - Pedestals in Zelda Echoes of Wisdom
Today we bring you an explanatory guide on How to Find Eternal Forest Routes - Pedestals in Zelda Echoes of Wisdom with precise details.
How to Defeat the Mogryph in Zelda Echoes of Wisdom
Discover How to Defeat the Mogryph in Zelda Echoes of Wisdom with this excellent and detailed explanatory guide.
How to Get Level Up Quest Pack in Fortnite Chapter 5 Season 4
We welcome you to our guide on How to Get Level Up Quest Pack in Fortnite Chapter 5 Season 4 in a specific and detailed way.
How to Get Redeemer Handgun in Remnant 2
Today we bring you an explanatory guide on How to Get Redeemer Handgun in Remnant 2 with precise details.
How to build Golden Pirate pieces in LEGO Fortnite
Today we bring you an explanatory guide on How to build Golden Pirate pieces in LEGO Fortnite.
How to get Rare Enchanted Ink in Throne and Liberty
Today we bring you an explanatory guide with everything you need to know about How to get Rare Enchanted Ink in Throne and Liberty.
How to find Wildkin in Throne and Liberty
Today we bring you an explanatory guide on How to find Wildkin in Throne and Liberty.
As players go through Zelda Echoes of Wisdom, they will encounter Hyrule Castle, the fourth major dungeon. This famous setting appears in nearly all of The Legend of Zelda games; however, the dungeon in Echoes of Wisdom: Hyrule Castle features more stealth and fighting than the usual Zelda puzzles.
You are free to visit Gerudo Sanctum or the Jabul Ruins in any sequence you like, but when you finish the second dungeon, you will be led to Hyrule Castle. The stealth sections of Hyrule Castle can be challenging without the proper Echoes, but they aren't as bad after you have them.
This guide provides a comprehensive walkthrough of the Hyrule Castle dungeon in Zelda Echoes of Wisdom, including all of the rooms and their bosses, including Ganon, the last boss.
How to Complete Hyrule Castle in Zelda Echoes of Wisdom
As you enter Hyrule Castle from Still Hyrule Town, go straight ahead until you come to a set of stairs that will take you down.
If you're interested, you can explore the rooms to the right, although they don't hold any significance. The room on the far right of this region is actually Zelda's, divided in half by the Rift.
To reach the first Stealth area of Hyrule Castle, use the stairs. A number of guards are stationed at various points throughout the chamber, with some of them moving around on patrol. Even if you summon Echoes to battle these Rift Guards, they will be annihilated in a second. If a guard catches you, you'll be locked in a sub-zone from which you can't escape unless you kill all the adversaries.
In a guard's life cycle, there are three states: undetected, detected, and hunting.
- When a guard looks up and sees nothing, it means they aren't seeing Zelda right now.
- They can tell something is wrong if a question mark is present. To activate this, you need to either walk briefly into their line of sight or have an Echo spawn in their field of view. The possibility of alerting them exists if they are still being activated.
- The Guards will pursue Zelda wherever she is at the moment if lines indicate that they have been notified. In their pursuit of Zelda, the guards will alter their usual routes, demonstrating their surprising speed and jumping abilities.
- To obstruct the view and path of these soldiers, you can use the Bind talent to move things, such as the crates lying about or called Echoes, which can impede visibility.
A single crate positioned front and center can easily obstruct the first guard.
- You can obstruct the second guard's patrols by positioning two crates side by side on the bottom half of the screen.
- Put a crate in front of the guard on the far right of the screen to block their path.
- Slide the boxes into the area with the guard below, block it, or rush around the bottom right corner of the screen to escape the confined space.
- Dash to the second part of this Hyrule Castle stealth section after blocking the guard on top of the screen with one last crate from the bottom of the screen.
- Difficulty increases once you pass the first four guards. Even from a distance, some of the Guards will be able to see Zelda—and they'll be dropping down to pursue her. Another part features two guards moving in a circular formation.
- Grab the boxes on the right side of the upper level, bind them, and bring them to the guard up above. To get through it later, you need aim to obstruct its path on the right and bottom.
- Ascend the right wall using an Echo (or another type of trampoline) and keep an eye out for the guardsman duo patrolling to your right.
- A counter-clockwise direction is followed by the patrolling Guards as they travel. With some careful timing, you can squeeze in between them and run at their speed to the door. However, getting to the room's center and then to the far right can be accomplished with significantly less effort by using two Flying Tile Echoes.
- To access the sidescrolling area, when you leave the Guard patrol room, turn around and go up the stairs on your right. Head down the stairs at the bottom left of the area to reach the next section of the Echoes of Wisdom Hyrule Castle dungeon after defeating the Darknuts and monsters spawned from the Rift Blobs that fly into Zelda.
Lights, Gustmasters, and a map of the Hyrule Castle Dungeon
Once you've climbed the stairs, you'll enter a room populated by adversaries and equipped with four torches.
A typically inaccessible set of bars conceals one of these torches. To achieve Long Distance Echoes, you need to level up Tri sufficiently. When your beam reaches beyond the bar, press down Y. Then, release the button to summon an Ignozol, also known as Fire Slime. Place it next to the Brazier and light it.
To reach the Brazier in the upper right corner of the area, you must first bind to an Ignizol that you summon from the right side of the room, outside the bars.
One last thing to do is ignite the torch at the top of the stairs. Then, on the brazier in the upper left corner of the room, you can long-distance summon one last Ignizol.
Gustmasters, an adversary that opens its mouth and releases a powerful gust of wind every so often, may be found in the region accessible via the upper door. You can only harm these adversaries when they're releasing gusts, but there are a several ways to defeat them. Bombfish can be timed to burst apart enemies, or the Swordfighter Form's Bow of Might can be used from a distance to defeat them. You can also get the Gustmaster Echo by binding to them and dragging them off the edge, but you'll have to reload the room.
Get past the Rift monsters in your path and head into the room on your right, which is roughly three quarters of the way down this corridor. When you blow the sand heaps away, a chest will appear; taking it out will provide you access to the Hyrule Castle Dungeon Map.
Get out of here and head upstairs to the dungeon area outside Hyrule Castle's Throne Room.
A Delicate Key Within the Second Covert Section
Proceed into the chamber on the left after touching the Waypoint. Reach an underwater place where the Zora Scale can be useful by using the stairs on the platform in the middle of the water.
Here, if you throw the Bombfish at the right moment (or use Bind on one about to explode), you can open the wall and retrieve a cool 50 Rupees from the treasure beyond.
Use Swordfighter Form to slice through any webs blocking your path as you swim to the left of this underwater location. To defeat most fish foes, such as Tangler Lvl 2s, use a powerful underwater Echo. By severing the spider webs that link to the center, you can obtain the chest in this location for 20 Rupees. Be sure to illuminate any crystals you come across for better visibility.
Navigate to the second Hyrule Castle stealth location by use the ladder located on the top left side to exit this underwater area. There may be more Guards, but this one seems a bit lenient.
- To evade the watchful eye of the guard positioned at the top of the screen, swiftly make your way to the elevated platform located at the bottom of the screen.
- Construct a staircase to the platform's peak using the Water Block Echo. The Echo can be built higher by repeatedly casting it on itself. While this may draw the attention of the Guards, they will be unable to reach you once you are submerged in the water.
- Upon acing the platform, patiently wait for the guards to lose interest in you (or become distracted) before utilizing the Flying Tile Echo or additional Water Blocks to traverse to a central region surrounded by small walls.
- If you want to hide from the guards, you should go behind the little wall that is at the very top of the room.
- Construct an additional Water Block tower atop the platform located to the upper right of the main area, and subsequently ascend to its peak. A Pressure Plate can be activated by jumping to the platform immediately to the right of the bottom right.
- A chest will appear in the center of the space after you activate the Pressure Plate. You can either land straight on top of the chest using a Flying Tile or retrace your steps to avoid Guards and jump across the wall to reach it.
If you can find a way to get the Small Key, then you can leave the chamber through the right exit. If you manage to evade the guards and get your hands on the Small Key, you'll be able to quickly return to the Waypoint outside the Throne Room.
Back outside the Throne Room, keep going to the right. On the right side of the screen, you'll find an unopenable door; on the bottom of the screen, you'll see a Scorpion enemy in the sand.
Obtain the Big Key from the last section of the Hyrule Castle dungeon by using the Small Key on the locked door beneath the ladder.
Find the Big Key to Hyrule Castle!
After you use the small key on this door, you'll enter another sidescrolling region. First, you'll encounter a harmless Gustmaster; then, in the middle of the region, you'll face a Strandtula problem. Using a Flying Tile to traverse the gap or constructing a bridge will allow you to entirely bypass this puzzle. Make use of the Strandtula's webs to traverse the drops if you so like, and call upon your own Standtulas to traverse regions devoid of webbing, should you so desire.
Exit via the opposite side to go to the last chamber before the Big Key. There are three foes Zelda must defeat: two Darknuts, a Ball-and-Chain Trooper, and herself.
Deal with the low-level Darknuts using Swordfighter Form or your own high-level Echoes. Then, switch to the Ball-and-Chain Trooper. The ball will become stuck when it swings towards Zelda if she is near a wall, and it will take the Trooper a few seconds to free it. Swordfighter Form or your own Echoes can be called at this point to wailing away at it.
Gather the Ball-and-Chain Trooper Echo after you've vanquished these foes, and then enter the treasure room. Here you can discover the Big Key to Hyrule Castle at last, along with two additional fantastic prizes: a golden egg and a frog ring.
With the Frog Ring, Zelda can jump twice as high as usual, bypassing the need for Echoes altogether.
Once you've gathered your loot, head return to the throne room via the left exit from the room where you battled the Darknuts. Use your Big Key to access the Boss Arena, where you'll encounter an old enemy.
Defeating Ganon at Hyrule Castle:
When you reach the inner chamber beyond the Throne Room, you'll find the imposter King, Lefte, and Wright waiting for you. Following a short exchange of words, they band together to call upon a Ganon from the Rift.
Despite its seeming simplicity, this battle is incredibly challenging due to the false Ganon's devastating damage output. The battle unfolds in three distinct stages; the first sees Ganon charging forward, creating numerous openings for attacks. During the second stage, Ganon will begin attacking Zelda with his axe. When Ganon unleashes his legendary Rally attack in Phase 3, Zelda can only inflict harm by slashing at the ball whenever it rebounds between her and the Demon King.
- During the first phase, Ganon will teleport around the area after spinning his axe to block Ranged damage. He reappears, briefly charges, and then thrusts ahead. Just wait a second while he holds this position; that's when you can ask an Echo to come to his aid.
- Spewing the Ball-and-Chain Trooper, which you mastered prior to obtaining the Boss Key, close to Ganon while he is susceptible causes significant damage.
- Continuing from Phase One, Ganon now begins to hurl his axe across the floor, where it will spin in place after destroying anything it hits. It may be helpful to divert attention with your Summons. Once he resurfaces in a different part of the chamber, he will wait a second before restraining his axe. Having an Echo out, though, can have Ganon aim at it instead of you when you use this move.
- As Ganon prepares to retract his axe, unleash a barrage of Swordfighter Form assaults (along with a Ball-and-Chain Trooper) on him. Due to his ability to teleport away after taking damage, progressing to the next phase can require multiple rounds.
- In the third stage, Ganon will target Zelda whereabouts by hurling bolts of fire across the floor. An explosion will be produced when these smash into a wall, releasing a single energy particle. Gather them fast before Ganon unleashes the Rally maneuver.
- Zelda will be targeted by Ganon's charged ball of power. It tracks her every move, making it impossible to evade. To redirect the ball toward Ganon, go to Swordfighter Form and slash at it. His second strike will send it hurtling back at Zelda at a breakneck pace. Repeatedly stun Ganon for a few seconds by timing your slash perfectly to hit it again.
- During the boss fight with Ganon in Zelda Echoes of Wisdom, you won't need to worry too much about running out of Energy. For Zelda to be able to use her Swordfighter Form meter to counter Ganon's ball assault, she must first gather Energy generated by Ganon's fire bolt attack.
When you hit Ganon's ball back to stun him, he'll gain strength and another hit for the following rally (as shown by another angry cutscene). To stun Ganon the first time, you must hit the ball back three times. On the second playthrough, you'll have to Rally four times with Ganon. Hit the ball back five times for the third and last time. With each next strike, the tempo increases.
You can land a flurry of hits on stunned Ganon, particularly if you use Swordfighter Form and summon a Ball-and-Chain Trooper. Rally with Ganon until you vanquish the illusionary demon king, close the Rift, rescue the inhabitants of Hyrule Castle and town, and, of course, obtain a Heart Container.
That's all there is to know about How to Complete Hyrule Castle in Zelda Echoes of Wisdom, you just have to follow the instructions to progress through this stage of the game.
Mode:
Other Articles Related
How to Get the Bow in Zelda Echoes of WisdomWe invite you to discover How to Get the Bow in Zelda Echoes of Wisdom with our guide today.
All Stamp Locations in Zelda Echoes of Wisdom
Our guide today aims to tell you about All Stamp Locations in Zelda Echoes of Wisdom.
How To Get All Amiibo Reward in Zelda Echoes Of Wisdom
We welcome you to our guide on How To Get All Amiibo Reward in Zelda Echoes Of Wisdom in a specific and detailed way.
How to complete the Beetle Ballyhoo quest in Zelda Echoes of Wisdom
This time we return with a guide with the objective of explaining to you How to complete the Beetle Ballyhoo quest in Zelda Echoes of Wisdom.
How to get Monster Guts in Zelda Echoes of Wisdom
Discover How to get Monster Guts in Zelda Echoes of Wisdom with this excellent and detailed explanatory guide.
How to Find Monster Stones in Zelda Echoes of Wisdom
We invite you to discover How to Find Monster Stones in Zelda Echoes of Wisdom, a new task in this incredible adventure.
How to Break Spider Webs in Faron Wetlands in Zelda Echoes of Wisdom
Our guide today aims to explain to you How to Break Spider Webs in Faron Wetlands in Zelda Echoes of Wisdom.
All Side Quests in Zelda Echoes of Wisdom
We invite you to discover All Side Quests in Zelda Echoes of Wisdom with this excellent and explanatory guide.
How to Find Eternal Forest Routes - Pedestals in Zelda Echoes of Wisdom
Today we bring you an explanatory guide on How to Find Eternal Forest Routes - Pedestals in Zelda Echoes of Wisdom with precise details.
How to Defeat the Mogryph in Zelda Echoes of Wisdom
Discover How to Defeat the Mogryph in Zelda Echoes of Wisdom with this excellent and detailed explanatory guide.
How to Get Level Up Quest Pack in Fortnite Chapter 5 Season 4
We welcome you to our guide on How to Get Level Up Quest Pack in Fortnite Chapter 5 Season 4 in a specific and detailed way.
How to Get Redeemer Handgun in Remnant 2
Today we bring you an explanatory guide on How to Get Redeemer Handgun in Remnant 2 with precise details.
How to build Golden Pirate pieces in LEGO Fortnite
Today we bring you an explanatory guide on How to build Golden Pirate pieces in LEGO Fortnite.
How to get Rare Enchanted Ink in Throne and Liberty
Today we bring you an explanatory guide with everything you need to know about How to get Rare Enchanted Ink in Throne and Liberty.
How to find Wildkin in Throne and Liberty
Today we bring you an explanatory guide on How to find Wildkin in Throne and Liberty.