
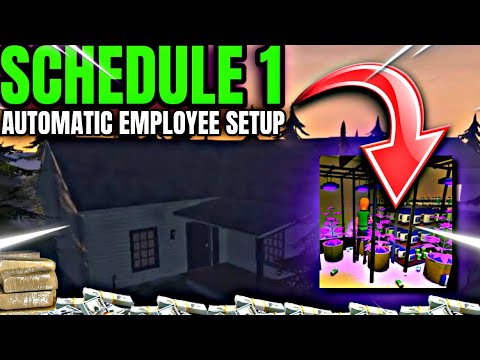
How to Make Your Bungalow Automatic in Schedule 1
Securing the Bungalow in Schedule 1 marks a significant turning point in your operation. This spacious new property unlocks the true potential for expansion and, most importantly, the coveted ability to achieve full automation. By strategically organizing your equipment across the Hall, Kitchen, and Bedroom, hiring and assigning specialized roles to a dedicated workforce, and meticulously setting up machine routing and worker tasks, you'll transform your bungalow into a highly efficient, self-sustaining peddling enterprise. Get ready to sit back and watch your investment evolve into a well-oiled, profit-generating machine! Let's dive into the essential steps required to automate your Bungalow and maximize your earnings in Schedule 1.
Schedule 1: Make Your Bungalow Automatic
The Bungalow Advantage: Your Hub for Automated Production
Purchasing the Bungalow is undeniably one of the most crucial upgrades in Schedule 1. It's the key that unlocks the ability to hire a larger workforce and fully automate your production processes, leading to a significantly smoother and more profitable operation. However, upon acquiring this spacious new property, it's understandable to feel a bit overwhelmed about where to begin and how to establish an efficient, automated system. The Bungalow offers three distinct and roomy areas – the Hall (Living Room), Kitchen, and Bedroom – making it the ideal foundation for building a streamlined, automated peddling empire.Essential Equipment for Bungalow Automation:
To fully automate your Bungalow, you'll need to acquire the following equipment:
- Grow Operation:
- 16 Suspension Racks
- 16 Best Grow Lights
- 16 Best Pots
- Storage:
- 7 Large Storage Racks
- 2 Trash Cans
- Worker Amenities:
- 6 Beds (5 for your hired workers, 1 for your own rest)
- Production:
- 2 Mixing Stations (MK1 or MK2 - MK2 is recommended for faster processing)
- 1 Packaging Station
Strategic Room-by-Room Equipment Setup:
Your primary new expense in the Bungalow will be accommodating your growingworkforce. Purchase a bed for each worker from Oscar at the warehouseand strategically place them within your bungalow. While the majority of your production equipment will be housed in the room to the right ofthe front door (the Hall/Living Room), you'll also utilize the Kitchenfor additional grow space and storage. Consider utilizing motel roomsfor worker beds to maximize production space in the Bungalow.
1. Hall / Living Room:
Grow Racks:
- 3 Grow Racks positioned near the main entrance door (place a Trash Can centrally within this group).
- 3 More Grow Racks arranged along the back wall (the wall with the back door).
- 5 Grow Racks placed along the left-side wall.
- 1 Grow Rack situated on the right-side wall (near the entryway to the Kitchen).
Large Storage Racks:
- 1 Large Storage Rack positioned near the back door. Utilize this for storing seeds and soil.
- 1 Large Storage Rack placed near the walkway leading into the Kitchen. Use this also for seeds and soil.
2. Kitchen:
Grow Racks:
- 4 Grow Racks arranged in a square formation within the Kitchen space.
Large Storage Racks:
- 1 Large Storage Rack placed against the right wall. Designate this for storing your packaging supplies (baggies, jars, etc.).
- 1 Large Storage Rack positioned against the back wall. Use this for storing your finished, packaged product.
Production:
- 2 Mixing Stations (MK1 or MK2) placed anywhere convenient within the Kitchen.
- 1 Packaging Station placed in a convenient location within the Kitchen.
Waste Disposal:
- 1 Trash Can placed in a corner of the Kitchen.
3. Bedroom (and Potential Motel Room Usage):
- Worker Beds: 6 Beds in total (5 for workers, 1 for yourself). To maximize production space in the Bungalow, consider placing the 5 worker beds in yourpreviously owned motel rooms. This frees up valuable space in theBungalow for additional storage or even a few more Grow Racks.
- Large Storage Racks (if beds moved): If you relocate the worker beds to motel rooms, utilize the freed-up space in the Bungalow's Bedroom for 3 Large Storage Racks:
- 2 Large Storage Racks dedicated to storing your mixing ingredients (designate one type of ingredient per rack for organization).
- 1 Large Storage Rack for miscellaneous storage or as backup storage for any needed supplies.
- Drying Racks (Optional): If managing a large number of Growing Pots feels overwhelming, consider swapping out a few Grow Racks for Drying Racks in the Bedroom (orfreed-up Bungalow space). Drying Racks can help boost the quality andpotentially the value of your final product.
Automating Your Bungalow: Setting Up Machines, Routing, and Worker Roles
With your equipment strategically placed, the next crucial step is toconfigure your machines, establish efficient routing, and assignspecific roles to your hired workforce.
1. Machines & Routing:
- Mixing Station 1 ➡ Mixing Station 2: Configure your first Mixing Station to automatically feed its output into the second Mixing Station.
- Mixing Station 2 ➡ Packaging Station: Set your second Mixing Station to automatically route its processed product to the Packaging Station.
- Packaging Station ➡ Final Product Rack (Kitchen): Ensure the Packaging Station is set to automatically place thefinished, packaged goods onto the designated Large Storage Rack in theKitchen (the one against the back wall).
- From Mix Ingredient Rack 1 ➡ Mixing Station 1: Configure the Large Storage Rack containing your first type of mixing ingredient to automatically supply Mixing Station 1.
- From Mix Ingredient Rack 2 ➡ Mixing Station 2: Configure the Large Storage Rack containing your second type of mixing ingredient to automatically supply Mixing Station 2.
- From Packaging Supply Rack ➡ Packaging Station: Ensure the Large Storage Rack in the Kitchen designated for packagingsupplies (baggies, jars, etc.) is set to automatically supply thePackaging Station.
- Pot Routing: Crucially, ensure that ALL your Growing Pots are configured to automatically route their harvested product to Mixing Station 1. This creates the initial link in your production chain.
2. Worker Roles:
- 2 Botanists (Planting): Hire two Botanists. Their primary role will be to tend to your plants in the Grow Pots.
- 1 Handler (Logistics): Hire one Handler. Their main responsibility will be managing the flow of packaged goods.
- 1 Chemist (Mixing): Hire one Chemist. They will be responsible for operating the Mixing Stations.
- 1 Cleaner (Trash): Hire one Cleaner. Their task will be to empty the Trash Cans located in the Kitchen and the Hall/Living Room.
3. Assigning Beds:
- Use the "Manage" interface (accessible through your phone or a managementmenu) to assign each of your five hired workers to one of the availablebeds (either in the Bungalow's Bedroom or in the motel rooms).
4. Detailed Worker Setup:
Handler Setup:
- Assign the Handler to the Packaging Station.
- Add the following route for the Handler: Take from the Packaging Station and place on the Final Product Rack (Kitchen).
Botanist 1 Setup:
- Assign Botanist 1 to Supply Rack 1 (one of the Large Storage Racks containing seeds and soil in the Hall/Living Room).
- Assign Botanist 1 to the following Grow Pots:
- The first few Grow Racks located near the main entrance in the Hall/Living Room.
- All three Grow Racks situated along the back wall in the Hall/Living Room.
- Two Grow Racks located on the left wall in the Hall/Living Room.
Botanist 2 Setup:
- Assign Botanist 2 to Supply Rack 2 (the other Large Storage Rack containing seeds and soil in the Hall/Living Room).
- Assign Botanist 2 to the remaining Grow Pots:
- The leftover Grow Racks on the left wall in the Hall/Living Room.
- All four Grow Racks arranged in the square formation within the Kitchen.
Chemist Setup:
- Assign the Chemist to both Mixing Stations (Mixing Station 1 and Mixing Station 2).
Cleaner Setup:
- Assign the Cleaner to both Trash Cans (the one in the Kitchen and the one in the Hall/Living Room).
5. Paying Your Workers:
- Use Shift+Click on each worker's briefcase (located near their bed) to give them their wages. An initial amount of $1,000 per worker is a good starting point, but you may need to adjust this based on their needs and your profitability.
Important Automation Tips:
- New Mix Confirmation: If you introduce a new mixing recipe, you must manually interact with each Mixing Station and click "Done" after the mixing process is complete for the first time. This confirmsthe discovery of the new product and allows the automation to continuesmoothly.
- Delivery Management: Utilize the "Deliveries" tab on your phone to manage the sale and delivery of your packaged goods (baggies, jars,etc.). You can store up to 16 full stacks of product in your drivewayfor easy loading.
- Bulk Transportation: The Jeeper (the second vehicle available at the dealership) is an excellent choice for bulk storage and supply runs, as it can hold up to 16 full stacksof items.
- Initial Cycle Monitoring: Once you have everything configured, allow the automated system to run for at least one full production cycle. Carefully observe the flow of materials and products to ensureeverything is working correctly and that there are no bottlenecks orerrors in your routing.
Congratulations! By following these detailed steps, you have now successfullytransformed your Bungalow into a fully automated, high-efficiencypeddling operation in Schedule 1. Sit back, monitor your production, and watch your profits soar!
Other Articles Related
How To Get the Golden Toilet in Schedule 1Learn how to unlock the elusive Golden Toilet in Schedule 1. This guidecovers the secret steps, challenges, and strategies to achieve thisprestigious status symbol.
Where To Find Lucy Pennington in Schedule 1
Can't find Lucy Pennington in Schedule 1? We break down where to lookwithin the complex legal document to locate her specific entry andunderstand its context.
Where To Find Elizabeth Homely in Schedule 1
Searching for Elizabeth Homely in Schedule 1? Find the correct legaldocument, list, or registry where this specific entry is located. Getthe right source quickly.
How to Conceal Items During a Body Search in Schedule 1
Learn methods and techniques on how to hide and conceal personal itemsduring a thorough body search. Understand the risks and legalconsequences involved.
How To Unlock the Off-Road Skateboard in Schedule 1
Unlock the Off-Road Skateboard in Schedule 1 with our step-by-step guide. Discover tips and tricks to enhance your skating experience today!
How to Get Brick Press in Schedule 1
Learn how to obtain a brick press in Schedule 1 with our step-by-step guide. Unlock the secrets to efficient brick production today!
How to Get Hyland Manor in Schedule 1
Discover the steps to acquire Hyland Manor in Schedule 1. Unlock valuable insights and tips for a seamless process today!
Where to Find North End of Overpass in Schedule 1
Discover the North End of Overpass in Schedule 1 with our comprehensive guide. Find directions, tips, and insights for your journey!
Where to Find the Church in Schedule 1
Discover the location of the Church in Schedule 1 with our comprehensive guide. Find directions, tips, and more to enhance your visit!
How To Get The Soil Pourer in Schedule 1
Discover the step-by-step guide on how to obtain the Soil Pourer in Schedule 1. Unlock this essential tool for your gardening needs today!
How to fix AI Limit Ghosting Issue
Learn how to fix AI limit ghosting problems with our detailed guides.Improve your performance
How to change Zoi Preference in InZOI
Learn how to change your Zoi preferences with InZOI. Discover step-by-step instructions
How to disable zooming in and out in League Of Legends
Learn how to disable zooming in and out in League of Legends with ourstep-by-step guide.
All safe locations and Return to Verdansk rewards in Warzone
Discover all safe locations in Warzone and unlock exclusive Return to Verdansk rewards.
How to use rides in Amusement Park in Inzoi
Discover the ultimate guide on how to enjoy rides at the Amusement Park in Inzoi.