
Where to Find Purgatory in Ninja Gaiden 4
Ninja Gaiden 4: Purgatory Location
Understanding the Purgatory Challenge
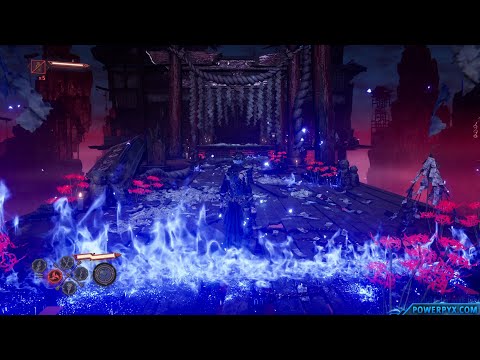
Purgatory gates are scattered across nearly every chapter of Ninja Gaiden 4. They are clearly marked by a Torii gate illuminated with a distinctive blue flame.Once you enter a Purgatory challenge, you are immediately plunged into waves of tough enemies, typically variants linked to the chapter you are currently playing. These challenges are reminiscent of the Crystal Skull challenges from Ninja Gaiden 3 but come with a unique twist: the health wager system.The Risk/Reward Wager
Before beginning the fight, you can choose to wager a percentage of your maximum health to increase the rewards earned upon victory. This allows players to adjust the difficulty and reward based on their confidence:
| Realm of Challenge | Health Wagered |
| Realm of Gods | 0% (Standard Reward) |
| Realm of Man | 15% Health Wagered |
| Realm of War | 30% Health Wagered |
| Realm of Beasts | 45% Health Wagered |
| Realm of Hunger | 60% Health Wagered |
| Realm of Hell | 75% Health Wagered |
Wagering your health—especially at the higher tiers—creates extreme tension, as mistakes are punished severely. But the massive influx of currency and experience points makes the risk well worth the reward.
Locating All 18 Purgatory Gates
Finding the blue-flamed gates is often the hardest part of the challenge. They are almost always tucked away off the main path, requiring sharp observation and often a bit of tricky platforming.
Yakumo’s Chapters (Chapters 1–13)
| Chapter | Chapter Name | Location Guide |
| Chapter 1 | Bloodsoaked Tokyo | After acquiring the Caddis Wire and using it for the first time, you’ll land on a platform. Instead of using the wire again to proceed, head left past the large glowing billboard. Follow this path and climb up to find the gate. |
| Chapter 2 | Haunted District | After the first major rail-grinding section and the introduction of flying grapple drones, grapple up to the next building. Look for blue crates nearby, proceed through them, and you’ll find a hidden rail to grind that leads directly to the Purgatory. |
| Chapter 3 | Phantom Pleasure Quarter | This is one of the easiest. After defeating the first group of enemies, jump up to the next level. Immediately turn around and follow the yellow-marked path opposite the main route to find the gate at the end. |
| Chapter 4 | Pilgrim's Windswept Path | After unlocking the Wing Suit, you'll climb a mountain. Stop at the wall where a wall run and a point zip converge (usually triggering two enemies). Instead of continuing up, head right through a secret, easy-to-miss path. |
| Chapter 5 | Raging Valley | Located shortly after you reach Umi's shop (about halfway through the level). From Umi's shop, jump down and continue forward until you see a staircase next to a door you can't open. Go up the stairs, jump down into the ravine, and follow the path to the right. |
| Chapter 6 | Guiding Winds | After navigating several wind tunnels and reaching a section with many grapple points, continue upwards to a giant rope to grind down. Grind to the wooden platform, then use the wind tunnel but aim sharply to the right (instead of straight ahead) to reach a very sneaky gate. |
| Chapter 7 | Altar of the Mountain God | As you platform across the level, just before reaching the main gate to the boss, head down the stairs, jump across the platforms with yellow tape, and then head left to find the gate. |
| Chapter 8 | Drowned District | Once you acquire the Pond Strider, ride it until you reach the large disco room. Clear the room, then head right of the main path after opening the door, wall-flip up to the next level, and ride your Pond Strider to the gate. |
| Chapter 9 | Realm of the Silent Dead | Early in the level, when you reach the first large pool of water you can use your Pond Strider on, head left instead of proceeding forward. Look for a hole in the wall, jump over, and continue straight. |
| Chapter 10 | Bounding Spirits | This one is near the start. After clearing the first room of enemies, head slightly right of Umi's Shop and through the open door. Follow the path forward. |
| Chapter 11 | Infiltration | Midway through the level, you'll reach a building marked E4 before taking a rail into a room. Stick to the rail until a train approaches, forcing you to jump right. As soon as the train passes, quickly jump back onto the left rail; it will lead to the Purgatory. |
| Chapter 12 | Dragon's Maw | Found late in the chapter. After a major rail-grinding section, clear out the tough enemies in the room. Head toward the exit door, but turn left and grapple across the void using the Caddis Wire point to find the gate. |
| Chapter 13 | Clash of Convictions | At the very start, head backwards and down the stairs. Keep descending until you find a grapple platform on the left that leads to a small platforming section and the gate. |
| Chapter 14 | Unholy Descent | NOTE: Chapter 14 has no Purgatory Gate. |
Ryu’s Chapters (Chapters 15–18) & Final Chapter
| Chapter | Chapter Name | Location Guide |
| Chapter 15 | Fanged Gate | After escaping the Underworld through a portal and landing in the underground disco, clear the first room. Head down until Ryu sees another portal ahead. DO NOT JUMP IN. Instead, jump to the platform on the left, wall run, and follow the path right through a gate to find the Purgatory on the dance floor. |
| Chapter 16 | Downpour | Found early in the level. After taking the first elevator, continue forward until you reach the open Tokyo street scene. Instantly head right instead of left, wall run, and platform forward to find the gate. |
| Chapter 17 | Howling Ravine | This gate is located in the exact same spot as Chapter 7's Purgatory. Head down the stairs at the beginning and across the platforms to the left. |
| Chapter 18 | Darkness Reborn | After the opening and taking the big elevator, move forward and up the stairs. Clear the next room of enemies, then head left instead of up the next set of stairs. Follow this path to the Purgatory. |
| Chapter 19 | Ebon Wings | The final Purgatory is found in the exact same location as Chapter 18. Follow the same path after the initial section (head left after the main room with the stairs). |
By systematically locating and clearing these 18 optional Purgatory challenges—especially utilizing the higher Realm wagers—you will not only earn the highly coveted Annihilator trophy but also stockpile the resources needed to fully upgrade Yakumo and Ryu into unstoppable forces.
Other Articles Related
How To Unlock the Dark Dragon Blade in Ninja Gaiden 4Unlock the Dark Dragon Blade in Ninja Gaiden 4. Our guide reveals the secretsteps, hidden challenges, and ultimate techniques needed to wield thislegendary, powerful weapon.
How to Fix Ninja Gaiden 4 Crashing Error on PC
Struggling with Ninja Gaiden 4 crashing on PC? Our guide provides proven solutions to fix the crashing error, from updating drivers to adjusting in-gamesettings. Get back to the action quickly and smoothly.
How To Unlock Master Ninja Difficulty in Ninja Gaiden 4
Unlock the Master Ninja Difficulty in Ninja Gaiden 4 and test your skills! Conquer challenges and elevate your gameplay
How to Unlock All Weapon in Ninja Gaiden 4
Unlock every weapon in Ninja Gaiden 4 with our ultimate guide. Discover secret methods, mission requirements, and the fastest ways to expand yourarsenal.
Where to Find Purgatory in Ninja Gaiden 4
Discover the Purgatory location in Ninja Gaiden 4. Uncover secrets,strategies, and tips to navigate this challenging area
All Collectibles Chapter 1 in Ninja Gaiden 4
Struggling to find every item? Get the complete Ninja Gaiden 4 Chapter 1collectibles guide. Find all Scarabs, Essence Gems, and hidden chestswith our detailed locations.
Difficulty Level Explained in Ninja Gaiden 4
the intricacies of Ninja Gaiden 4's difficulty levels. Our guide breaksdown each mode to help you choose the right challenge for your skills.
How to Unlock All the Weapons in Ninja Gaiden 4
Unlock all weapons in Ninja Gaiden 4 with our guide. Elevate your gameplay and dominate your enemies with powerful weapon strategies.
How to Fix Ninja Gaiden 4 Missing Pre-Order Skin
how to fix the missing pre-order skin in Ninja Gaiden 4. Follow ourstep-by-step to ensure you unlock your exclusive content
How To Level Up Every Weapon in Ninja Gaiden 4
Level up every weapon in Ninja Gaiden 4! Discover the fastest ways to earnmastery, find hidden upgrade materials, and unlock the ultimatepotential for the Dragon Sword, Lunar Staff, and more.
How To Get Mega Stones in Pokemon Legends Z-A
Unlock powerful Mega Evolutions! Learn how to find and obtain all Mega Stonesfor your Pokemon in the upcoming game Pokemon Legends Z-A. Your guide to locating every stone.
Where to Find The Bronze Pocket Watch in Escape From Duckov
Searching for the Bronze Pocket Watch in Escape From Duckov? Find its exactlocation and a step-by-step guide to complete this key quest and unlockthe next part of the story.
All Collectibles Chapter 1 in Ninja Gaiden 4
Struggling to find every item? Get the complete Ninja Gaiden 4 Chapter 1collectibles guide. Find all Scarabs, Essence Gems, and hidden chestswith our detailed locations.
How to Jump Across Gaps in Pokemon Legends Z-A
Master the art of traversal in Pokemon Legends Z-A! This guide reveals theessential techniques and abilities you need to safely jump across gapsand explore every corner of Lumiose City.