Destiny 2 の最新ダンジョン「Equilibrium」では、近年で最も複雑でやりがいのあるクエスト チェーンの 1 つ、「The Way Between」が導入されました。 PC、PlayStation、Xbox のプレイヤーが利用できるこの秘密のミッションでは、新しい Praxic Bladeレリックの潜在能力が完全に解除され、エンドゲームの限定戦利品にアクセスできます。クエストの複雑さはバグでも見落としでもありません。ベテランガーディアンにふさわしい多層的なチャレンジを作成するために、Bungieが意図的に設計したものです。多くのプレイヤーが直面する問題はグリッチではなく、パズルの迷宮的な性質、要求される正確な実行、および特定の隠された目的でダンジョンを複数回実行する必要があることです。このガイドでは、プロセス全体をわかりやすく説明し、フラストレーションを勝利に変えます。
コアループは次のとおりです。イクイリブリアムダンジョンを一度クリアすると、最終ボスから最初のレリックを入手できます。その後のプレイでは、特定のエンカウンターで3つの隠されたアーティファクトを見つける必要があります。各アーティファクトを見つけるには、プラクシックブレードのメカニズムを使用して、独自の「テイクドトライアル」をクリアする必要があります。各アーティファクトは、ダンジョンを発見後クリアすることでチャージされ、Inner Templeに戻されます。4つのレリック(スターターと3つのシークレット)をすべて配置すると、 Shade of Sereとの最終ボス戦がアンロックされます。これを倒すと、エネルギーコンジットカタリストが付与され、イクイリブリアムギア用のダンジョンフォーカスがアンロックされます。
ステップ1:クエストのアンロック
まず、イクイリブリアムダンジョンを全周クリアし、最終ボスのドレドゲン・セレを倒す必要があります。セレが最初のクエストレリックをドロップします。
ステップ2:内陣へのアクセス
ダンジョンに再び入ります。最初のエンカウントエリア(ハーベスター)では、エンカウントを開始する代わりに、階段のある大きな建造物、内陣を探します。以前は閉ざされていた扉が開きます。中に入って最初の遺物を右側の祭壇に置きます。これで作戦拠点が確立され、残りの3つのアーティファクト探しが始まります。
場所:最初のボス戦 (ハーベスター) を完了した直後。
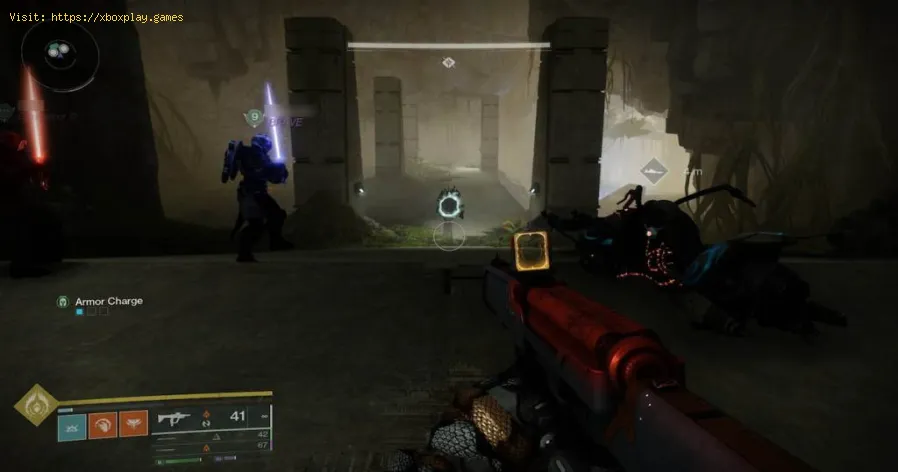
The Trial: Do NOT board the exit ship. Return to the Inner Temple area; a Taken blight will now be on the right path. Destroy it with your Praxic Blade to start.
The Puzzle: Your goal is to manage two buffs: Gathering Shadow (stacks by killing Taken with the blade) and In Shadow (a timer extended by destroying Forgotten Eyes, the glowing white orbs). Build to Shadow Master (max stacks), then use your Shadow Power ability (melee) to break a Taken Captain's shield, kill him, and destroy the blight he guards.
The Path: Continue on a Sparrow, constantly shooting Forgotten Eyes to keep yourtimer alive. In the final large room, repeat the process: kill adds forShadow Master, break the Captain's shield, kill him, and destroy thefinal blight blocking the path.
The Reward: A door will open on the left wall, revealing the first artifact. Complete the dungeon to charge it. Return it to the Inner Temple on your next run to receive Offensive Form, a powerful bonus for your Praxic Blade.
Location: In the ship hangar area after Harvester, where you shoot blue fuses to open doors to space.
The Trial: The door closest to the two fuses is open. Find and destroy the Taken blight inside with your Praxic Blade.
The Puzzle: This is a vertical, exploration-focused trial. Destroy Forgotten Eyes to raise your Gathering Shadow to Shadow Apprentice level. At this level, you can shoot a Taken-infused panel on a left wall, opening a door behind it with another Eye.
The Path: Backtrack to the trial's start, find and kill the Shadow Apprentice enemy, then destroy the blight at the blocked door. Cross thehyperspace bridge to the other ship. Continue destroying Eyes, thenshoot another panel in the right room. Use Shadow Power on the TakenCaptain in the middle room, then enter the right room to destroy ablight and a vent.
The Descent: Drop down the new path, following Eyes and pathways. In a finalspacious room on the right, you'll find the last set of Eyes, a TakenCaptain, and a blight on the right wall hiding the final panel. Destroyit to claim the second artifact.
The Reward: Charge it via a dungeon completion. Returning it grants Invigorating Blade, a Blade Focus for your Praxic Blade.

Location: In the floating, low-gravity jumping puzzle section just before Dredgen Sere.
The Trial: Find a door with a Taken blight on the left wall and destroy it.
The Puzzle: This trial tests platforming and battlefield control. Build Gathering Shadow, destroy Eyes, and use Shadow Power to push enemies off edges to clear rooms.
The Path: In a large chamber, look for Taken blights floating in the air. Destroy these with your Praxic Blade to create solid platforms. Use these to navigate and find more Forgotten Eyes.
The Activation: On the back right, use Shadow Power on a battery panel. Find a second panel high up on the far left wall. Activate both.
The Final Room: Enter the red pipe (the normal boss path), shoot the floor vent to drop through, and enter afinal room. Clear the Eyes, kill the Taken Captain, and destroy theblight hiding the last battery panel. Activate it to open the lockeddoor beside it.
The Reward: Grab the final artifact. Once charged and returned, you'll get the Gyro Core Power Core upgrade.
Step 1: Summon the Boss
With all four relics placed on their altars in the Inner Temple, a Taken blight and Raid Banner will appear at the room's rear. Destroy the blight.
Step 2: Mechanics of the Fight
You'll be teleported to fight the Shade of Sere.
Damage Phase Unlock: Kill Taken enemies with your Praxic Blade to earn the Shadow Master buff. With the buff active, interact with the Shade of Sere to "Compel" him. Do this three times.
DPS Phase: The boss will teleport upwards. Use the Taken blights he spawns as platforms to climb to him. Damage him to extend your In Shadow timer. Deal enough damage before it runs out.
Repeat: A new wave of adds spawns. Repeat the process—build Shadow Master, Compel the boss three times, platform up, and damage him.
Step 3: Final Rewards
Upon the Shade's defeat:
You will receive the Energy Conduit Catalyst for the Praxic Blade.
Interact with the Praxic Fire that spawns.
You have now officially completed The Way Between.
Permanent Unlocks: You gain the ability to focus Equilibrium loot at the HELM and you will obtain the Catalyst for the Heirloom Exotic Crossbow.
ファイアチームを連れて行く:ソロでも可能ですが、追加の制御と復活のために 2 ~ 3 人のプレイヤーがいると、これらのトライアルは大幅に簡単になります。
コミュニケーションが鍵です: Forgotten Eye の場所と Shadow Power のクールダウンを伝えます。
タイマーを優先する: In Shadowタイマーはあなたの命綱です。常に1人のプレイヤーが次のForgotten Eyeを見つけて撃つことに集中しましょう。
周回プレイ:一度に全てをこなす必要はありません。アーティファクトを1つ見つけ、ダンジョンをクリアしてチャージし、次の周回でそれを提出して、また次の周回でアーティファクトを探しましょう。こうすることで、グラインドを中断できます。
モビリティ ツールを装備:プラットフォーム セクションでのジャンプと滑空機能を強化するサブクラスのフラグメント、アスペクト、エキゾチック (タイタンの場合は Lion Rampant など) を使用します。
Q: 1回のダンジョンプレイで全てのアーティファクトを入手できますか?
A:いいえ。このクエストは複数回のプレイを想定して設計されています。1回のプレイで入手できる秘密のアーティファクトは1つだけで、入手するには同じダンジョンインスタンスをクリアしてチャージする必要があります。
Q: これにアクセスするには、最新の拡張版を所有している必要がありますか?
A:はい、Equilibrium Dungeon は The Final Shape 拡張版のエンドゲーム コンテンツの一部であるため、The Final Shape 拡張版を所有している必要があります。
Q: トライアルに失敗した場合はどうなりますか?リセットされますか?
A:影のタイマーがゼロになると、そのトライアルエリアの開始地点で死亡し、復活します。宿られた疫病に再度ダメージを与えることで、すぐに再開できます。
Q: アーティファクトのアンロックはアカウント全体で有効ですか?
A:はい。プラクシックブレードのアップグレードまたはカタリストをアンロックすると、アカウント内のすべてのキャラクターで使用できるようになります。
Q: 最終ボス戦はマッチメイキングされますか?
A:いいえ。Shade of Sere との戦いはダンジョンインスタンスの一部であり、事前に編成されたファイアチームが必要です。
「The WayBetween」は、Destiny 2ダンジョンデザインの真骨頂と言えるでしょう。謎めいて難解、そして途方もないやりがい。「EquilibriumDungeon」を、一度きりのアクティビティから、その仕組みを深く学び、粘り強さに見合う確かな力を与えてくれる、複数回にわたる充実した旅へと変貌させます。
地図を手に入れた今、旅はあなたの手で完結します。ファイアチームを結成し、プラクシックブレードを研ぎ澄まし、イクイリブリアムへと足を踏み入れましょう。二つの世界の間に隠された秘密が待ち受けています。どのレリックアップグレードを最も楽しみにしていますか?ガーディアンよ、あなたの勝利と疑問を、下のコメント欄で共有してください。