
How to Find Lorestangirs in Hellblade 2
Find out How to Find Lorestangirs in Hellblade 2 in this excellent and precisely explanatory guide.
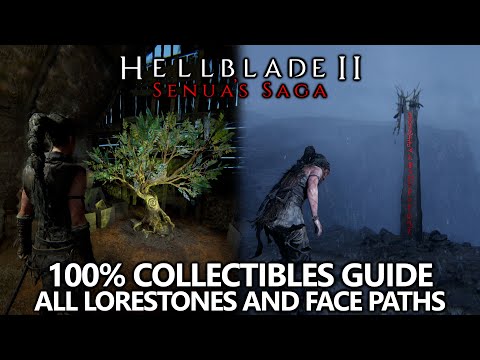
To get the Tales Midgard trophy in Hellblade 2, you must find 18 Lorestangirs, which are essentially runic messages with engraved characters spread throughout the first 5 chapters. These totems, shaped like a stone pedestal with an animal skull on top, are often hidden behind secret paths and often require exploring to discover them. We will explain how to find the 18 Lorestangirs. More conveniently, you can find them all in a single playthrough, but you can also use the chapter select option in the main menu to track them down. For greater convenience, we will tell you what you should do in each chapter in the following content.
We will see the location of each of the 18 Lorestangirs per chapter and they are as follows:
Discover How To Get the Stun Lance and Baton in Helldivers 2 with our explanatory guide today.
How to Destroy Illuminate Monoliths and Disruptors in Helldivers 2
Join the fight in Helldivers 2! Destroy Illuminate Monoliths and Disruptors to save humanity. Experience intense co-op action and strategic gameplay!
How to Fight the Illuminate in Helldivers 2
In this guide entry we explain everything about How to Fight the Illuminate in Helldivers 2.
How to Destroy the Illuminate Dropships in Helldivers 2
Our guide today aims to explain to you How to Destroy the Illuminate Dropships in Helldivers 2.
How to Get the Car in Helldivers 2
Discover how to unlock and acquire the car in Helldivers 2 with our comprehensive guide. Get tips and strategies for success!
How to Get the Alpha Commander Armor Set in Helldivers 2
Unlock the ultimate power in Helldivers 2 with the exclusive Alpha Commander Armor Set. Gear up for epic battles and dominate the battlefield!
How to use the DSS in Helldivers 2
With our help you will see that knowing How to use the DSS in Helldivers 2 is easier than you think.
How to unlock the bar in No More Room in Hell 2
Today we bring you an explanatory guide on How to unlock the bar in No More Room in Hell 2 with precise details.
How To Play With Friends in No More Room In Hell 2
Our guide today aims to explain to you How To Play With Friends in No More Room In Hell 2.
How to use the Eagle 500KG Bomb to maximize kills in Helldivers 2
We invite you to discover How to use the Eagle 500KG Bomb to maximize kills in Helldivers 2, a new task in this fast-paced game.
How to beat the slaver in Hellblade 2
Today we bring you an explanatory guide with everything you need to know about How to beat the slaver in Hellblade 2.
How to unlock Obsidian camo in MW3 and Warzone
Today we bring you an explanatory guide with everything you need to know about How to unlock Obsidian camo in MW3 and Warzone.
Where to find Trogs in Fallout 76
Today we bring you an explanatory guide on Where to find Trogs in Fallout 76.
How to unlock Kar98k in MW3 and Warzone
Today we bring you an explanatory guide with everything you need to know about How to unlock Kar98k in MW3 and Warzone.
How to unlock Artifact of Devotion in Risk of Rain 2
We invite you to discover everything about How to unlock Artifact of Devotion in Risk of Rain 2.
To get the Tales Midgard trophy in Hellblade 2, you must find 18 Lorestangirs, which are essentially runic messages with engraved characters spread throughout the first 5 chapters. These totems, shaped like a stone pedestal with an animal skull on top, are often hidden behind secret paths and often require exploring to discover them. We will explain how to find the 18 Lorestangirs. More conveniently, you can find them all in a single playthrough, but you can also use the chapter select option in the main menu to track them down. For greater convenience, we will tell you what you should do in each chapter in the following content.
How to Find Lorestangirs in Hellblade 2?
We will see the location of each of the 18 Lorestangirs per chapter and they are as follows:
Chapter 1
- 1- Overturned Ship: After passing through the ship, continue until Senua sees the slavers for the first time. The monument faces the sea on the right side.
Chapter 2
- 2-Viden Freyslaug: At the beginning of the chapter, she goes to the small cabins on the right, go between them and right in front of you you will see Lorestangir overlooking the sea.
- 3-Return home: After completing the rune puzzle, she crosses the bridge to reach the highest part of the town. She goes through the house, turns left, then goes through the basement and finds the column on the right.
- 4-Draugar Ritual: During the ritual on the rock, she looks for the stairs to the left. She goes up, turns right, jumps over the low wall and follows the path to find Lorestangir.
- 5-Encounter with the stranger: After the ritual and Iltauga's attack, she follows the stranger towards the village, finding a path halfway to the left, marked with a stick on the rocky hill. Follow it to find the message.
Chapter 3
- 6-Red Hills:Follow Fargrimir to the ruined village, turn left and continue past the ruined house. Lorestangir is in a small hidden space on the right.
- 7-On the hill: After talking to Fargrimir about the people hiding, follow the path to the top of the village. At the top, turn left towards the hut, on the right you will find the totem pole.
- 8-On the Hill: After completing the first trial of the Orb of Hidden Men, follow the path until you reach a clearing with a ledge on the left and a tunnel through the rock formation on the right. Jump to the ledge and follow the path until you find the statue.
- 9-On the Hill: Complete the second puzzle with the Hidden Man's orb, then follow the newly opened path. We continue until we go down two ledges and a path opens up, passing through a small pond. Cross the pond and go through the gap on the left. Follow the ledge and go up to find the statue.
- 10-On the hill: After solving the second puzzle with the Orb of the Hidden, follow the path that opens. Continue until you go down two ledges and reach a small pond. Cross the pond and look to the right to see a narrow tunnel through the rock. Follow him and jump off the ledge in front of you to reach him.
- 11- Find hidden people: At the beginning of this section you will find a puzzle in which you must place three balls on a pedestal. Grab the first two orbs and then fight the Draugar. When you reach the platform with the third orb, turn around and you will see the totem hanging from the ceiling.
Chapter 4
- 12-Enter the cave: To the hidden kingdom of popular caves. Once inside the cave, follow the one-way path until you fall from the ledge into a puddle and listen to advice on how to protect the torch. Continue right and jump off the ledge to find the statue.
- 13-Enter the cave: After solving the third burning pedestal puzzle, which opens a bridge over a body of water, continue until you reach a chasm on the right. Look to the right and you will see Lorestangir. To get to it, jump over the thin stone bridge.
- 14-Act of Consecration: After returning the sword and following the light, you will reach an area with floating rocks. Continue until you reach a room where all the rocks fall to the ground. Continue to the right and you will find the path that leads to the totem.
Chapter 5
- 15-Towards the sea: From the beginning of the chapter, follow the path until you reach a very small waterfall on the right. We follow the road a little further and take the path to the right. Follow it, then turn right and you'll find a post.
- 16-Sjávarrisi: Follow Astrid until she starts talking about her mother and you both jump over the small wall. Turn right past the wall, then follow the path as it turns right again and follow it to find Lorestangir.
- 17-One more question: Once you have solved the puzzle with the symbols s on the beach near the boat, open the right side, facing the beach. Interact with the orb to change the landscape and go through the hole in the back. Follow the path and turn right on the beach to find the totem pole.
- 18-One more question: Once in the city, follow the main road and turn left up a small hill. At the top of Lorestangir.
Finally, now that we have the necessary indications that will lead us to find Lorestangirs we can make important progress in this game as complex and entertaining as Hellblade 2.
Mode:
Other Articles Related
How To Get the Stun Lance and Baton in Helldivers 2Discover How To Get the Stun Lance and Baton in Helldivers 2 with our explanatory guide today.
How to Destroy Illuminate Monoliths and Disruptors in Helldivers 2
Join the fight in Helldivers 2! Destroy Illuminate Monoliths and Disruptors to save humanity. Experience intense co-op action and strategic gameplay!
How to Fight the Illuminate in Helldivers 2
In this guide entry we explain everything about How to Fight the Illuminate in Helldivers 2.
How to Destroy the Illuminate Dropships in Helldivers 2
Our guide today aims to explain to you How to Destroy the Illuminate Dropships in Helldivers 2.
How to Get the Car in Helldivers 2
Discover how to unlock and acquire the car in Helldivers 2 with our comprehensive guide. Get tips and strategies for success!
How to Get the Alpha Commander Armor Set in Helldivers 2
Unlock the ultimate power in Helldivers 2 with the exclusive Alpha Commander Armor Set. Gear up for epic battles and dominate the battlefield!
How to use the DSS in Helldivers 2
With our help you will see that knowing How to use the DSS in Helldivers 2 is easier than you think.
How to unlock the bar in No More Room in Hell 2
Today we bring you an explanatory guide on How to unlock the bar in No More Room in Hell 2 with precise details.
How To Play With Friends in No More Room In Hell 2
Our guide today aims to explain to you How To Play With Friends in No More Room In Hell 2.
How to use the Eagle 500KG Bomb to maximize kills in Helldivers 2
We invite you to discover How to use the Eagle 500KG Bomb to maximize kills in Helldivers 2, a new task in this fast-paced game.
How to beat the slaver in Hellblade 2
Today we bring you an explanatory guide with everything you need to know about How to beat the slaver in Hellblade 2.
How to unlock Obsidian camo in MW3 and Warzone
Today we bring you an explanatory guide with everything you need to know about How to unlock Obsidian camo in MW3 and Warzone.
Where to find Trogs in Fallout 76
Today we bring you an explanatory guide on Where to find Trogs in Fallout 76.
How to unlock Kar98k in MW3 and Warzone
Today we bring you an explanatory guide with everything you need to know about How to unlock Kar98k in MW3 and Warzone.
How to unlock Artifact of Devotion in Risk of Rain 2
We invite you to discover everything about How to unlock Artifact of Devotion in Risk of Rain 2.