
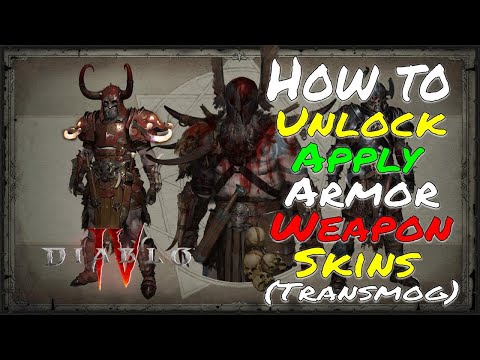
How to Transmog in Diablo 4 - Ultimate Guide
Learn how to transmog in Diablo 4 today. Transmog is a popular feature in Diablo 4 that allows players to customize and enhance their character’s look.
Transmog is a popular feature in Diablo 4 that allows players to customize and enhance their character’s look. With a wide range of colors, shapes, and textures, Transmog gives players the ability to make their character look unique while also providing them with additional benefits such as better item drops and more powerful stats. With the help of Transmog, players will be able to craft a costume that’s tailored to their playstyle and desired look.
Transmog in Diablo 4 provides a number of benefits. It gives players the chance to customize the look of their character, making them stand out from the rest. Additionally, Transmog also provides the player with powerful stats and better item drops. It also unlocks additional Ensemble slots, allowing players to equip more pieces of armor and weapons at once.
Before you start transmoging, it’s important to allot a certain amount of time to work on your costume. This will allow you to choose the right pieces and colors, as well as make sure that you’re maximizing the benefits of Transmog. Additionally, you should also select a class to base your look on. This will help you determine which pieces and colors work best with your desired look.
Discover how to obtain Chaos Armor in Diablo 4 with our comprehensive guide. Unlock powerful gear and enhance your gameplay
How to Get Ophidian Iris In Diablo 4
how to obtain the Ophidian Iris in Diablo 4 with our comprehensive guide. Unlock secrets and enhance your gameplay
How To Get Twin Strikes in Diablo 4
Discover the ultimate guide on how to get Twin Strikes in Diablo 4. Unlock powerful abilities and enhance your gameplay today!
How To Get Band of Ichorous Rose in Diablo 4
Discover the ultimate guide on how to obtain the Band of Ichorous Rose in Diablo 4. Unlock its secrets and enhance your gameplay today!
How To Complete Cache Claimer in Diablo 4
Discover the ultimate guide to completing the Cache Claimer in Diablo 4. Unlock rewards and master strategies
How To Get Spark of Creation in Diablo 4 Season 9
Unleash the power of the Spark of Creation in Diablo 4 Season 9. Explore strategies and tips to elevate your gaming
How To Get Deathmask of Nirmitruq in Diablo 4 Season 9
Unveil the secrets to acquiring the Deathmask of Nirmitruq in Diablo 4Season 9. Elevate your character
How To Get Volatile Crystal in Diablo 4 Season 9
Learn how to get Volatile Crystals in Diablo 4 Season 9 with ourstep-by-step guide. Discover farming tips, best locations, andstrategies to maximize your loot!
How To Get Luminous Gem in Diablo 4 Season 9
Learn how to obtain the Luminous Gem in Diablo 4 Season 9 with ourstep-by-step guide. Discover farming tips, best locations, andstrategies to upgrade your gear!
How To Get Murky Essence in Diablo 4 Season 9
Learn how to farm Murky Essence in Diablo 4 Season 9 with ourstep-by-step guide. Discover the best methods, locations, and strategies to collect this key resource efficiently!
How to Fix Puget Lakes Error In MW2 and Warzone 2
How to Fix Puget Lakes Error In MW2 and Warzone 2 is a guide that can help you fix the Puget Lakes error and play your game normally.
How to Refund Skill Points in Diablo 4
Learn How to Refund Skill Points in Diablo 4. Watch this video and learn how to refund skill points.
How to Search Elysian island for the Warehouse GTA Online
How to Search Elysian Island for the Warehouse GTA Online is the latest game to be released by Rockstar Games. It is the second installment in the GTA Online series.
How to Fix Valorant Required Dependencies Error
We will discuss the steps How to Fix Valorant Required Dependencies Error.
How to unlok Tempus Torrent in DMZ
This guide will show you how to unlock the Tempus Torrent in DMZ. It will also cover the various skills and knowledge you will need to unlock this powerful weapon.
Transmog is a popular feature in Diablo 4 that allows players to customize and enhance their character’s look. With a wide range of colors, shapes, and textures, Transmog gives players the ability to make their character look unique while also providing them with additional benefits such as better item drops and more powerful stats. With the help of Transmog, players will be able to craft a costume that’s tailored to their playstyle and desired look.
Benefits of Transmog
Transmog in Diablo 4 provides a number of benefits. It gives players the chance to customize the look of their character, making them stand out from the rest. Additionally, Transmog also provides the player with powerful stats and better item drops. It also unlocks additional Ensemble slots, allowing players to equip more pieces of armor and weapons at once.
Preparation
Before you start transmoging, it’s important to allot a certain amount of time to work on your costume. This will allow you to choose the right pieces and colors, as well as make sure that you’re maximizing the benefits of Transmog. Additionally, you should also select a class to base your look on. This will help you determine which pieces and colors work best with your desired look.
Crafting the Look
The first step to creating a unique transmog set is selecting the right pigments and shaders for your armor. Pigments are materials that can be applied to armor, allowing you to customize the color of your gear. Shaders, on the other hand, are used to give your gear a specific look or pattern. You can select these pigments and shaders from the “Pigments & Shaders” menu, which can be accessed from the “Customization” tab.
Once you’ve selected your pigments and shaders, you’ll need to unlock ensemble slots in order to apply them to your character. You can unlock ensemble slots by selecting the “Unlock Ensemble Slots” option from the “Customization” menu.
When you’ve finished customizing your character’s look, you can then access the “Wardrobe” to see all of the transmog sets you’ve created. You can also save your favorite transmog sets and easily switch between them whenever you want.
Unlocking New Looks
Creating the perfect transmog set can take lots of time and effort, so it’s important to make sure you’re taking advantage of all the options available to you. One way to unlock new transmog sets is by salvaging armor. When you salvage armor, you’ll be able to choose from a selection of pigments and shaders that you wouldn’t normally have access to.
Another way to unlock new transmog sets is by using the Blacksmith. The Blacksmith allows you to craft armor and weapons with specific pigments and shaders. You can also purchase armor and weapons from the Blacksmith with the pigments and shaders of your choice.
Finally, you can mark gear as “junk” in order to make room for new transmog sets. When you mark an item as “junk”, it will no longer appear in your inventory but will still be in your “Junk” tab. This allows you to free up inventory space for new transmog sets.
Transmog in Diablo 4 is a great way to customize your look and get powerful stats and better item drops. With the ability to craft a costume that’s tailored to your playstyle, Transmog gives players the chance to stand out from the rest. To get started, allot a certain amount of time for Transmog, select a class to base your look on, and unlock new looks by salvaging existing pieces, using the Blacksmith, and marking gear as junk. With these tips, you’ll be able to craft a costume that’s perfect for your playstyle.
Tags: Diablo IV, action RPG, dungeon crawler, loot-driven, dark fantasy, character classes, skill trees, endgame content, worl
Platform(s): Xbox One, Xbox Series X/S, PlayStation 4, PlayStation 5, Microsoft Windows
Genre(s): Action role-playing, hack and slash
Developer(s): Blizzard Team 3, Blizzard Albany
Publisher(s): Blizzard Entertainment
Release date: June 6, 2023
Mode: Single-player, multiplayer
Age rating (PEGI): 18+
Other Articles Related
How to Get Chaos Armor in Diablo 4Discover how to obtain Chaos Armor in Diablo 4 with our comprehensive guide. Unlock powerful gear and enhance your gameplay
How to Get Ophidian Iris In Diablo 4
how to obtain the Ophidian Iris in Diablo 4 with our comprehensive guide. Unlock secrets and enhance your gameplay
How To Get Twin Strikes in Diablo 4
Discover the ultimate guide on how to get Twin Strikes in Diablo 4. Unlock powerful abilities and enhance your gameplay today!
How To Get Band of Ichorous Rose in Diablo 4
Discover the ultimate guide on how to obtain the Band of Ichorous Rose in Diablo 4. Unlock its secrets and enhance your gameplay today!
How To Complete Cache Claimer in Diablo 4
Discover the ultimate guide to completing the Cache Claimer in Diablo 4. Unlock rewards and master strategies
How To Get Spark of Creation in Diablo 4 Season 9
Unleash the power of the Spark of Creation in Diablo 4 Season 9. Explore strategies and tips to elevate your gaming
How To Get Deathmask of Nirmitruq in Diablo 4 Season 9
Unveil the secrets to acquiring the Deathmask of Nirmitruq in Diablo 4Season 9. Elevate your character
How To Get Volatile Crystal in Diablo 4 Season 9
Learn how to get Volatile Crystals in Diablo 4 Season 9 with ourstep-by-step guide. Discover farming tips, best locations, andstrategies to maximize your loot!
How To Get Luminous Gem in Diablo 4 Season 9
Learn how to obtain the Luminous Gem in Diablo 4 Season 9 with ourstep-by-step guide. Discover farming tips, best locations, andstrategies to upgrade your gear!
How To Get Murky Essence in Diablo 4 Season 9
Learn how to farm Murky Essence in Diablo 4 Season 9 with ourstep-by-step guide. Discover the best methods, locations, and strategies to collect this key resource efficiently!
How to Fix Puget Lakes Error In MW2 and Warzone 2
How to Fix Puget Lakes Error In MW2 and Warzone 2 is a guide that can help you fix the Puget Lakes error and play your game normally.
How to Refund Skill Points in Diablo 4
Learn How to Refund Skill Points in Diablo 4. Watch this video and learn how to refund skill points.
How to Search Elysian island for the Warehouse GTA Online
How to Search Elysian Island for the Warehouse GTA Online is the latest game to be released by Rockstar Games. It is the second installment in the GTA Online series.
How to Fix Valorant Required Dependencies Error
We will discuss the steps How to Fix Valorant Required Dependencies Error.
How to unlok Tempus Torrent in DMZ
This guide will show you how to unlock the Tempus Torrent in DMZ. It will also cover the various skills and knowledge you will need to unlock this powerful weapon.