
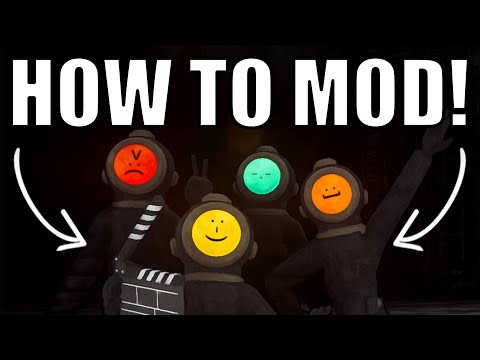
How to install mods in Content Warning
Learn How to install mods in Content Warning with our step-by-step guide. Enhance your gaming experience today!
Mods, short for modifications, are user-created content that can enhance and modify the gameplay experience of a video game. They can range from small changes like adding new items or characters to major changes like overhauling the entire game. Content Warning, a popular game that allows players to create their own stories, also has a thriving modding community. If you're new to modding or just want to learn How to install mods in Content Warning, this article is for you.
The first step to installing mods in Content Warning is to download a mod manager. A mod manager is a tool that helps you manage and install mods for your game. There are several mod managers available for Content Warning, but one of the most popular and user-friendly ones is Vortex.
Once you have downloaded the mod manager, run the installer and follow the instructions to install it. Make sure to select the correct location for your Content Warning game files when prompted. This will ensure that the mod manager can detect your game and install the mods in the right place.
Learn how to unlock the powerful Dual Hammers for the Bardin Goreksson inVermintide 2. This guide covers the simple steps to get this top-tiermelee weapon for the Ironbreaker, Ranger Veteran, and Slayer careers.
All Heroes and Careers in Vermintide 2
Explore the diverse heroes and careers in Vermintide 2. Discover unique abilities, playstyles, and strategies to enhance your gameplay
Return to the Reik Grimoire and Tome Locations in Vermintide 2
Searching for every grimoire and tome? Our Vermintide 2 collectible guide for"Return to the Reik" reveals all book locations to maximize your lootand complete the mission.
All Formable Nations in Europa Universalis 5
all formable nations in Europa Universalis 5! Explore strategies, tips, and guides to expand your empire and dominate the game.
How To Beat Challenges in Kirby Air Riders
Struggling to master the skies? Learn expert tips and strategies to overcome every challenge in Kirby Air Ride. Dominate the City Trial, conquer all racetracks, and unlock the game's secrets with our complete guide.
How To Get All Crafting Materials in Moonlighter 2
essential tips for gathering all crafting materials in Moonlighter 2. Enhance your gameplay and unlock new possibilities!
Weapon Tier List in Moonlighter 2
the ultimate weapon tier list for Moonlighter 2! Optimize your gameplay with our guide to the best weapons and strategies.
How to find Mandrakes in Don't Starve Together
Struggling to find Mandrakes in Don't Starve Together? Learn thebest seasons, locations, and strategies to hunt these elusive livingroots and craft their powerful items.
How To Improve Institution Growth In Europa Universalis 5
effective strategies to enhance institution growth in Europa Universalis 5. Unlock new potential and dominate your gameplay
How to Fix Europa Universalis 5 Not Launching Error
Resolve the Europa Universalis 5 not launching error with our step-by-step. Get back to gaming quickly and enjoy seamless gameplay!
Where to find Zevlor in Baldur’s Gate 3
Discover Where to find Zevlor in Baldur’s Gate 3. Uncover hidden spots and tips to help you on your quest.
How to find hidden Central Cave in ARK Scorched Earth Ascended
Discover How to find hidden Central Cave in ARK Scorched Earth Ascended with our comprehensive guide. Uncover treasures and conquer challenges today!
Where to Find Wine for the Massive Feather in Honkai Star Rail
Discover Where to Find Wine for the Massive Feather in Honkai Star Rail. Explore our website for a curated selection of wine options. Cheers!
Where to find Linus’ blackberry basket in Stardew Valley
Discover Where to find Linus’ blackberry basket in Stardew Valley. Uncover the secrets of this elusive treasure in our comprehensive website.
How to Emerge From Water in Fortnite Chapter 5 Season 2
Discover How to Emerge From Water in Fortnite Chapter 5 Season 2. Enhance your gameplay with expert tips and tricks on our website.
Mods, short for modifications, are user-created content that can enhance and modify the gameplay experience of a video game. They can range from small changes like adding new items or characters to major changes like overhauling the entire game. Content Warning, a popular game that allows players to create their own stories, also has a thriving modding community. If you're new to modding or just want to learn How to install mods in Content Warning, this article is for you.
How to install mods in Content Warning
Step 1: Download a Mod Manager
The first step to installing mods in Content Warning is to download a mod manager. A mod manager is a tool that helps you manage and install mods for your game. There are several mod managers available for Content Warning, but one of the most popular and user-friendly ones is Vortex.
Step 2: Install the Mod Manager
Once you have downloaded the mod manager, run the installer and follow the instructions to install it. Make sure to select the correct location for your Content Warning game files when prompted. This will ensure that the mod manager can detect your game and install the mods in the right place.
Step 3: Download Mods
After installing the mod manager, you can start downloading mods for your game. Content Warning has a dedicated modding website where you can find a wide range of mods created by the community. You can also find mods on other websites like Nexus Mods or ModDB. When downloading mods, make sure to check the compatibility and requirements of each mod to ensure they will work with your game.
Step 4: Install Mods
Once you have downloaded the desired mods, open the mod manager and click on the 'Mods' tab. This will show you all the mods you have downloaded. To install a mod, simply drag and drop the downloaded file into the mod manager window. You can also use the 'Install from File' button to select the mod file and install it.
Step 5: Enable Mods
Once the mods are installed, you need to enable them in the mod manager. Click on the 'Mods' tab and check the box next to the mods you want to enable. You can also use the 'Sort' button to arrange the mods in a specific order. This is important as some mods may depend on others to work properly.
Step 6: Launch the Game
After enabling the mods, click on the 'Launch' button in the mod manager to start the game. If everything went smoothly, you should see a message that says 'Mods loaded successfully' when the game starts. If you encounter any issues, make sure to check the mod's requirements and compatibility.
Step 7: Manage Mods
The mod manager also allows you to manage your mods easily. You can disable or uninstall mods by unchecking the box next to them or by using the 'Uninstall' button. You can also change the load order of mods by using the 'Sort' button.
In conclusion, How to install mods in Content Warning is a simple process that can greatly enhance your gameplay experience. With the help of a mod manager, you can easily install, enable, and manage mods for your game. Just make sure to always read the mod descriptions and follow the instructions carefully to avoid any issues. Happy modding!
Mode:
Other Articles Related
How To Get Dual Hammers in Vermintide 2Learn how to unlock the powerful Dual Hammers for the Bardin Goreksson inVermintide 2. This guide covers the simple steps to get this top-tiermelee weapon for the Ironbreaker, Ranger Veteran, and Slayer careers.
All Heroes and Careers in Vermintide 2
Explore the diverse heroes and careers in Vermintide 2. Discover unique abilities, playstyles, and strategies to enhance your gameplay
Return to the Reik Grimoire and Tome Locations in Vermintide 2
Searching for every grimoire and tome? Our Vermintide 2 collectible guide for"Return to the Reik" reveals all book locations to maximize your lootand complete the mission.
All Formable Nations in Europa Universalis 5
all formable nations in Europa Universalis 5! Explore strategies, tips, and guides to expand your empire and dominate the game.
How To Beat Challenges in Kirby Air Riders
Struggling to master the skies? Learn expert tips and strategies to overcome every challenge in Kirby Air Ride. Dominate the City Trial, conquer all racetracks, and unlock the game's secrets with our complete guide.
How To Get All Crafting Materials in Moonlighter 2
essential tips for gathering all crafting materials in Moonlighter 2. Enhance your gameplay and unlock new possibilities!
Weapon Tier List in Moonlighter 2
the ultimate weapon tier list for Moonlighter 2! Optimize your gameplay with our guide to the best weapons and strategies.
How to find Mandrakes in Don't Starve Together
Struggling to find Mandrakes in Don't Starve Together? Learn thebest seasons, locations, and strategies to hunt these elusive livingroots and craft their powerful items.
How To Improve Institution Growth In Europa Universalis 5
effective strategies to enhance institution growth in Europa Universalis 5. Unlock new potential and dominate your gameplay
How to Fix Europa Universalis 5 Not Launching Error
Resolve the Europa Universalis 5 not launching error with our step-by-step. Get back to gaming quickly and enjoy seamless gameplay!
Where to find Zevlor in Baldur’s Gate 3
Discover Where to find Zevlor in Baldur’s Gate 3. Uncover hidden spots and tips to help you on your quest.
How to find hidden Central Cave in ARK Scorched Earth Ascended
Discover How to find hidden Central Cave in ARK Scorched Earth Ascended with our comprehensive guide. Uncover treasures and conquer challenges today!
Where to Find Wine for the Massive Feather in Honkai Star Rail
Discover Where to Find Wine for the Massive Feather in Honkai Star Rail. Explore our website for a curated selection of wine options. Cheers!
Where to find Linus’ blackberry basket in Stardew Valley
Discover Where to find Linus’ blackberry basket in Stardew Valley. Uncover the secrets of this elusive treasure in our comprehensive website.
How to Emerge From Water in Fortnite Chapter 5 Season 2
Discover How to Emerge From Water in Fortnite Chapter 5 Season 2. Enhance your gameplay with expert tips and tricks on our website.