
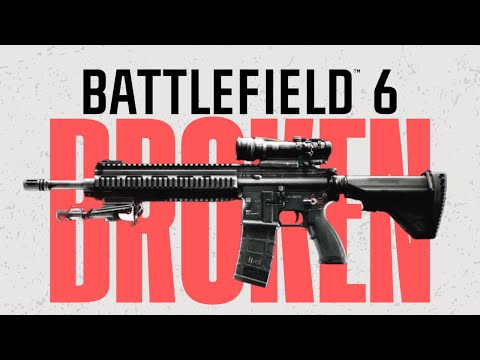
Best DSR-IAR Loadout in Battlefield 6
Loadout 1: The Aggressive Assault Hybrid
This build transforms the DSR-IAR into a high-capacity, run-and-gun powerhouse, perfect for players who lead the charge.- Muzzle: Double-Port Brake (10 Points)
- Why it Works: This cost-effective attachment is your first line of defense against recoil. It significantly improves both vertical and horizontal control, allowing for tighter shot groupings during sustained firefights.
- Barrel: 16.5" LSW Heavy (10 Points)
- Why it Works: This barrel enhances the weapon's innate precision at medium to long range. It stabilizes your aim during extended bursts, ensuring your shots stay on target when it matters most.
- Underbarrel: Low Profile Stubby (45 Points)
- Why it Works: This is the cornerstone of the build. While a major point investment, the Low Profile Stubby offers a massive reduction to recoil and a faster Aim-Down-Sights (ADS) time. This combination is crucial for winning sudden duels and maintaining accuracy while on the move.
- Laser: 5mw Green Laser (10 Points)
- Why it Works: In close-quarters combat, hip-fire can be a lifesaver. This laser tightens your hip-fire spread, giving you the edge when you don't have time to aim.
- Magazine: 30 Fast Mag (10 Points)
- Why it Works: Speed is key for an aggressive playstyle. The fast mag drastically cuts down on reload times, keeping you in the fight and reducing your vulnerable moments.
Playstyle: Use this build to play as a frontline fighter. Stick with Assaultplayers, flank enemy positions, and use your superior magazine capacityand control to win one-on-one engagements.
Loadout 2: The Defensive Anchor LMG
Embrace the traditional role of the Support class with this setup, designed for holding chokepoints and laying down accurate, suppressive fire from afortified position.
- Muzzle: Compensated Brake (20 Points)
- Why it Works: For a stationary role, recoil management is paramount. The CompensatedBrake offers an even greater recoil reduction than the Double-Port,making the weapon a laser beam when deployed.
- Barrel: 20" SDM-R Heavy Extended (10 Points)
- Why it Works: This long barrel maximizes the DSR's precision and control over extreme distances. The trade-off in mobility is irrelevant for a build focusedon holding a position.
- Underbarrel: Bipod (10 Points)
- Why it Works: The Bipod is the heart of this loadout. When deployed on a surface orgoing prone, it eliminates virtually all recoil. This allows you toaccurately engage snipers, suppress entire lanes, and cut down multipleenemies without losing control.
- Laser: 5mw Green Laser (10 Points)
- Why it Works: Even a defensive player can get caught off-guard. The laser provides acrucial close-range contingency for defending your position againstflankers.
- Magazine: 50 Round Mag (45 Points)
- Why it Works: This attachment fundamentally changes the weapon's role. With 50rounds, you can sustain fire for much longer, suppress larger groups,and secure multi-kills without the constant need to reload. It turns the DSR into a true area-denial tool.
Playstyle: Find a vantage point overlooking an objective or a high-traffic lane.Deploy your bipod and become an immovable object. Your job is tosuppress the enemy, cover your squad's advances, and make any push intoyour sightline a costly endeavor for the opposition.
Final Tips for Dominance
Choose your loadout based on your squad's needs and the map's flow. The Assault Hybrid excels on smaller, chaotic maps, while the Defensive Anchor is unmatched for breaking through fortified enemy lines on largerconquest sectors. Master both, and you'll become an invaluable asset toany Battlefield 6 team.
Other Articles Related
how to earn all Red Bull Challenges rewards in Battlefield 6Unlock all Red Bull Challenges rewards in Battlefield 6. Our guide coversstrategies, tips, and step-by-step instructions to complete everychallenge and earn exclusive in-game content.
How to Change Character Skins in Battlefield 6
Learn how to customize your soldier's appearance in Battlefield 6. Our guidecovers unlocking and equipping new character skins and camouflage tostand out on the battlefield.
How to Fix Battlefield 6 challenges not working
Struggling with Battlefield 6 challenges not tracking or completing? Learn how tofix common issues with our quick troubleshooting guide for resetting,updating, and getting back in the game.
Battlefield 6: Best Loadouts for Gauntlet Mode
the best class loadouts for Gauntlet Mode in BF6. Optimize your gameplay with tips and strategies to dominate the battlefield
How to Level Up Weapons in Battlefield 6
expert tips on leveling up weapons in BF6. Enhance your gameplay and dominate the battlefield with our guide!
How to Fix Battlefield 6 REDSEC error occurred when launching the game
Fix the frustrating REDSEC error in Battlefield 6 with our step-by-stepsolutions. Get back to gaming adventure!
How to Access a Vehicle Trailer in Battlefield RedSec
Discover the thrilling Vehicle Trailer for Battlefield RedSec! Dive into intense gameplay and explore new features.
How to Open Locked Safes in Battlefield RedSec
Unlock the secrets of Battlefield RedSec! Discover expert tips and strategies to open locked safes and enhance your gameplay.
How to Redeploy Teammates in Battlefield RedSec
Optimize your Battlefield RedSec strategy. Learn when and how to effectivelyredeploy teammates for tactical advantages, better positioning, andsecuring key objectives. Master the redeploy feature to control the flow of battle.
How to Complete All Exploration Challenges in Battlefield Redsec
Master all Battlefield Redsec exploration challenges with our expert guide.Find hidden intel, complete all objectives, and unlock every reward with step-by-step strategies.
How to Fix Battlefield 6 not working on Xbox
Resolve Battlefield 6 issues on Xbox with our easy troubleshooting guide. Get back to gaming in no time!
How to Fix Battlefield 6 not working on PS5
Resolve Battlefield 6 issues on PS5 with our expert tips and solutions. Get back to gaming seamlessly!
Best SCW-10 Loadout in Battlefield 6
Level up your game with the best SCW-10 loadout in Battlefield 6. Discoverthe ultimate attachments, specialization, and playstyle tips to dominate close-quarters combat.
How to Complete Danger Close Challenges in Battlefield 6
Master Battlefield 6 with our guide to complete Danger Close challenges. Unlock rewards and enhance your gameplay today!
Best B36A4 Loadout in Battlefield 6
Maximize your close-quarters dominance with the best B36A4 loadout inBattlefield 6. This meta build focuses on recoil control and hip-fireaccuracy to turn this bullpup assault rifle into an unstoppable force.