
Life is Strange: Where to Find All Graffiti - Ultimate Guide
Today we embark on a quest through Life is Strange in order to tell you where to find all graffiti, let's see.
This is a necessary search that we must carry out and they are nothing more than a few pieces to draw, in this sense, knowing where to find all the graffiti takes us into the possibility of finding the number of 10 graffiti that perfectly well can become collectible pieces, of so that it is necessary to take care of finding them, to make things a little easier for you, we have brought an extra explanatory guide.
Today we bring you an explanatory guide on How to water both plants in Life is Strange Double Exposure.
Where To Take All Possible Photos In Life Is Strange Double Exposure
We invite you to discover Where To Take All Possible Photos In Life Is Strange Double Exposure with this excellent and explanatory guide.
How To Use The Dualtone Phone Booth in Life Is Strange Double Exposure
Our guide today aims to explain to you How To Use The Dualtone Phone Booth in Life Is Strange Double Exposure.
How To Find Vinh's Package in Life Is Strange Double Exposure
Today we bring you an explanatory guide on How To Find Vinh's Package in Life Is Strange Double Exposure.
How To Find All Hellerton Decorations in Life Is Strange Double Exposure
Today we bring you an explanatory guide with everything you need to know about How To Find All Hellerton Decorations in Life Is Strange Double Exposure.
How to fix Life is Strange Double Exposure Error UE-Chronos
We welcome you to our guide on How to fix Life is Strange Double Exposure Error UE-Chronos in a specific and detailed way.
How to Fix Life is Strange Double Exposure Blurry Graphics Issue
This time we are back with a guide with the aim of explaining to you How to Fix Life is Strange Double Exposure Blurry Graphics Issue.
How to fix Life is Strange Double Exposure Infinite Loading Screen
With our help you will see that knowing How to fix Life is Strange Double Exposure Infinite Loading Screen is easier than you think.
Chapter 3 Photo Locations in Life Is Strange Double Exposure
Today we bring you an explanatory guide on Chapter 3 Photo Locations in Life Is Strange Double Exposure with precise details.
Chapter 5 Photo Locations in Life Is Strange Double Exposure
Today we bring you an explanatory guide on Chapter 5 Photo Locations in Life Is Strange Double Exposure.
Dying Light 2: How to Open the Bazaar Safe
The tasks are still latent in Dying Light 2 and this allows us to tell you how to open the bazaar safe.
Dying Light 2: How to solve Garrison Electrical Station Puzzle
Riddles are essential in Dying Light 2 and this leads us today to explain how to solve Garrison Electrical Station Puzzle.
Dying Light 2: Where to Find Save and Config File
The searches are still latent in Dying Light 2 and for this reason today wewill tell you where to find the configuration and save file.
Dying Light 2: How to Meet the People of the Bazaar
Dying Light 2 has a lot for us and that is why today we will tell you how to meet the people of the bazaar.
Dying Light 2: Where to find Infected Trophies
Find out where to find infected trophies in this excellent and explanatory Dying Light 2 guide.
What does it mean to find all graffiti in Life is Strange?
This is a necessary search that we must carry out and they are nothing more than a few pieces to draw, in this sense, knowing where to find all the graffiti takes us into the possibility of finding the number of 10 graffiti that perfectly well can become collectible pieces, of so that it is necessary to take care of finding them, to make things a little easier for you, we have brought an extra explanatory guide.
Where to find all graffiti in Life is Strange?
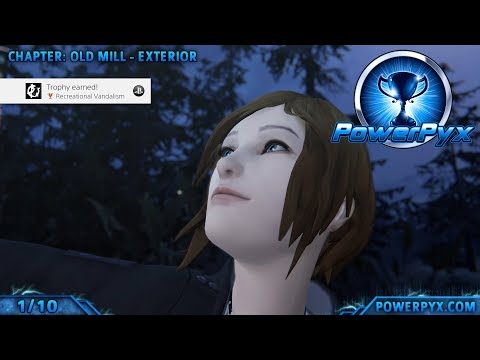
- Graffiti: we must get to the "Old Mill" and before entering the Firewalk enclosure choose to go around the back of the caravan, in this sense, it is necessary to take care of walking towards the front of the van and choose to turn to the left to visualize the place where we are allowed to place the art, this in order to find ourselves removed from inopportune looks.
- Graffiti 2: We continue on the quest to find out where to find all the graffiti and our next search step leads us to go to the bar and then continue to the left where we will see a saw on the wall that we can then decorate.
- Graffiti 3: the search continues in Life is Strange and in this case we must go to our own terrain, in this sense, it is necessary to go to Chloe's room to take a look at a unicorn poster, it is necessary to knock him down to make a very striking painting where it is essential to place some words.
- Graffiti 4: we continue the tour to find out where to find all the graffiti and it becomes necessary to talk with Joyce, once this has happened we must leave in order to get David to take us to school, but he asks us to go look the water pipe wrench that is in the toolbox, so it becomes necessary to go to the garage and get it from the box that is on the floor, here we will see that there is a particular place where we are allowed to write some kind words for David.
- Graffiti 5: this is usually on the Blackwell Campus, it is only necessary to reach the site and proceed to turn left in order to visualize the exterior stage, behind it we can visualize a wall in the corner where we can perfectly leave the art in Life is Strange so that our mark remains on these sides.
- Graffiti 6: we continue with the task to know where to find all the graffiti and we are still in the school, we will be attacked by Rachel and we will take the belt to proceed to enter the locker room where she is usually changing, we must see the door that is to the left of the makeup mirrors where a Tempest poster is usually seen, here we can do a graffiti, this can be about Ratchel or about Nathan.
- Graffiti 7: We continue to progress in this quest through Life is Strange, nothing more than leaving the school and proceeding to travel on a train with Ratchel, she usually tells us to take a seat in a piece of cargo that is usually nearby, in this sense, it is done It is necessary to take care of moving the load to the left, avoiding sitting down directly, this is because it is important to approach the part of the train that we have just entered in order to find railway poetry and that can be incorporated into some boxes that are behind.
- Graffiti 8: to carry out this search about where to find all the graffiti, it is necessary to be outside the train and once this has been done, go to the viewpoint where there is a statue in front of the viewers, which makes it necessary to read the plate to take a look to the statue, here we are allowed to have an option to capture a story.
- Graffiti 9: the search to know where to find all the graffiti continues and in this sense it is necessary to go over it in order to find the junkyard, here we will see a discussion between Ratchel with Chloe and that will end with Ratchel leaving , we will see that Chloe gets angry which allows us to break through to the Good Kiddos vertical poster to knock it down, once this has been executed it will be necessary to take care of going to where the red paint cans are to destroy them, then we will return to the signal where the graffiti option appears in Life is Strange, here it is possible to break some things avoiding making the wrong button.
- Graffiti 10: this is the last one we must look for to complete this task in Life is Strange, so we must return to William's car to do some graffiti there, it will only be enough to take a look at the Tempest poster and move it, we must find the marker to do the graffiti, so that it is necessary to take a look to the left in order to see a bottle of wine that usually contains the marker stuck in the upper part, here we must interact with the bottle and then mark the back of the seat of the passenger and done.
Platform(s): PlayStation 4 PS4, PlayStation 5 PS5, Xbox One, Xbox Series X/S, Steam, Stadia
Genre(s): Graphic adventure
Developer(s): Deck Nine
Publisher(s): Square Enix
Release date: 10 September 2021
Mode: Single-player
Age rating (PEGI): 16+
Other Articles Related
How to water both plants in Life is Strange Double ExposureToday we bring you an explanatory guide on How to water both plants in Life is Strange Double Exposure.
Where To Take All Possible Photos In Life Is Strange Double Exposure
We invite you to discover Where To Take All Possible Photos In Life Is Strange Double Exposure with this excellent and explanatory guide.
How To Use The Dualtone Phone Booth in Life Is Strange Double Exposure
Our guide today aims to explain to you How To Use The Dualtone Phone Booth in Life Is Strange Double Exposure.
How To Find Vinh's Package in Life Is Strange Double Exposure
Today we bring you an explanatory guide on How To Find Vinh's Package in Life Is Strange Double Exposure.
How To Find All Hellerton Decorations in Life Is Strange Double Exposure
Today we bring you an explanatory guide with everything you need to know about How To Find All Hellerton Decorations in Life Is Strange Double Exposure.
How to fix Life is Strange Double Exposure Error UE-Chronos
We welcome you to our guide on How to fix Life is Strange Double Exposure Error UE-Chronos in a specific and detailed way.
How to Fix Life is Strange Double Exposure Blurry Graphics Issue
This time we are back with a guide with the aim of explaining to you How to Fix Life is Strange Double Exposure Blurry Graphics Issue.
How to fix Life is Strange Double Exposure Infinite Loading Screen
With our help you will see that knowing How to fix Life is Strange Double Exposure Infinite Loading Screen is easier than you think.
Chapter 3 Photo Locations in Life Is Strange Double Exposure
Today we bring you an explanatory guide on Chapter 3 Photo Locations in Life Is Strange Double Exposure with precise details.
Chapter 5 Photo Locations in Life Is Strange Double Exposure
Today we bring you an explanatory guide on Chapter 5 Photo Locations in Life Is Strange Double Exposure.
Dying Light 2: How to Open the Bazaar Safe
The tasks are still latent in Dying Light 2 and this allows us to tell you how to open the bazaar safe.
Dying Light 2: How to solve Garrison Electrical Station Puzzle
Riddles are essential in Dying Light 2 and this leads us today to explain how to solve Garrison Electrical Station Puzzle.
Dying Light 2: Where to Find Save and Config File
The searches are still latent in Dying Light 2 and for this reason today wewill tell you where to find the configuration and save file.
Dying Light 2: How to Meet the People of the Bazaar
Dying Light 2 has a lot for us and that is why today we will tell you how to meet the people of the bazaar.
Dying Light 2: Where to find Infected Trophies
Find out where to find infected trophies in this excellent and explanatory Dying Light 2 guide.