
How to fix CSGO VAC was unable to verify your game session
Check out our guide on How to fix CSGO VAC was unable to verify your game session and get back to playing your favorite game in no time.
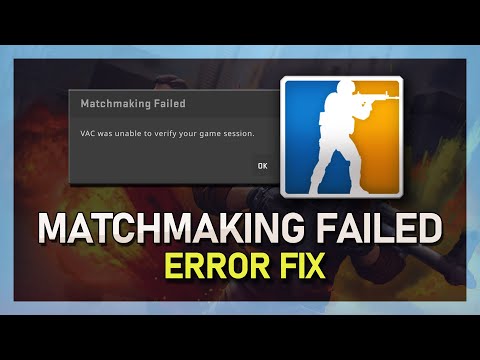
If you’ve been playing CS:GO recently, you may have encountered the error “VAC Was Unable to Verify Your Game Session”. This error is relatively common and can be a nuisance to players. Fortunately, there are several steps you can take to fix the “VAC Unable to Verify” error in CS:GO. In this blog post, we’ll go over how to fix the “VAC Unable to Verify” error in CS:GO.
Are you having trouble with your CSGO VAC? Are you having a difficult time trying to figure out how to fix it? Well, don't worry, in this blog post, we will be discussing how to fix the CSGO VAC was unable to verify your game session.
This article dissects key areas such as the most promising cases available, the market dynamics surrounding case rarities, community engagement through case openings, and economic considerations
How to unlock Premier Season 1 medal in CS2
In this guide post we explain How to unlock Premier Season 1 medal in CS2.
How to bunny hop in CS2
Our guide today aims to explain everything about How to bunny hop in CS2, let's see.
How to remove fog from Train in CS2
Today we bring you an explanatory guide on How to remove fog from Train in CS2.
How to Get 0 Ping in CS2
Welcome to our guide on How to Get 0 Ping in CS2 in a specific and detailed way.
How to Fix CS2 packet loss error
We invite you to discover How to Fix CS2 packet loss error with this excellent and explanatory guide.
How to convert Counter-Strike 2 sensitivity to FragPunk
Welcome to our guide on How to convert Counter-Strike 2 sensitivity to FragPunk in a specific and detailed way.
How to fix packet loss and jitter in CS2
Today we bring you an explanatory guide on How to fix packet loss and jitter in CS2 with precise details.
How to fix CS2 network issues
Today we bring you an explanatory guide on How to fix CS2 network issues with precise details.
How to make CS2 look like CS:GO
Discover How to make CS2 look like CS:GO with this excellent and detailed explanatory guide.
How to Be Born in Kansas in BitLife
How to Be Born in Kansas in BitLife is a guide to playing this popular online life simulation game.
How to Make a Tannery in Smalland Survive the Wilds
Are you a survivalist who wants to craft quality leather goods? Learn How to Make a Tannery in Smalland Survive the Wilds.
How to Get Iron Shards in Smalland Survive the Wilds
We'll show you where to look and How to Get Iron Shards in Smalland Survive the Wilds. Get started now!
How to Get Stone Armor in Smalland Survive the Wilds
Learn how to get stone armor in Smalland and prepare yourself for any adventure that comes your way!
How to Make a Torch in Smalland Survive the Wilds
Learn How to Make a Torch in Smalland Survive the Wilds with our helpful guide. Get in the game and start exploring today!
If you’ve been playing CS:GO recently, you may have encountered the error “VAC Was Unable to Verify Your Game Session”. This error is relatively common and can be a nuisance to players. Fortunately, there are several steps you can take to fix the “VAC Unable to Verify” error in CS:GO. In this blog post, we’ll go over how to fix the “VAC Unable to Verify” error in CS:GO.
Are you having trouble with your CSGO VAC? Are you having a difficult time trying to figure out how to fix it? Well, don't worry, in this blog post, we will be discussing how to fix the CSGO VAC was unable to verify your game session.
How to fix CSGO VAC was unable to verify your game session
- Restarting Steam: The first step in fixing the “VAC Unable to Verify” error in CS:GO is to restart Steam. This can be done by right-clicking on the Steam icon in the taskbar and selecting “Exit”. Once Steam has been closed, you can then open Steam again and try launching CS:GO again.
- Uninstalling and Reinstalling the Game: In some cases, the “VAC Unable to Verify” error can be caused by a corrupted game file. To fix this, you can try uninstalling and reinstalling the game. To uninstall the game, open the Steam library and right-click on the game and select “Uninstall”. Once the game has been uninstalled, you can then reinstall it from the same library.
- Restarting Your Router: Another potential cause of the VAC issue is a poor connection. If this is the case, you may need to restart your router. This will help reset your connection and ensure that the VAC is able to verify your game session. To restart your router, simply unplug the power cord from the back of the router, wait for a few seconds, and then plug it back in. Once the router has restarted, you should be good to go.
- Verifying CSGO Game Files: If your game files are corrupted, this can also cause the VAC to be unable to verify your game session. To fix this, you'll need to verify the game files. To verify your game files, open the Steam client, go to the Library tab, right-click CSGO, and then click Properties. On the Local Files tab, click Verify Integrity Of Game Files. This will scan your game files and replace any corrupted or missing files.
- Restarting Your Computer: If all else fails, you may need to restart your computer. This will help reset any settings that may be causing the VAC to be unable to verify your game session. To restart your computer, simply click the Start button, select the Restart option, and then wait for your computer to shut down and restart. Once it has restarted, you should be good to go.
The “VAC Unable to Verify” error in CS:GO can be a nuisance to players, but fortunately, there are several steps you can take to fix it. In this blog post, we’ve gone over how to fix the “VAC Unable to Verify” error in CS:GO. These steps include restarting Steam, uninstalling and reinstalling the game, restarting your router, verifying game files, and restarting your computer. By following these steps, you should be able to fix the “VAC Unable to Verify” error in CS:GO.
Tags: CS:GO, hltv, cs, ranks, cs go patch notes, counter strike global offensive, skins
Platform(s): Windows PC, Xbox 360, PS3, PS4, Mac OS, Linux, SteamOS, Xbox One
Genre(s): First-person shooter
Developer(s): Valve Corporation, Hidden Path Entertainment
Publisher(s): Microsoft (Xbox Live), Sony (PlayStation Network), Valve Corporation (Steam)
Engine: Source
Mode: Multiplayer
Age rating (PEGI): 16+
Other Articles Related
Best Cases to Open in CS2This article dissects key areas such as the most promising cases available, the market dynamics surrounding case rarities, community engagement through case openings, and economic considerations
How to unlock Premier Season 1 medal in CS2
In this guide post we explain How to unlock Premier Season 1 medal in CS2.
How to bunny hop in CS2
Our guide today aims to explain everything about How to bunny hop in CS2, let's see.
How to remove fog from Train in CS2
Today we bring you an explanatory guide on How to remove fog from Train in CS2.
How to Get 0 Ping in CS2
Welcome to our guide on How to Get 0 Ping in CS2 in a specific and detailed way.
How to Fix CS2 packet loss error
We invite you to discover How to Fix CS2 packet loss error with this excellent and explanatory guide.
How to convert Counter-Strike 2 sensitivity to FragPunk
Welcome to our guide on How to convert Counter-Strike 2 sensitivity to FragPunk in a specific and detailed way.
How to fix packet loss and jitter in CS2
Today we bring you an explanatory guide on How to fix packet loss and jitter in CS2 with precise details.
How to fix CS2 network issues
Today we bring you an explanatory guide on How to fix CS2 network issues with precise details.
How to make CS2 look like CS:GO
Discover How to make CS2 look like CS:GO with this excellent and detailed explanatory guide.
How to Be Born in Kansas in BitLife
How to Be Born in Kansas in BitLife is a guide to playing this popular online life simulation game.
How to Make a Tannery in Smalland Survive the Wilds
Are you a survivalist who wants to craft quality leather goods? Learn How to Make a Tannery in Smalland Survive the Wilds.
How to Get Iron Shards in Smalland Survive the Wilds
We'll show you where to look and How to Get Iron Shards in Smalland Survive the Wilds. Get started now!
How to Get Stone Armor in Smalland Survive the Wilds
Learn how to get stone armor in Smalland and prepare yourself for any adventure that comes your way!
How to Make a Torch in Smalland Survive the Wilds
Learn How to Make a Torch in Smalland Survive the Wilds with our helpful guide. Get in the game and start exploring today!