
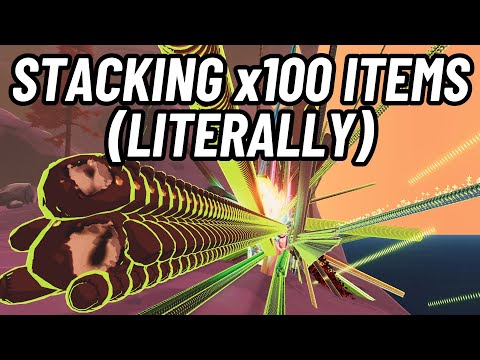
The Three Stacking Types in Risk of Rain 2
Why Item Stacking Mechanics Matter
Simply grabbing every item you see is a recipe for a late-game failure. The secret to dealing millions of damage lies in understanding item synergy and scaling. Different items follow distinct stacking rules, and knowing which ones multiply your power versus which ones offer diminishing returns is the key to creating an unstoppable build. By the end of this guide, you'll know exactly which items to prioritize for a devastating damage output.The Three Core Stacking Types Explained
1. Linear Stacking (Additive)
This is the most straightforward scaling method. Each additional copy of an item adds its base value directly to the total.- How it Works: The effect increases in a simple, straight line. For example, two Soldier’s Syringes, each granting +15% attack speed, will give you a total of +30% attack speed.
- Key Items: Soldier’s Syringe, Gasoline, Crowbar, Ukulele.
- Strategic Insight: While simple, Linear stacking has inherent diminishing returns. Stacking 10 of the same item is often less effective than diversifying your build with items from other categories, as the relative value of each new stack decreases.
2. Logarithmic Stacking (Diminishing Returns)
Often confused with Hyperbolic stacking, this type features a curve thatprovides less value per stack, making it impossible to reach 100%effectiveness.
- How it Works: The chance-based formula makes early stacks very powerful, while laterstacks offer smaller gains. A classic example is Tougher Times. Thefirst few stacks dramatically increase your block chance from 15% to 55% (5 stacks), but reaching 80% requires 10 stacks.
- Key Items: Tougher Times, Harvester's Scythe.
- Strategic Insight: There is a "sweet spot" for these items. Instead of stacking theminfinitely, aim for a reasonable number (e.g., 8-12 Tougher Times) andthen invest in other defensive or utility items for a more efficientbuild.
3. Hyperbolic Stacking (Exponential/Multiplicative)
This is where the game's most spectacular damage numbers come from. Hyperbolic stacking involves items from different sources multiplying their bonuses together.
- How it Works: Instead of adding percentages, the multipliers combine to create anexplosive growth in damage. Combining a Focus Crystal (+20%), an ATGMissile (+300%), and Armor-Piercing Rounds (+20%) doesn't add up—itmultiplies: 1.2 * 3.0 * 1.2 = a 4.32x total damage multiplier.
- Key Items: ATG Missile, Runald's Band, Focus Crystal, Lens-Maker's Glasses (for critical strike chance).
- Strategic Insight:Diversification is key. To maximize your damage, you want a wide variety of thesemultiplicative items. A build with one of ten different damage itemswill always outperform a build with ten of the same item.
Advanced Stacking Concepts: Proc Chains and Coefficients
To truly master stacking, you need to understand how items trigger each other.
- Proc Coefficients: Every attack and ability has a "Proc Coefficient" (a value between 0and 1) that affects the chance for on-hit items to activate. Ahigh-coefficient ability like Commando's primary fire (1.0) is excellent for triggering effects, while a area-of-effect ability might have alower coefficient (e.g., 0.5), halving your item's trigger chance.
- Proc Chains: This is the engine of Hyperbolic scaling. A single attack can triggeran ATG Missile, which then triggers a Runald's Band, creating a cascadeof damage where each proc scales off the last. This is how playersachieve those legendary, screen-clearing explosions.
Final Verdict: How to Build for Maximum Damage
The path to becoming a Risk of Rain 2 god is clear: prioritize Hyperbolic (multiplicative) items above all else. While Linear items are good for early-game consistency and Logarithmicitems have their defensive uses, the incredible scaling of diversified,multiplicative damage sources is what will carry you through the finalloop. Stop blindly stacking and start building with purpose—your futureMonsoon wins depend on it.
Other Articles Related
How To Unlock the Captain in Risk of Rain 2Learn the specific steps to unlock the Captain in Risk of Rain 2. This guidedetails the requirements, the secret stage, and how to beat the finalchallenge to add this powerful survivor to your roster.
How To Unlock Bandit in Risk of Rain 2
Unlock the Bandit in Risk of Rain 2 with our guide! Discover tips, strategies, and secrets to enhance your gameplay.
Artifact of Enigma Unlock Code in Risk of Rain 2
Unlock the Artifact of Enigma in Risk of Rain 2 with our complete guide. Discover the code and enhance your gameplay
How To Find the Abandoned Aqueduct in Risk of Rain 2
Navigate treacherous cliffs and unlock a hidden secret. Learn the exact steps to locate the elusive Abandoned Aqueduct stage in Risk of Rain 2 and findits legendary hidden boss.
How To Get Ceremonial Dagger in Risk of Rain 2
Acquire the Ceremonial Dagger - the ultimate Survivor's guide to finding anddominating with this powerful Lunar Item in Risk of Rain 2. Unlock itspotential now!
How To Get Prayer Beads in Risk of Rain 2
Find Prayer Beads faster! This guide explains the item's effects, the secret boss you need them for, and the best farming strategies to get them inRisk of Rain 2.
How To Get Hooks of Heresy in Risk of Rain 2
Master every step to obtain the elusive Hooks of Heresy item in Risk of Rain2. Learn the secret Newt Altar location, conquer the challenge, andunlock this powerful equipment.
How To Get Light Flux Pauldron in Risk of Rain 2
Unlock the Light Flux Pauldron in Risk of Rain 2! Find our complete guide with locations, strategies, and effects for this powerful Lunar Equipmentitem. Master your speed and cooldown management.
How To Get Box of Dynamite in Risk of Rain 2
Unlock explosive power! Learn how to find & use the Box of Dynamiteequipment in Risk of Rain 2 for massive AOE damage. Tips, locations, and strategies.
How To Get Little Disciple in Risk of Rain 2
Unlock the Little Disciple item in Risk of Rain 2! Our guide covers theArtifact of Sacrifice strategy, boss farm locations, and tips toefficiently obtain this powerful homing missile weapon.
How to get Units for free in Marvel Rivals
Maximize your roster! Learn the best methods to earn free Units in Marvel Rivals through gameplay, events, and challenges. Unlock newheroes faster without spending money.
How To Build Cerydra in Honkai Star Rail
Learn the step-by-step process to build Cerydra in Honkai Star Rail. Discover the best Light Cones, Relics, team compositions, and upgrade priorities to maximize her potential in your team.
Should you pull for Dialyn in Zenless Zone Zero
Struggling to decide if Dialyn is worth your pulls in Zenless Zone Zero? Our guide breaks down her combat style, team synergy, and value to help youdecide if she's the right Agent for your squad.
All Keys Locations in ARC Raiders
Find every key location in ARC Raiders with our complete guide. Unlockhidden areas, secure valuable loot, and get the edge you need tosurvive. Master the map and dominate the game.
How to complete Teach a Dog New Kicks quest in Assassin's Creed Shadows
Learn how to complete the "Teach a Dog New Kicks" quest in Assassin's CreedShadows. Our guide provides a clear walkthrough to help you finish thisobjective and earn your rewards.